English
36
Georeferencing may have been done earlier using a third-
party tool.
Georeferencing can also be done after adding the background
map. This can be done in two different ways:
1. You know the coordinates of the reference points used to
georeference the image. You will have to tap successively
on each of these points on the map. For each point, you
will have to enter its coordinates.
2. You go to the field and stand successively on each
reference point used to georeference the image. (You
should choose reference points that can easily be spotted
both on the map and in the field.) You will have to tap
successively on each of these points on the map. Each
time, the receiver will automatically fill in the
corresponding fields on the screen with the computed
coordinates of your current location.
MobileMapper Field may accept several background maps,
each holding a different geographical area. All logged
features will always appear over the background map.
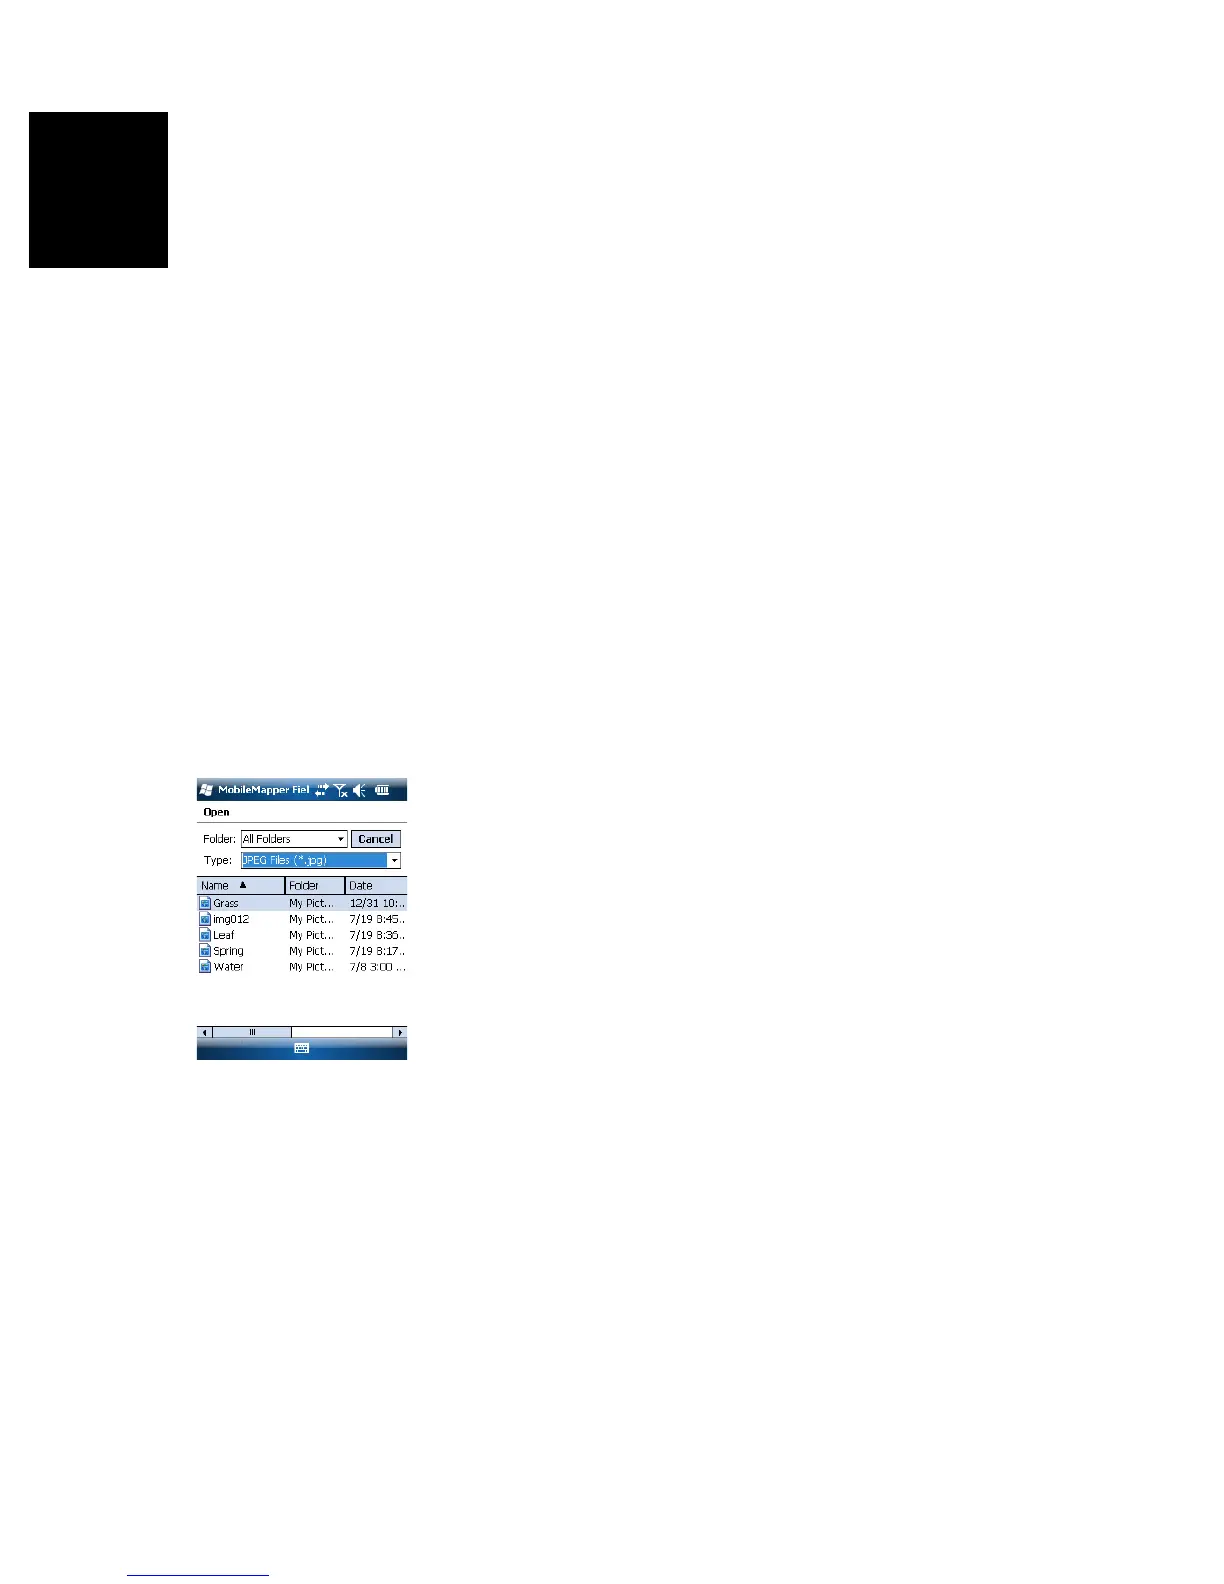
•Tap Menu>Options and then on the Map tab.
• Tap on the Add... button
•Tap in the Type field and select the format of the file
containing the background map:
– Bitmap (bmp)
– GIF (gif)
– GeoTIFF (tif)
– JPEG (jpg)
– JPEG2000 (jp2)
MobileMapper Field then browses all the folders in search
of all the image files stored in the receiver meeting the
current Type selection.
• Select the name of the image file you want to add. This
automatically adds the file to the list of background maps.
A message will warn you if you are attempting to add an
already georeferenced background map that uses a
coordinate system different from the one used in the open
job.
Like layers, each of the added background maps can be
shown or hidden on the map screen. Set accordingly each
of the check boxes placed before the names of the
background maps (cleared= hidden, ticked= shown).
•Tap OK to return to the map screen. Note that the map
screen will show the background map(s) only after the