8
9. When the machine has stopped:
Open the door
by pressing
• After a program, which concludes by
pumping out the water, the door can be
opened directly.
• After a program which stops with water in
the machine, turn to
6 – pumping out
7 – spinning
8 – pumping out
After pumping out (and spinning) the
door can be opened.
Access openings under the drum paddles
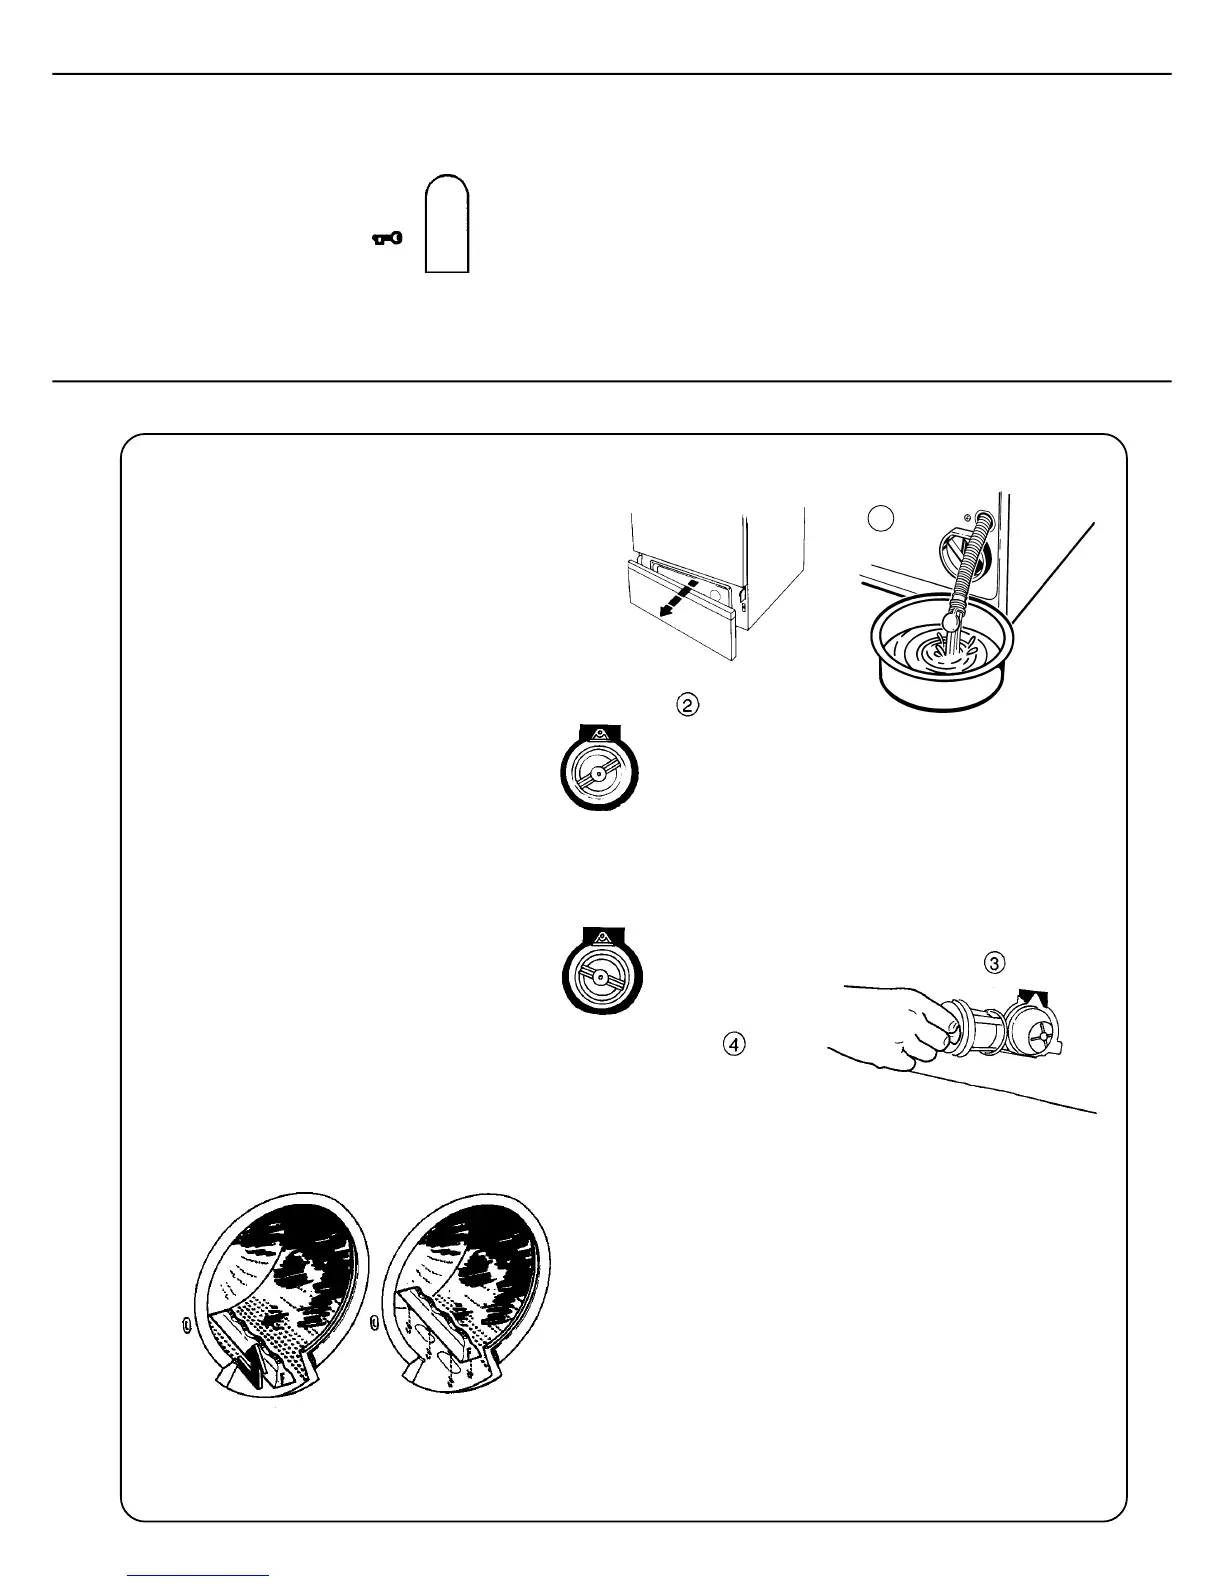
User -Maintenance Instructions – Care of the machine
Check the needle trap and outlet pump
The machine has a needle trap which
will trap needles, hairpins, coins and
similar items. Clean it at intervals as
follows:
1. Open the lower cover in front of the
pump, pull the small drain hose and
drain off water into a shallow bowl
after removing the plug from the end
of the hose (1).
2. Turn the pump cover anticlockwise to
the position shown in (2). This un-
covers the drain holes and water will
run out into the bowl.
3. When the water has finished draining
out, turn the pump cover further and
pull it off. Clean out the needle trap,
and clean the pump rotor at the back
of the pump housing (3).
4. Check that there is no grit or small
objects in the pump, and replace the
pump cover. Turn it clockwise in two
stages: when you hear a click, turn it
a little more to its end stop, as shown
in (4).
If an object has fallen between the drum and the outer
container, you can get it out as follows:
1. Undo the screw on top of the paddle with a screwdriver
(three turns).
2. Pull the paddle towards you and lift it upwards.
3. Remove the object. Be careful not to bend the immersion
heater elements.
4. Locate the paddle in its fixing hole, with the F-mark to the
front (i.e. facing you). Slide the paddle backwards as far
as it will go. Check that its clips are properly located in the
slots in the drum, and retighten the screw.
Closed
1
Open
Bot-
tom
Bottom
Top
Top