•Take the back cover off the Aspera Jazz 2. This can be done by applying gentle force on the indent located on the bottom corner of the phone (please
see diagram in “Getting to know your Aspera Jazz 2”).
•Insert the micro-SIM into the first slot in the orientation shown by the phone (as shown by (1) in the diagram). Please ensure that the micro-SIM is
orientated correctly and inserted fully.
•You can also optionally insert a second SIM card, as the Aspera Jazz 2 is a dual-SIM phone. The second SIM slot is a standard size SIM. Please
ensure when inserted the standard SIM that it is orientated correctly and inserted fully, as shown by (2) in the diagram.
•You can optionally insert a micro-SD card to expand the storage on the Jazz 2. This can be inserted into the (3) slot, following the orientation as given
in the diagram.
•Insert the battery into the back of the phone by lining up the battery connections to the pins (4) in the battery slot.
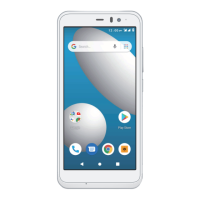
You may now turn on the phone to begin the Android setup process.
•Press and hold the power button for five seconds, and the phone will begin the start-up process. Let go of the power button at this stage.
•After the phone has finished starting up, it will display a Welcome screen. Select the language you wish to use on the phone, then tap “Start”.
•If the SIM card has not been inserted correctly, it will ask you to insert the SIM card. If there is no SIM card in the phone, you can skip this step.
•You can connect to a Wi-Fi network to continue setup or skip this step if you do not wish to pursue any backup/restoring options for now.
•If you do not connect to a wireless network, you will need to manually adjust date and time, and setup the device “as new” from the list of Google Services onwards.
•If you do connect to a wireless network, the phone will need to check for necessary updates, and this may take some time.
•If you do decide to connect to a wireless network, you will have the option of Copying Apps & Data over to the Aspera Jazz 2.
If you decide to setup the device as new:
•Select “Do Not Copy”
•You can opt to sign into a Google Account, or skip this selection.
•There will be a list of Google Services, you can enable or disable some of these to your choosing by tapping on the radio button. Tap “Next” to continue.
•You may choose to setup a security measure, including a pattern, PIN, password, and/or fingerprint sensor.
Warning: Please keep a note of the PIN, Password, or Pattern used to lock/unlock the phone. If you lose this, you may lose access into the device due
to the security protocols of Android.
•Your device is ready to be used.
If you decide to setup the device from a backup/copy:
•Please ensure that you follow the on-screen prompts if you do decide to back-up from either a different device or previous copy, as the instructions will change.
Please note that you cannot restore a backup from a higher Android version into a lower Android version. The Aspera Jazz 2 runs on Android 9.0 Go.
For any further documentation please visit Google’s support portal on back-up and restore, which can be located here - https://support.google.com/android/answer/2819582?hl=en
10