1110
9. PRELIMINARY CHECKS
After assembling the wheelchair, these checks should be completed prior to initial use:
1. Check that the seating surface is locked into place, creating a flat support surface.
2. Check that rear wheels are locked in place and that quick release axle is not loose.
3. Check that rear brakes engage and disengage.
4. If fitted with accessories, ensure that they are secure and locked in place.
10. GENERAL OPERATION
10.1 GENERAL OPERATION
It is very important that this wheelchair is used under guidance from all warnings or hazards listed in this
product user manual. Key safety measures should be taken by both users and attendants when using
this wheelchair:
• Avoid quick direction changes.
• Ensure your wheelchair is used on surfaces intended for its use.
• Ensure an attendant is available to assist at all times.
10.2 LIFTING THE WHEELCHAIR
To fold your chair correctly follow the ‘ASSEMBLY’ instructions
in reverse
3
,
2
,
1
.
Then, use the carry handle on the seating surface to safely lift
the wheelchair.
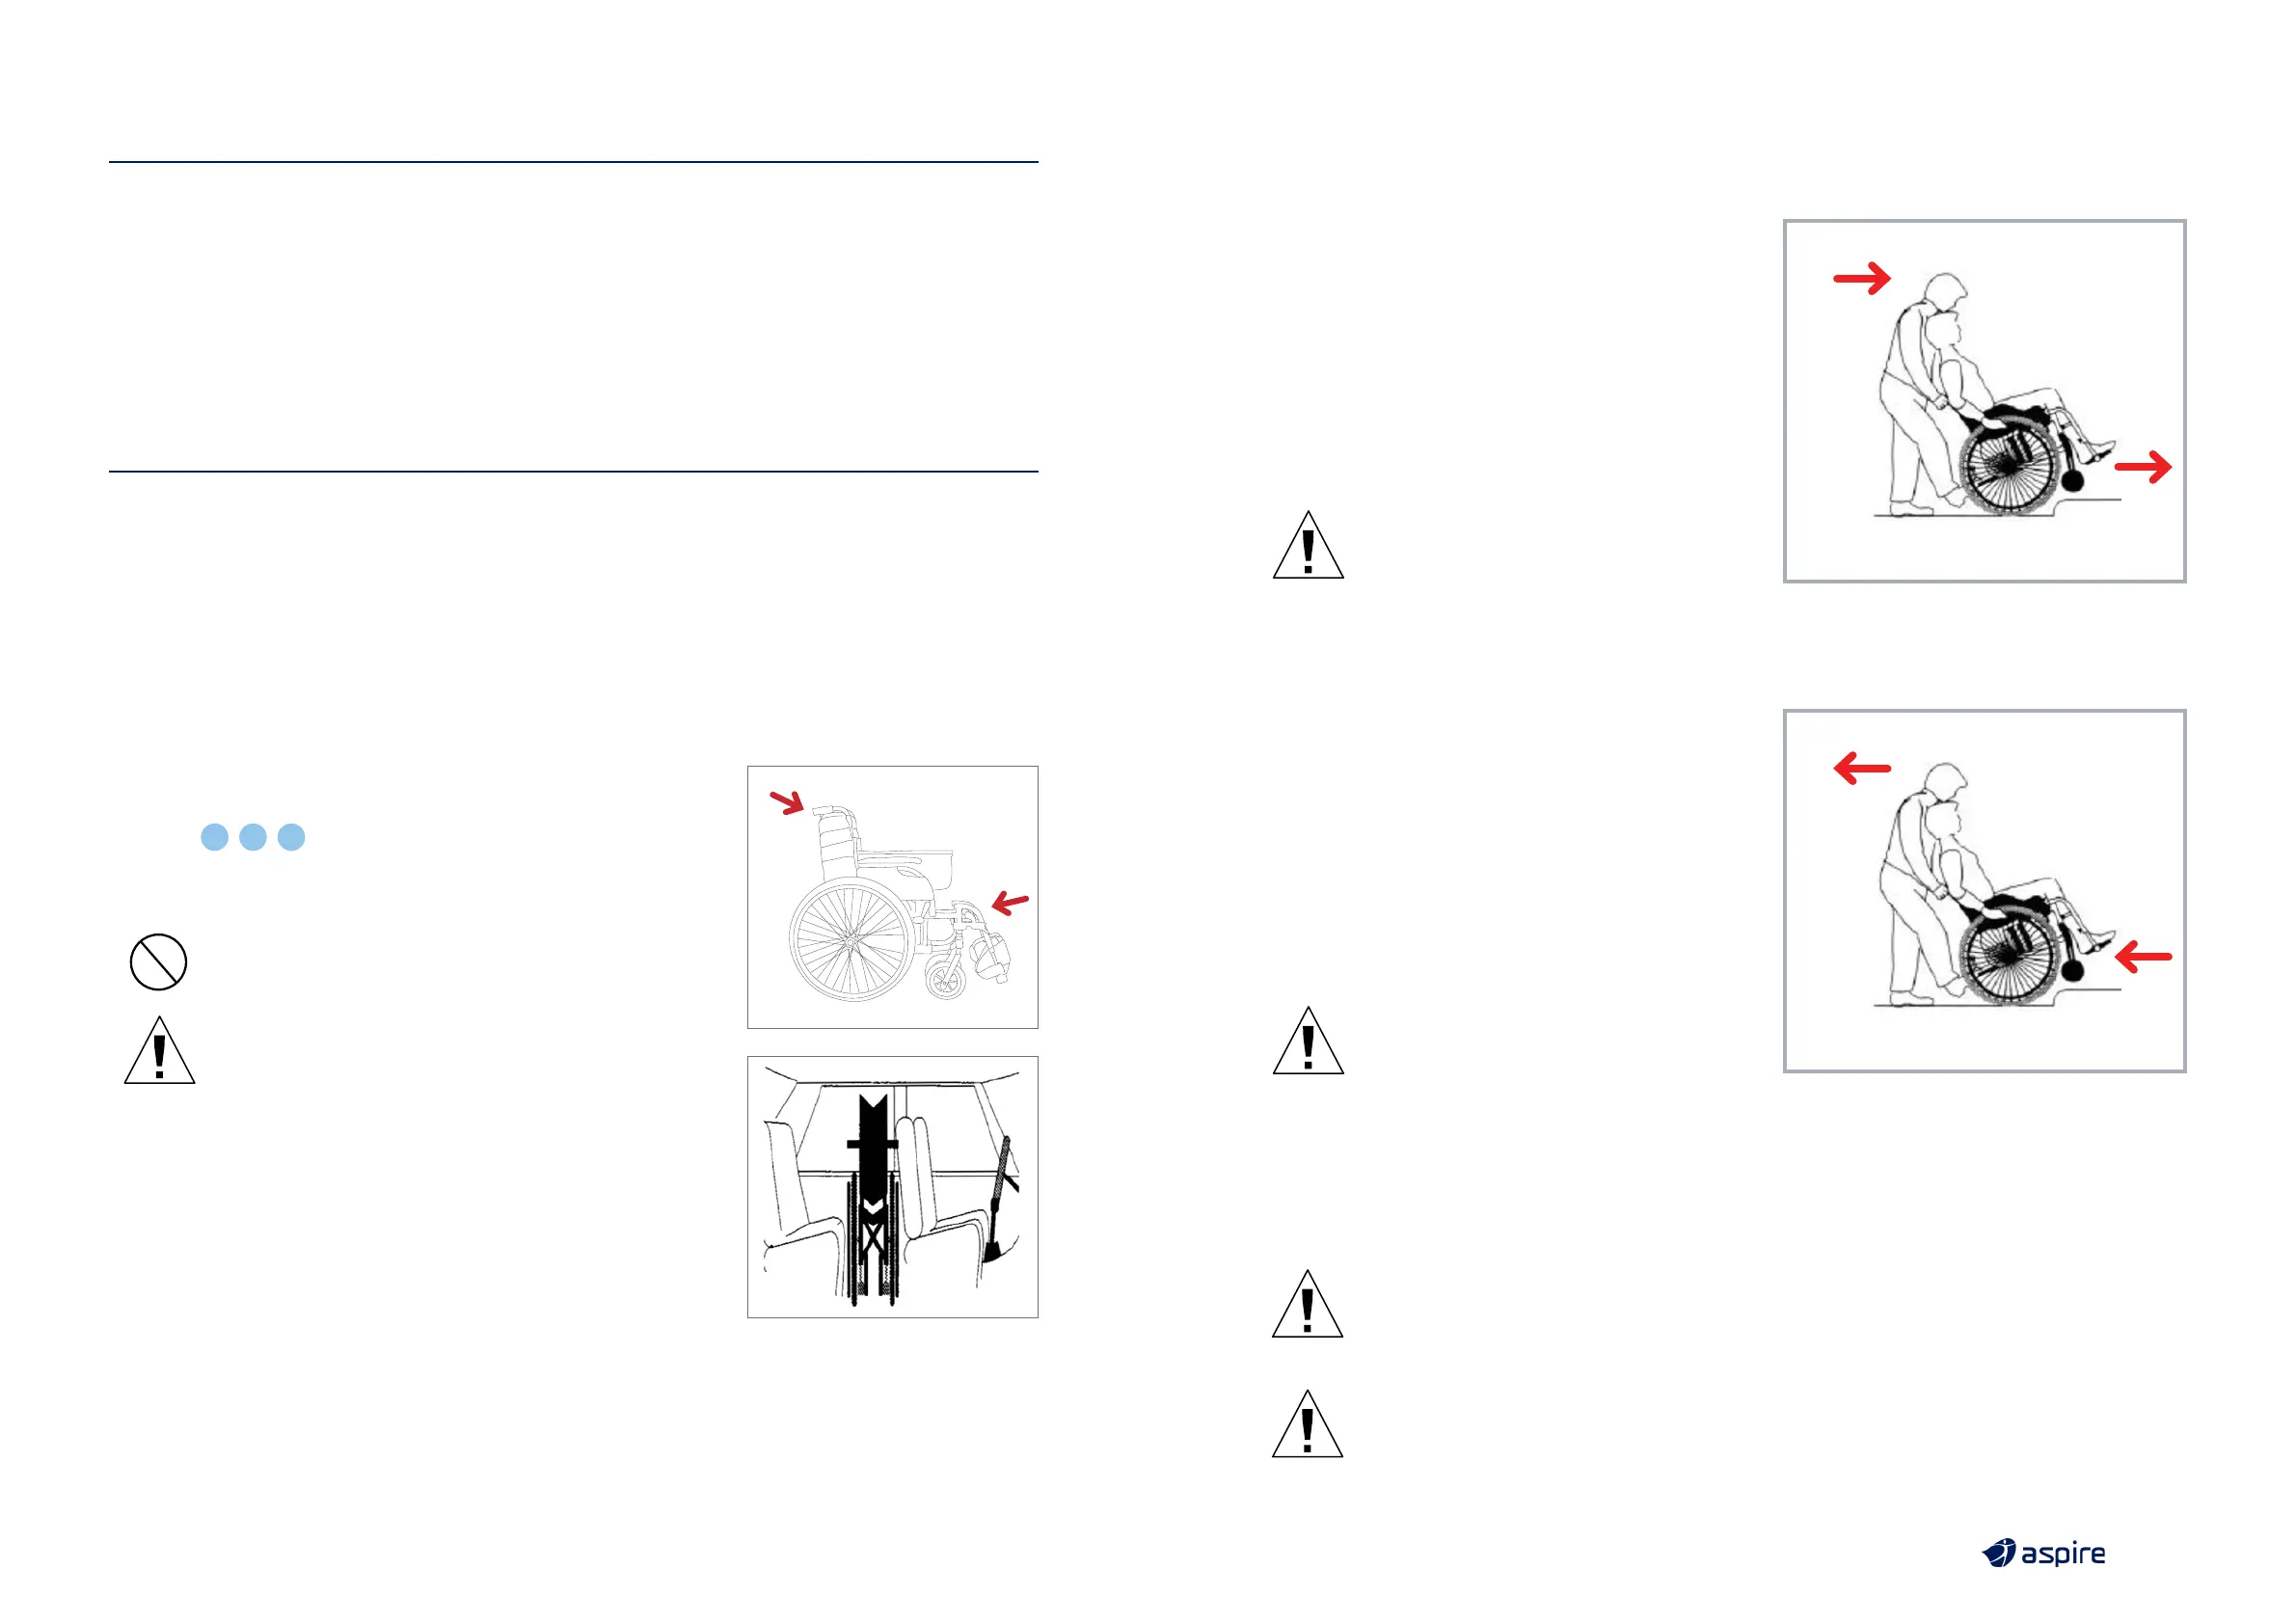
DO NOT lift the wheelchair with an occupant in
the seat. This lifting guide is for safe handling of
the wheelchair only.
WARNING
WARNING! DO NOT lift the wheelchair by holding it
by the legrests or the armrests! Fold-up the legrests
prior to lifting the chair.
10.3 TRANSPORTING THE WHEELCHAIR
WITHOUT OCCUPANT
To transport this chair in a motor vehicle it is suggested that
the backrest, seat and legrests are folded as per the “Lifting the
Wheelchair” instructions above. This will help reduce the overall
chair size in order to fit into the rear boot or backseat of a standard
motor vehicle.
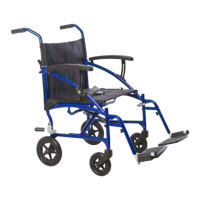
10.4 MOVING WHEELCHAIR UP A KERB OR
SINGLE STEP WITH AN ATTENDANT
1. Push the wheelchair up to the kerb FEET FIRST.
2. The attendant should push down on the rear foot
peg to slightly incline the chair.
DO NOT tilt the chair back with the push handles.
3. Once the front wheels are firmly on the ground
above the kerb, the rear wheels should be pushed
against the kerb to propel the entire chair to rest
above the kerb.
Product may vary to image.
WARNING
WARNING! This should only ever be done
with an attendant and not performed by
a user on their own. It is very important
the above steps are followed to prevent
injury to both the user and the attendant.
Product may vary to image.
WARNING
WARNING! This should only ever be done
with an attendant and not performed by
a user on their own. It is very important
the above steps are followed to prevent
injury to both the user and the attendant.
10.5 MOVING WHEELCHAIR DOWN A KERB
OR SINGLE STEP WITH AN ATTENDANT
1. Reverse the wheelchair up to the kerb FEET LAST.
2. The attendant should check for cars or obstructions
prior to commencing the descent.
3. The attendant should slowly lower the rear wheels
down to the road surface, ensuring not to tip the chair.
4. Once the rear wheels are firmly on the road surface,
the front wheels should be slowly lowered onto the
road surface.
WARNING
Warning! Slopped or uneven terrain
This wheelchair is designed for use on flat-level surfaces. If encountering sloped or uneven
terrain an alternative route should be sought. If impossible a carer should always be present,
and use the attendant brakes to control speed and ensure the wheelchair to continues
straight forward until reaching flat ground.
WARNING
Warning! Maintaining stationary position
When not propelling the wheelchair the brakes should be applied in the locked position
at all times.
OTHER IMPORTANT WARNINGS