The Aspire Evoke 2 and Evoke 2 JNR are manual wheelchairs designed to assist individuals with limited mobility or an inability to walk. These wheelchairs are suitable for both indoor and outdoor use, though outdoor use is recommended on sealed, level terrain. For enhanced safety during outdoor use, the fitting of anti-tip wheels is suggested. The wheelchairs are available in a range of sizes to accommodate various users.
Function Description
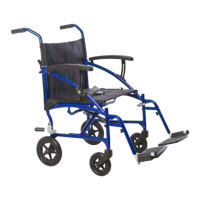
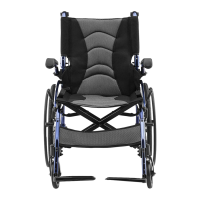
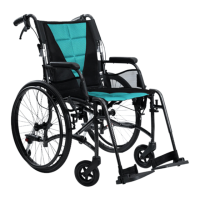
The Aspire Evoke 2 Manual Wheelchair is a lightweight, four-wheel wheelchair featuring a cross-folding frame made from aircraft-grade aluminum. This construction ensures strength, durability, and ease of movement, offering enhanced maneuverability and stability. It comes equipped with a fabric seat and back, a seat cushion, push handles, 24-inch rear self-propelling quick-release wheels, and removable swing-away legrests. A wide range of accessories can be fitted to improve its overall performance and customize the fit for the user.
The Aspire Evoke 2 JNR Manual Wheelchair is a lightweight, four-wheel wheelchair with a cross-folding frame, also made from aluminum for strength, durability, and easy movement. It provides enhanced maneuverability and stability, with a wide size range and adjustability for a customized fit. It includes a fabric seat and back, a seat cushion, push handles, 20-inch rear self-propelling quick-release wheels, and removable swing-away legrests. Like the adult version, a variety of accessories can be added to the JNR model to enhance its overall performance.
Usage Features
The wheelchair is designed for both attendant propulsion (using push handles) and self-propulsion (using self-propelling wheels). It is crucial to read the user manual carefully before initial use.
Assembly and Preliminary Checks:
Upon receiving the wheelchair, it should be opened carefully to avoid damaging the product. The wheelchair frame, rear wheels, left and right legrests, Allen keys, user manual, and seat cushion are included in the box.
- Place the wheelchair on level ground and push down on the side rails of the seat until it lies flat.
- Secure the cushion onto the base.
- Insert the legrests into the corresponding receivers at a 90° angle. Twist and hold the latch, then rotate the legrest towards the center until it clicks into place. To remove legrests, twist and hold the hook outwards and lift.
Before initial use, ensure the seating surface is locked, rear wheels are locked and quick-release axles are secure, brakes engage and disengage correctly, and any fitted accessories are secure.
General Operation:
- Safety: Avoid quick direction changes and use the wheelchair on intended surfaces. An attendant should always be available to assist.
- Lifting: To fold the chair, reverse the assembly instructions. Use the carry handle on the seating surface to lift the wheelchair. Never lift the wheelchair with an occupant. Do not lift by the legrests or armrests; fold up the legrests first.
- Transporting (without occupant): For transport in a motor vehicle, fold the backrest, seat, and legrests to reduce the overall size.
- Moving up a kerb/single step (with attendant): Push the wheelchair up to the kerb feet first. The attendant pushes down on the rear foot peg to incline the chair (do not tilt back with push handles). Once the front wheels are on the ground, push the rear wheels against the kerb to propel the chair up. This action should only be performed with an attendant.
- Moving down a kerb/single step (with attendant): Reverse the wheelchair up to the kerb feet last. The attendant checks for obstructions, then slowly lowers the rear wheels to the road surface, ensuring the chair does not tip. Once the rear wheels are firm, the front wheels are slowly lowered. This action should only be performed with an attendant.
- Sloped/Uneven Terrain: This wheelchair is designed for flat surfaces. If encountering slopes, seek an alternative route. If unavoidable, a carer must be present, using attendant brakes to control speed and maintain a straight path.
- Stationary Position: Always apply brakes when the wheelchair is stationary.
- Protecting Hands (self-propelling): When slowing or braking using hand rims, friction can generate heat. Wearing wheelchair gloves is strongly suggested to protect hands.
- Kerbs/Steps: Never travel down kerbs or multiple steps without an attendant carer.
- Anti-tip Wheels: When self-propelling, anti-tip wheels are strongly suggested. If they are raised or not fitted, an attendant carer should stand behind the wheelchair holding the handles.
- Reaching: Avoid reaching for objects outside the wheelchair's perimeter, as this changes the center of mass and can cause tipping.
- Brakes: Push forward on the brake lever to engage, pull back to disengage. Brakes should always be locked when leaving a user unattended.
- Quick Release Wheels: To remove a rear wheel, press and hold the release button and pull the wheel from the frame. To attach, reverse the process. Ensure quick release axles are correctly mounted and locked before seating a user.
Adjustments:
- Backrest Height: Peel back upholstery on the lower edge of the backrest cane to reveal bolts. Remove bolts, reposition canes, tighten bolts, and reattach upholstery.
- Backrest Tension: Peel back upholstery to reveal Velcro straps. Reposition straps as desired and reapply upholstery.
- Seat Depth and Rear Wheel: Remove bolts, move the backrest receiver bracket to the desired seat depth. Adjust rear wheel position and height by adjusting the axle mount and receiver. Ensure all hardware is tightened securely and rear wheels are symmetrical for stability.
- Backrest Angle: Loosen screws on either side of the backrest plate, reposition the backrest, and fasten screws.
- Front Castor Height: Loosen bolts and remove the center pin. Reposition to the desired height, reposition the center pin, and fasten with bolts. Ensure front castors are symmetrical.
- Front Castor Fork Angle: Remove mounting screws. Reposition the fork to one of four pre-determined angles and fasten with screws.
- Footrest Height: Loosen the bolt on the side of the footrest, reposition the height, and fasten.
- Footrest Angle: Loosen the bolt on the side of the footrest, reposition the angle, and fasten.
Accessories:
- Attendant Propelled Conversion Kit: Converts the wheelchair to attendant-propelled. Includes 12" wheels, T-brackets, attendant brake levers, and brake assemblies. Remove the 24" wheel by pressing the axle cap. Remove the axle receiver for the 24" wheels. Assemble the T-bracket to the frame, attach the 12" wheels, and assemble the attendant brakes.
- Elevating Legrests: Allow legs to be reclined. Connect using the same method as standard legrests. Adjust angle by pressing and holding the release button and lifting/lowering the footplate.
- Amputee/Stump Support: Connects to the legrest receiver. Adjust height or angle using the hand fastening lever.
- Brake Extension Lever: Replaces the existing brake lever to assist users in activating brakes.
- IV Pole: Clamps to either backrest cane for intravenous infusion.
- Anti-Tip Wheels: Prevents tipping. Remove rear foot pegs, slide on anti-tip bars, and lock in place. Height is adjustable for carer transportation.
- Oxygen Bottle Holder: Mounts to the rear of the chair frame. Align with mounting holes, fasten with bolts, and insert the oxygen bottle, ensuring tubing is clear of moving parts.
- Height Adjustable Armrests: Adjust height by pressing the button and raising/lowering the pad. Adjust depth by undoing bolts, positioning, and re-fastening.
- Gutter Armrests: For additional comfort. Remove standard armrest pads, line up gutter armrests, and fix in place. Note: Side transfers are not possible with gutter armrests attached.
- Contoured Padded Overlay: For extra user comfort. Remove seat cushion, place overlay, fasten with Velcro strips on seating and backrest surfaces.
- Deluxe Headrest: For comfort and safe vehicle transportation. Mount cross bar across rear push handles, fasten with locking pin. Adjust position and lock with fastening hand wheel.
- Drum Brakes for Rear Wheels: Remove quick release axle, lay wheelchair on its side, remove axle sleeve. Install drum brake, ensuring correct direction, and secure with hardware.
Amputee Setting Adjustment:
This adjustment allows for moving the rear axle mounting plate backward to shift the center of gravity. Detach the wheel, loosen the fastener, move the rear axle mounting plate backward, tighten the bolts, and reattach the wheel.
Troubleshooting:
- Steering/Pulling to one side: Check quick-release axles are locked, user weight is evenly distributed, and wheels rotate freely.
- Moving slowly: Ensure rear wheels are attached correctly, remove hair/dirt from castor/rear wheel axles, check weight distribution on castors, ensure clothing is not interfering, and both brakes are disengaged.
- Does not turn smoothly: Ensure front fork bolts are not overtightened, remove hair/dirt from castor axles, and both brakes are disengaged.
- Brakes not working properly: Check distance between tires and brake foot.
- Cannot be opened/folded easily: Clean crossbar and apply grease, check for lodged items, and ensure footplates are folded up.
Maintenance Features
Maintenance Schedule:
- Weekly: Check brakes are functioning properly, and all fastenings (nuts, bolts, hinges) are secure.
- Periodically: Check for signs of wear on front and rear castors/tires.
- Yearly: Service to be completed by an authorized Aspire service agent. This includes checking wheels & tires, forks, axles, armrest receivers, seat sling, footrest mounts, footplates, and armrest pads.
Care for Your Chair:
- Check tire condition at least twice per month.
- Ensure rear wheel spokes are not loose; adjust by a qualified technician if needed.
- Keep rear wheel axles clean and free from dirt and hair.
- Check brakes regularly.
Cleaning Instructions:
- Clean regularly with a damp cloth.
- Use a mild washing agent and warm water for dirt build-up.
- DO NOT use harsh abrasive or bleach-based agents.
- DO NOT use the wheelchair if seat or backrest upholstery is damaged.
- Dry with a soft cloth.
Warranty:
Aspire Manual Wheelchairs come with a 2-year warranty on the frame and a 1-year warranty on all components. Consumable parts (armrest pads, tires, castors, and upholstery) carry a 1-year warranty against manufacturer defect only, not covering wear and tear. Keep the purchase invoice as proof of warranty commencement.
Service Maintenance & Customisation:
Contact your local Aidacare branch for all inquiries. Aidacare stocks replacement parts, and all replacements should be completed by Aidacare or an authorized Aspire service technician. Customization or modification of the wheelchair may cause it to no longer meet safety standards and will void the warranty.