M
martha98Sep 6, 2025
How to stop my Assa Abloy Door Opening System from bouncing when it opens?
- CcookmatthewSep 6, 2025
If your Assa Abloy Door Opening System bounces when it reaches the open position, decrease the Slow Speed on the controller.
How to stop my Assa Abloy Door Opening System from bouncing when it opens?
If your Assa Abloy Door Opening System bounces when it reaches the open position, decrease the Slow Speed on the controller.
Why does my Assa Abloy Norton 6011 Door Opening System open and close repeatedly?
If your Assa Abloy Door Opening System opens and closes repeatedly, change the selector mode switch from H/O to On.
What to do if the motor in my Assa Abloy Norton 6011 is driving in the wrong direction?
If the motor in your Assa Abloy Door Opening System is driving in the wrong direction, change the Mount (Push / Pull) setting on the controller, reset the Home process, and save the values.
What does it mean if my Assa Abloy Norton 6011 Door Opening System says 'Aux1, Aux 2, or Aux 3 Stuck'?
If your Assa Abloy Door Opening System displays an error message stating “Aux1, Aux 2, or Aux 3 Stuck”, disconnect the respective Aux input (1, 2, or 3) and check if the error message disappears. If it does, ensure that the input device is not stuck, sending a constant signal. Note that the controller has a 3-minute protection limit.
What does 'Comm Error' mean on my Assa Abloy Door Opening System?
If your Assa Abloy Door Opening System displays a 'Comm Error' message, the inverter must be replaced.
What does the error 'Presence Detect' mean on my Assa Abloy Norton 6011 Door Opening System?
If your Assa Abloy Door Opening System shows a 'Presence Detect' error, it means the unit has a presence detector attached, and that device has been activated.
| Spring Force | Adjustable |
|---|---|
| Backcheck | Adjustable |
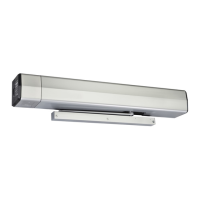
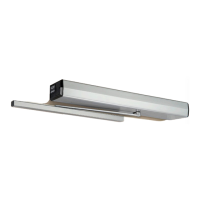
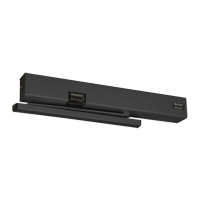
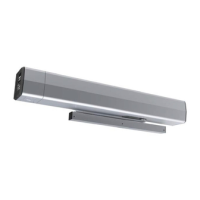
| Series | 6011 |
| Mounting | Surface Mount |
| Application | Commercial |
| Compliance | ANSI/BHMA A156.4 |
| Valve Adjustments | Yes |
| Door Width | Up to 48" |
| Closing Power | Adjustable |
| Temperature Range | -20°F to 120°F |
Details the three operational variations of the low energy operator.
Explains how the door opens, stops for obstruction, and reopens.
Describes the door's closing process, including slowing and obstruction handling.
Details the optional feature to keep the door held open indefinitely.
Specifies dimensions and recommended frame reinforcing for installation.
Lists required mounting hardware and frame fasteners for different materials.
Provides key technical specifications like power, door width, and opening angles.
Details marking and drilling holes for mounting the backplate and conduit.
Instructions for sliding and aligning the backplate over mounting screws.
Steps to locate and drill holes in the door for the track assembly.
Securing the backplate to the frame using specified screws.
Attaching end caps to each end of the backplate using screws.
Steps for installing the Operator LAP onto the mounted backplate.
Guides on orienting, securing, and wiring the conduit assembly.
Securing the power module sub-assembly and connecting its wiring.
Connecting the operator LAP and power module using specified connectors.
Steps for installing the union assembly and snapping on the union spacer.
Mounting the track assembly to the door using screws and sex bolts.
Steps for installing the arm assembly onto the operator's pinion.
Adjusting closer valves (Sweep, Latch, Backcheck) for proper door function.
How to adjust the spring force for opening and closing effort.
Configuring the door's closed and fully open positions via the control unit.
Setting the selector mode switch for activation or continuous hold open.
Steps to align cut-outs and securely snap the cover onto the backplate.
Details on power input connections, wire size recommendations, and current draw.
Information on standard wiring practices, local codes, and fire/smoke barrier requirements.
Lists common error codes displayed by the controller and their meanings.
Details for Screen 1 settings like Mount, Hold Open, Open Delay, and Latch Retract.
Details for Screen 2 settings like Door Feedback, PDET Option, and various relay functions.
Diagram for standard door operation with switches.
Wiring diagram for a fail-secure electric strike.
Wiring for fail-safe electric strike or electromagnetic lock.
Wiring diagram for a 24VDC electric exit device.
Wiring for electric dogging exit devices with touch bar monitoring.
Wiring diagram for hard-wired executive function.
Wiring for electric latch retraction exit devices.
Wiring for smoke ventilation with blow-open function.
Wiring diagram for standard operation using wireless switches.
Wiring diagram for executive function using wireless switches.
Wiring for vestibule applications with inside and outside door switches.
Configuration of DIP switches for relay activation modes.
Steps for learning and programming transmitters to the receiver.
Common issues and solutions for the 433MHz receiver.
Describes detector operation and how to activate its presence detection.
Details on configuring door-mounted sensors for opening and closing cycles.
Solutions for problems like door closing too fast, slow, or not opening correctly.
Guidance for resolving controller error messages.
Solutions for cover not snapping on or staying on properly.
Template for left-hand pull side application, showing dimensions.