18
Fig. 58
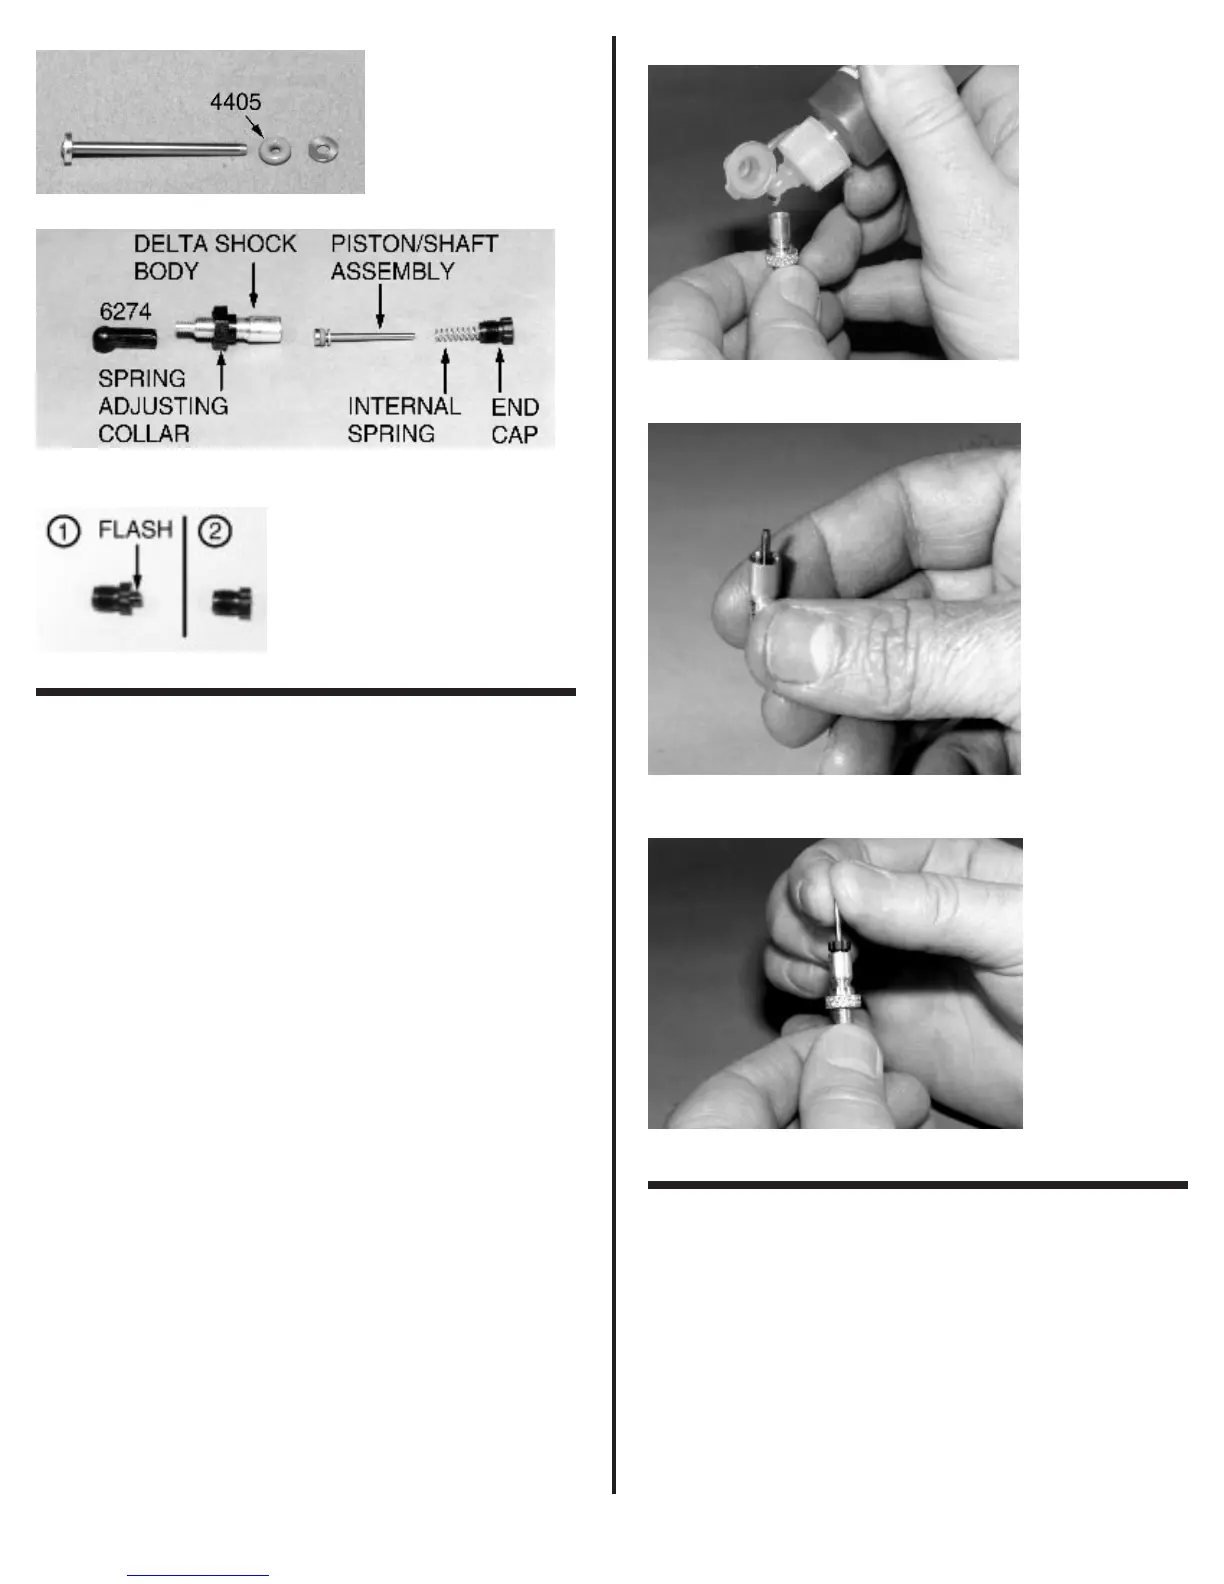
Fig. 59
Fig. 60
❑ Figs. 61, 62 & 63 From the master kit bag
remove the bottle of #5415 20 weight shock oil. Now hold the
shock body at a slight angle. Slowly add shock oil to the body.
Let the oil run down the inside wall of the shock body to prevent
air bubbles. Fill the shock body with oil to the BOTTOM of the
threads. Be sure to keep the shock upright after the oil has been
added.
Note: We do not recommend the use of Silicone shock
oil in the Delta shock. The shock volume is to small to use
Silicone oil.
Pick up the shock piston/shaft assembly and slowly
push it down into the shock body. Be careful not to create any
air bubbles or lose any oil. Now slide the shock internal spring
and black plastic end cap over the end of the shock shaft.
Slowly screw the plastic end cap into the shock body
two turns. Now we must bleed the shock. THIS IS THE MOST
IMPORTANT PART OF THE SHOCK ASSEMBLY. It will take
several minutes. Push the shock shaft in very slowly. We want
the shaft to go all the way in and touch the bottom of the shock.
If there is too much oil in the shock the shaft will not go all the
way down. If you find there is too much oil in the shock you will
need to bleed some out. To do this unscrew the cap. Now slowly
push the shock shaft all the way down. You can now thread the
plastic end cap back in two threads. Recheck the shock piston
travel. If it is still not right repeat the process. If everything is OK
thread the plastic end cap all the way down.
WARNING! Do not
use a wrench!
Now do a final recheck to make sure the shock
shaft goes all the way down. If not readjust as indicated above.
We want the shaft to go all the way in and feel smooth but the
shaft should also come out all the way by itself. Now move the
shaft in and out. If you feel any small jerky motions, you have
air inside the shock and you will have to add oil. Do not try to
rush this job. When this is accomplished the shock is correctly
assembled.
Fig. 61
Fig. 62
Fig. 63
❑ Figs. 64 & 65 Now we can remove the #4446 Delta
shock spring, the aluminum shock shaft end cap, one #6951 4-
40 x 1/8” socket set screw, and one #6274 plastic ball end cup.
We can start by threading the #6951 set screw into the shock
shaft end cap. Then we need to thread the #6274 plastic ball
end cup all the way onto the nipple of the aluminum shock shaft
end cap.
Slide the spring onto the shock body and down against
the spring adjust collar. While holding the spring collapsed,
slide the aluminum shock shaft end cap onto the shock shaft
and securely tighten the #6951 set screw against the shaft.
Now go ahead and tighten the spring adjust collar all the way
down. Fig. 65 shows the completed shock assembly.