2-9
P11C-C/4L
2.3.2 Installing the CPU heatsink
The Intel
®
LGA1151processorrequiresaspeciallydesignedCPUheatsinktoensure
optimum thermal condition and performance.
• WhenyoubuyaboxedIntel
®
processor,aspeciallydesignedCPUheatsinkora
CPUheatsinkwithaCPUfanassemblyisincludeddependingonthepackage.Ifyou
buyaCPUseparately,ensurethatyouuseonlyIntel
®
certiedmulti-directionalCPU
heatsinkorCPUheatsinkwithCPUfan.
• UseanLGA1151-compatibleCPUheatsinkandCPUfanassemblyonly.The
LGA1151socketisincompatiblewiththeLGA775andLGA1366socketsinsizeand
dimension.
OrienttheheatsinkandfanassemblysuchthattheCPUfancableisclosesttotheCPUfan
connector.
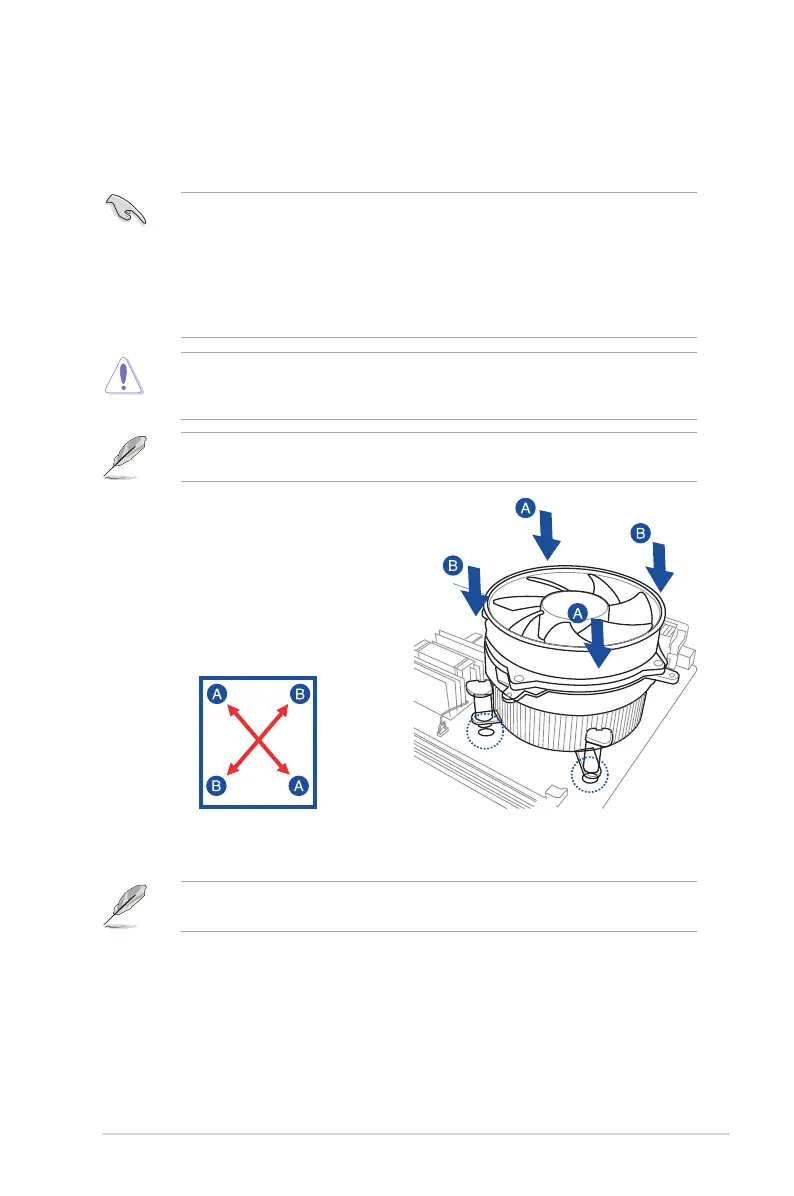
ToinstalltheCPUheatsinkandfan:
1. Place the heatsink on top of the installed
CPU,makingsurethatthefourfasteners
match the holes on the motherboard.
2. Push down two fasteners at a time in
adiagonalsequencetosecurethe
heatsink and fan assembly in place.
IfyoupurchasedaseparateCPUheatsinkandfanassembly,ensurethattheThermal
InterfaceMaterialisproperlyappliedtotheCPUheatsinkorCPUbeforeyouinstallthe
heatsink and fan assembly.
EnsurethatyouhaveinstalledthemotherboardtothechassisbeforeyouinstalltheCPU
fan and heatsink assembly.
 Loading...