Installation & Servicing Instructions ATAG Q-Series
37
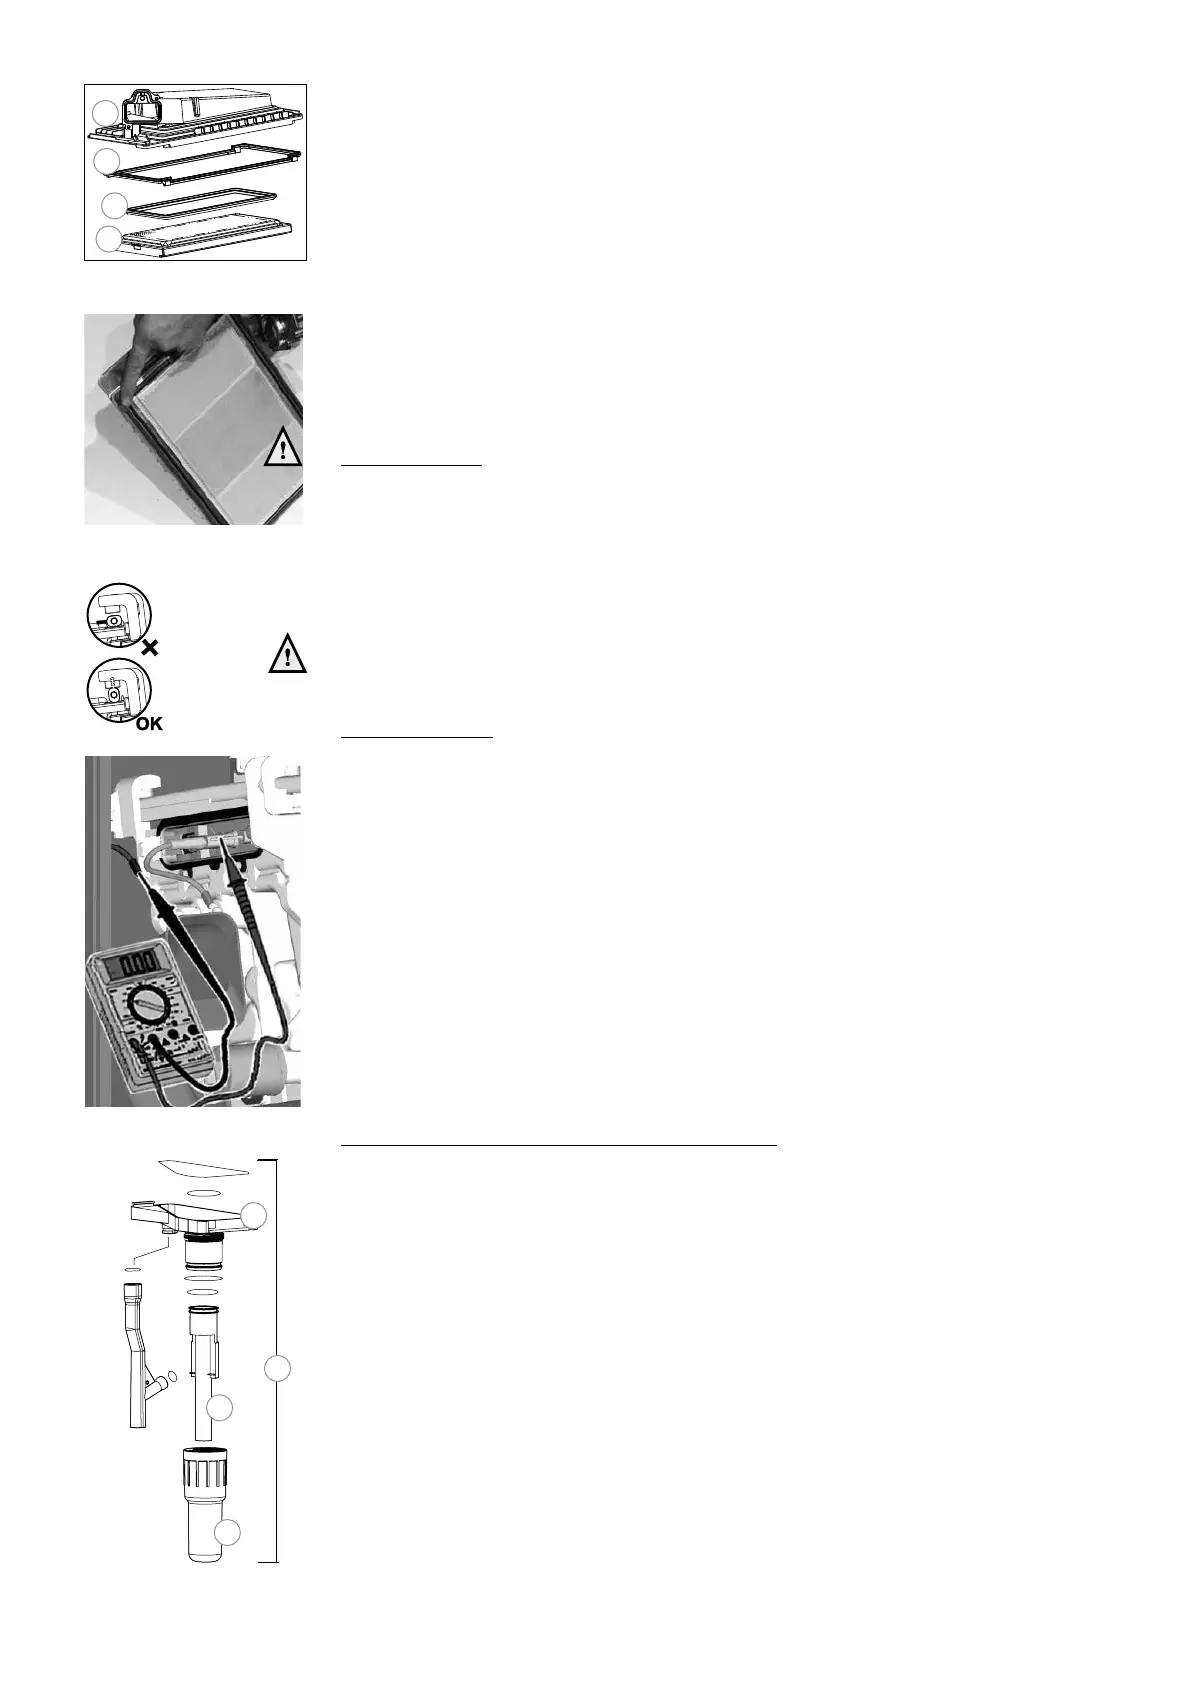
- Remove the burner cassette (18) from the ventilator unit;
- Check the burner cassette for wear and tear, pollution and any breakages. Clean
the burner cassette with a soft brush and vacuum cleaner. In the case of breakages,
always replace the complete burner cassette (18);
- Replace the gasket (17) between the burner (18) and upper casing (15), if required;
- Replace the gasket (16) between the upper casing (15) and exchanger, if required.
Heat exchanger
- Check the heat exchanger for contamination. Clean this if necessary with a soft
brush and a vacuum cleaner. Prevent dirt falling down into the heat exchanger.
Flushing the heat exchanger from the top down is not permitted
Retting of the components is done in reverse order.
Make sure that during retting of the clamping rods, they are put into the
correct position. They should be turned vertically.
Ignition electrode
The replacement of the electrode is only necessary when the electrode is worn off. This
can be checked by measuring the ionisation current with a multimeter (see gure 13.3.h).
The minimum ionisation current has to be greater than 4µA at full capacity.
If the viewing glass is damaged the complete electrode must be replaced.
Replacement goes as follows:
- Remove the electrical connections of the electrode;
- Press the clips on both sides of the electrode to both sides and remove the complete
electrode;
- Remove and replace the gasket;
Retting of the components is done in reverse order.
Siphon and condensate tray (see g. 13.3.i and j)
Step 1: Siphon
- First remove the condensate cup (7);
Check this for pollution. If there is no sign of strong pollution it is not necessary to
clean the condensate tray (Go to Step 3). If there is strong pollution in the cup it is
necessary to remove and clean the condensate tray according Step 2;
- Remove the inner siphon pipe (8) which remains in the condensate tray;
- Check the O-rings of the cup as well as those from the pipe and replace if necessary;
- Clean both parts by ushing it with clean water;
- Grease the O-rings again with acid free O-ring grease to make tting easier;
- If there is a leak at the condensate cup (7) or tray (9) the complete condensate trap
unit (10) has to be replaced by S4451610;
Siphon gure 13.3.i
7
8
9
10
Measuring ionisation current
figure 13.3.h
15
16
17
18
figure 13.3.e
Position gasket
figure 13.3.f
gure 13.3.g
 Loading...