Installation & Servicing Instructions ATAG Q-Series
36
13.3 Maintenance activities
Only to be carried out in the event that the CO, CO
2
and/or ratio gures are in-
correct.
Required tools:
- Cross head screwdriver
- ATAG T-handle key set with 3 bits (hex key 4mm, hex key 5mm and cross head PZ2)
- Open end wrench 8mm
To carry out the maintenance activities please follow the next procedure:
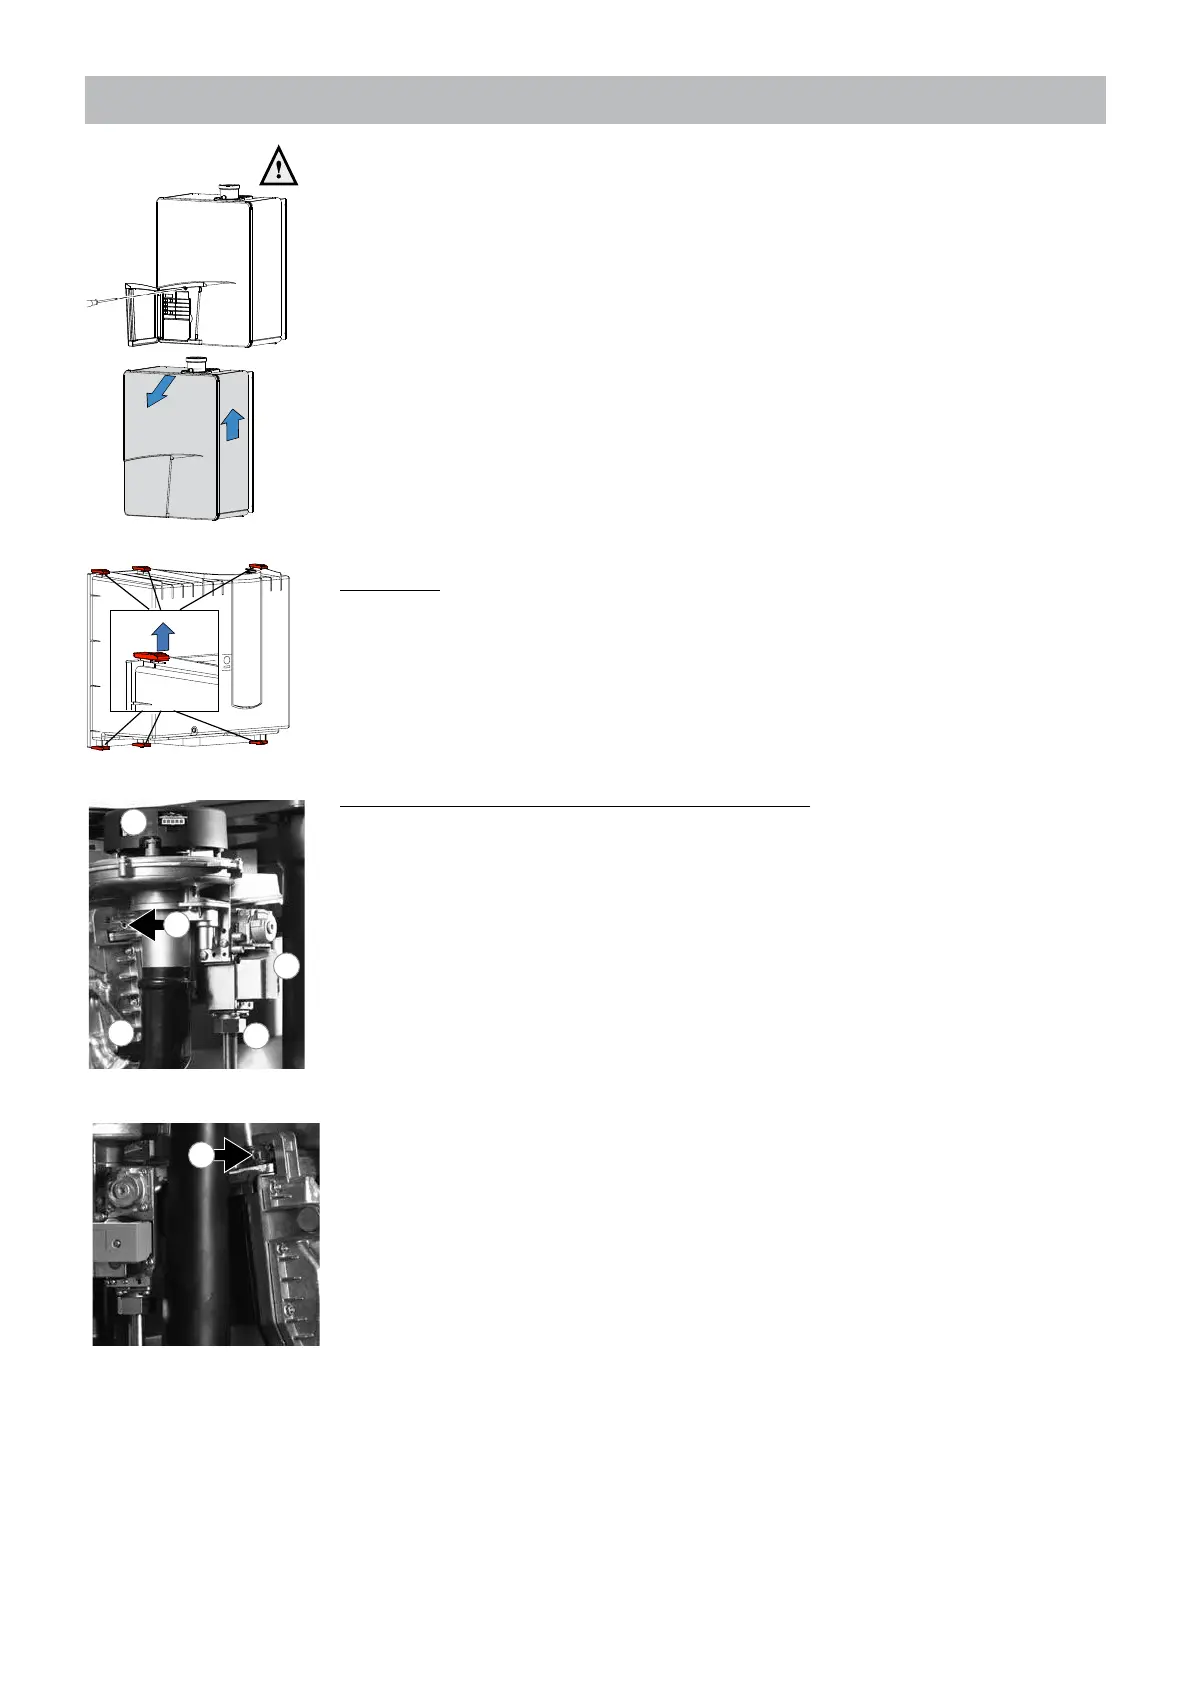
- Switch off the power supply;
- Remove the screw behind the door on the front of the casing (see g. 13.3.b);
- Lift the casing and remove it towards the front.
The air box
- Remove the transparant air box (see g. 13.3.b);
- Clean the box with a cloth with a simple (non-abrasive) cleaning agent;
The fan unit and burner cassette (see g. 13.3.c to g)
- Remove the electrical connection plug from the gas valve (1) and fan motor (2);
- Loosen the nut (3) of the gas pipe under the gas valve;
- Replace the gasket with a new one, if required;
- Loosen the front cross head screw (4) of the black plastic silencer;
- now turn the left (9) and right (10) clamp bars with the hex key a quarter turn and pull
these out in a forward motion. Mind the direction of rotation (red control cams);
- Slightly lift the fan unit and remove it towards the front of the heat exchanger;
OPEN
Opening air box
gure 13.3.b
Removing casing
gure 13.3.a
1
2
3
fan unit and gas valve
gure 13.3.c
gure 13.3.d
10
2
3
9
4
1
 Loading...