EasyManua.ls Logo

ATAGO PR-32a - User Manual

ATAGO PR-32a
28 pages
Print Icon
To Next Page IconTo Next Page
Loading...
3442-E16
DIGITAL REFRACTOMETER
Palette Series
PR-32α Cat.No.3405
P
R-101α Cat.No.3442
PR-201α Cat.No.3452
PR-301α Cat.No.3462
INSTRUCTION MANUAL
When a malfunction is suspected!
M
alfunctions often come from low battery.
Check the battery first, and if the battery is low,
replace it with a new battery.
Question and Answer IconNeed help?

Do you have a question about the ATAGO PR-32a and is the answer not in the manual?

Summary

Examples of Use

Measure Brix (%)

Easy Brix (%) measurement for various samples.

Convert Measurement Values

Display converted values using a user scale function.

Set Scale Number

Fix the scale to prevent accidental changes to displayed values.

Cautions and Instrument Durability

Solvents Affecting ABS Resin

List of solvents known to potentially damage the instrument's ABS resin casing.

Safety Precautions and Handling

Understanding Warning Indications

Explains the meaning of WARNING and CAUTION indicators used in the manual.

Understanding Safety Symbols

Explains the various symbols used for warnings, prohibitions, and instructions.

Safe Instrument Handling

Provides essential safety advice for handling the instrument and necessary protective measures.

Battery Management and Usage Conditions

Battery Warnings and Safety

Details critical warnings and safety precautions related to battery installation and use.

Environmental and Handling Advice

Outlines optimal environmental conditions and handling practices for instrument operation.

Daily Instrument Maintenance

Provides instructions for routine cleaning and maintenance of the instrument.

Package Contents and Part Identification

Confirming Package Contents

Lists the items included in the product package for user verification.

Instrument Component Overview

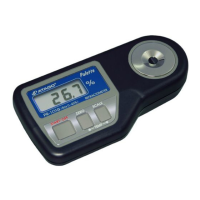
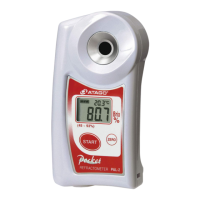
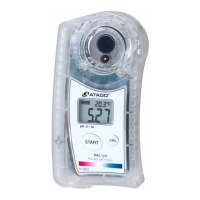
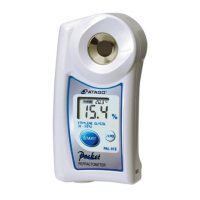
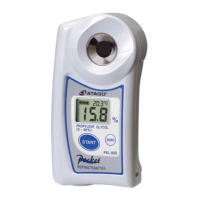
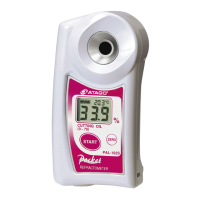
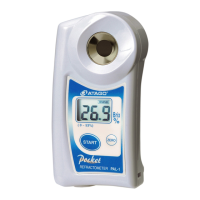
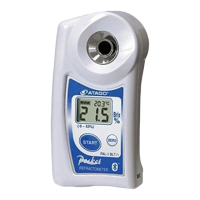
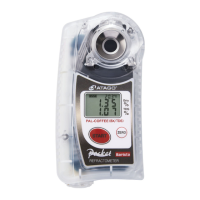
Identifies and describes the main parts, buttons, and display of the refractometer.

Battery Installation Procedure

Performing Zero Setting

Performing Standardization (PR-301 α)

Measurement Procedure

Data Transmission Function

Data Transmission Introduction

Overview of the instrument's data logging and NFC data transmission capabilities.

Control Data Transmission

Instructions on how to enable or disable the data transmission function.

Software for Data Export

Setting Date and Time

Reading Measurement Data History

Deleting Stored Data History

Instrument Power and Error Handling

Powering Off the Device

Information on how to manually turn off the instrument or its auto-off feature.

Interpreting Error Messages

Explanation of various error messages and troubleshooting guidance.

Understanding Measurement Display Units

Special Sample Measurement Techniques

Measuring High;Low Temperature Samples

Method for measuring samples with significant temperature differences, accounting for compensation.

Measuring High Viscosity Samples

Technique for measuring viscous samples, ensuring homogeneity and proper sample application.

Measuring Semisolid Samples

Method for measuring semisolid samples to ensure good surface contact and accurate results.

Customizing with User Scales

User Scale Function Introduction

Introduction to the instrument's user scales for custom measurement applications.

Using the Offset Function

Explanation of the offset function to adjust readings by multiplying or adding values.

Releasing Scale Lock

Selecting Measurement Scales

Configuring Offset Function Parameters

Executing a Measurement

Handling Concentration Range Errors

Switching Between Scales

Locking the Current Scale

Instrument Inspection and Verification

Storage, Maintenance, and Specifications

Proper Storage and Maintenance

Guidelines for storing and cleaning the instrument to ensure longevity and performance.

Technical Specifications Summary

Overview of the instrument's technical specifications, including range, accuracy, and power.

Repair, Warranty, and Servicing

Overview

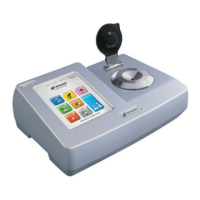
This document describes the ATAGO Palette Series Digital Refractometer, including models PR-32α, PR-101α, PR-201α, and PR-301α. This instrument is designed to measure the concentration of liquids based on the refraction of light, primarily using the Brix (%) scale, which represents the weight percentage of sucrose dissolved in water.

Function Description

The refractometer's core function is to measure the Brix (%) of a sample. It achieves this by detecting the refractive index of the liquid, which changes with concentration. The instrument then converts this refractive index into a Brix (%) value based on a fixed relationship determined by ICUMSA (International Committee of Uniform Method of Sugar Analysis).

User Scale Function: Beyond the standard Brix (%) measurement, the device offers a "User Scale" function, allowing for the display of converted concentration values for specific liquid samples. This is particularly useful for industrial liquids like metalworking fluids, cleaning fluids, or medicines. Users can set a conversion coefficient (a: multiplication) and an addition/subtraction number (b) to define the relationship between Brix (%) and their desired concentration unit, following the formula: "User scale (concentration) value = a × Brix (%) + b." This enables the instrument to directly display adjusted values tailored to specific applications. Up to four scales can be stored: one standard Brix (%) scale and three customizable user scales.

Data Transmission Function: The refractometer is equipped with Near Field Communication (NFC) technology, allowing it to store up to 100 measurement data records with time stamps. This data history can be accessed and exported to Android devices via an "NFC Reader" app or to a PC using a USB NFC Reader/Writer and the "ATAGO Logger (NFC)" software. This feature facilitates data management and analysis.

Usage Features

General Measurement:

  1. Preparation: Thoroughly clean the prism surface.
  2. Sample Application: Apply a small amount (minimum 0.1mL) of the sample to completely cover the prism surface.
  3. Measurement: Press the START/OFF button to initiate measurement. The instrument will display the Brix (%) value and the prism temperature.

Zero Setting (Calibration): This is a crucial step for accurate measurements and should be performed daily or whenever the ambient temperature changes significantly, or the battery is replaced.

  1. Clean the prism surface thoroughly.
  2. Apply tap water (minimum 0.1mL) to completely cover the prism.
  3. Press the START/OFF button. The display will flash three times and then show the measurement value.
  4. If the display shows 0.0%, zero-setting is correct. If not, press the ZERO Setting button until "000" is displayed, indicating completion. For PR-301α, "standardization" is performed using a standard liquid (18-25°C environment) instead of water.

Handling Special Samples:

  • High/Low Temperature Samples: The instrument has a temperature sensor and automatic temperature compensation. However, for samples with significant temperature differences from the prism (e.g., a 10°C sample on a 30°C prism), allow 20-60 seconds for the sample to acclimate to the instrument's temperature before measuring. Gently stirring with a plastic spoon can speed up acclimation.
  • High Viscosity Samples (e.g., thick sauce, honey): Ensure the sample is homogeneous by stirring well. Transfer about 10mL to a separate container, mix further, and then apply to the prism. Stirring on the prism 4-5 times with a plastic spoon can help prevent air trapping and improve reproducibility.
  • Semisolid Samples (e.g., agar cake, jelly): Place the semisolid sample on the prism surface and gently press it with a plastic spoon to ensure better adherence and repeatable measurements.

Battery Insertion:

  1. Remove the lid of the battery compartment.
  2. Insert a new 006P alkaline battery, paying close attention to the positive (+) and negative (-) poles. Incorrect insertion can damage the refractometer.
  3. Close the lid with your bare hand (avoid using a screwdriver to prevent overtightening). The instrument turns on automatically once the battery is inserted.

Date and Time Setting: This is necessary before using the data history readout function. The date (last two digits of the western calendar year, month, date) and time (hour, minute) can be set via a sequence of button presses while the instrument is powered on.

Selecting and Locking User Scales:

  • Releasing Scale Lock: At shipment, the scale is set to Brix (locked). To set a conversion coefficient, the scale lock must be released. Press the ZERO setting button and START/OFF button simultaneously.
  • Selecting Scale: Press the SCALE button repeatedly until the desired scale number (1 for Brix, 2-4 for user scales) is displayed.
  • Locking Scale: For continuous use of a specific user scale, it is recommended to lock it. Select the desired scale, then press the ZERO setting button and START/OFF button simultaneously.

Setting Offset Function (User Scale Conversion):

  1. Select the desired user scale (2, 3, or 4) by pressing the SCALE button.
  2. To set the addition/subtraction number (b): Press and hold the ZERO button for approximately 5 seconds. Use the ZERO button to select "+" or "-" and confirm with START/OFF. Enter the numerical value using the ZERO button for each digit and confirm with START/OFF.
  3. To set the coefficient (a): After setting 'b', the instrument will proceed to 'a' settings. Enter the numerical value using the ZERO button for each digit and confirm with START/OFF. To disable the Offset feature, set 'a' to 1.00 and 'b' to 0.00.

Powering Off: The instrument automatically turns off after approximately 2 minutes of inactivity. It can also be manually turned off by holding down the START/OFF button for more than 2 seconds.

Maintenance Features

Durability and Chemical Resistance: The body casing is made of ABS resin.

  • Steam Exposure: Avoid exposing the instrument to steam, as this can cause the casing to crack.
  • Solvent Exposure: ABS resin can be damaged by various solvents (e.g., aqua regia, cresol, chloroform, acetone, xylene). Exercise caution with these and similar solvents.

Cleaning:

  • Prism: After each measurement, completely wipe off any sample from the prism surface and surrounding area with tissue paper soaked in water, then dry thoroughly with dry tissue paper. For polymer or fats/oils samples, use tissue paper soaked in alcohol or neutral detergent before drying.
  • Body: If the instrument becomes dirty, wipe it with a soft, dry cloth. Do not use benzine, paint thinner, or petroleum solvents. If the body gets wet, wipe off moisture immediately.

Battery Maintenance:

  • Always use alkaline batteries.
  • When disposing of or storing batteries, protect both poles with insulating tape to prevent short circuits, bursts, or fires.
  • Remove the battery if the unit will not be used for a month or longer to prevent leakage.

Storage:

  • Store the instrument in its original box when transporting.
  • Avoid direct sunlight, heat sources, damp places, or extremely low temperatures.
  • Do not place heavy objects on the instrument or subject it to strong shocks or vibrations.
  • Keep the instrument away from dusty environments.

Error Messages: The instrument displays various error messages (e.g., "nnn" for zero setting error, "LLL" for low range over error, "HHH" for high range over error, "Lo" for low battery, "nnn" for external light interference) to indicate erroneous or incomplete operations. Addressing these errors often involves re-performing the measurement, replacing the battery, or shading the prism from excessive light.

Data History Deletion: All stored data history can be deleted. This action is irreversible. To delete, while pressing START/OFF, quickly press ZERO twice, then release START/OFF. Confirm deletion by pressing START/OFF again.

Periodic Inspection and Repair:

  • Self-Inspection: Periodically (e.g., once a month), inspect the instrument's accuracy using standard sucrose solutions (available from ATAGO). Perform zero adjustment with purified water (or standard liquid for PR-301α) and then measure the standard sucrose solution. If the deviation is within ±0.1%, the instrument is normal. If the deviation is ±0.2% or larger, check the sucrose purity, preparation method, and measurement method before repeating the inspection.
  • Professional Inspection: ATAGO recommends periodic professional inspection and maintenance (charged service, e.g., once every two years) to ensure dependable and accurate use. This includes inspection, confirmation, replacement of performance parts, and adjustment of span.
  • Warranty: The instrument is warranted for two years against manufacturer defects, excluding the prism and sample stage. The warranty is voided by unauthorized disassembly, liquid immersion, dropping, misuse, improper storage, or battery leakage from non-included batteries.
  • Repair Parts: ATAGO endeavors to secure performance parts for repair for up to seven years after discontinuation of manufacturing, though availability may be affected by part manufacturer changes.

ATAGO PR-32a Specifications

General IconGeneral
ModelPR-32a
CategoryMeasuring Instruments
Ambient Temperature10 to 40 °C
Light SourceLED
Sample Volume0.3ml
Battery LifeApprox. 11, 000 measurements
International Protection ClassIP65
Measurement Range0.0 to 32.0% Brix
Resolution0.1% Brix
Accuracy±0.2% Brix
Dimensions55 x 31 x 109 mm (2.2 x 1.2 x 4.3 in)
Weight100g
Temperature CompensationAutomatic (10 to 100°C / 50 to 212°F)

Related product manuals