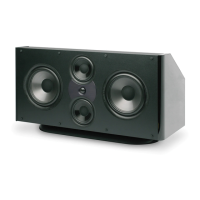
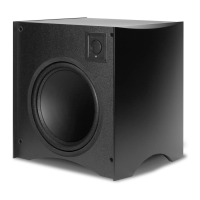
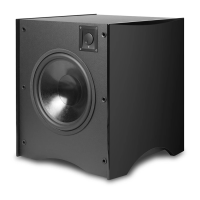
8200/6200 Pedestal Subwoofer System
Installing the Feet on the PedWoofer
Only install the spikes after you’ve decided on
the nal location for the PedWoofers. Once the spikes are attached
to the PedWoofers it will be much more dif cult to move them.
In order to ensure stability the Pedwoofers and PedWoofer/satellite com-
bination must be used in conjunction with the included feet. To mount
the feet carefully turn the PedWoofer upside down and place it on its
top on a carpet or some other soft non-damaging surface. You will see
four sets of holes with threaded inserts in the bottom of the PedWoofer.
Remove the black anodized at aluminum feet, the – 20 round head
bolts, and the package of pointed spiked feet from the PedWoofer pack-
aging. Place the at aluminum foot with the rounded end extended over
the side of the PedWoofer. Be sure that the threaded insert in the alumi-
num foot is facing up at you, as you’re looking down at the bottom of
the PedWoofer (see Figure 17). Line up the two holes in each aluminum
foot with the threaded inserts in the bottom of the PedWoofer. Insert
the – 20 screws into the holes and tighten them securely using the
System Setup and Operation
The setup and operation of the 8200 and 6200 PedWoofers is exactly the
same except that the SA 6200 single channel ampli er and its associated
controls effect both PedWoofers in the 6200 system while the 8200’s dual
channel ampli er provides controls for each PedWoofer independently.
When used with a complete THX Certi ed speaker
system, the PedWoofer system’s LOW PASS control
unless you are using a proces-
sor with a built-in crossover. If your processor is THX
certi ed or has a built-in crossover, bypass the Ped-
Woofer ampli er’s LOW PASS control by setting it to
All THX certi ed satellites have been optimized to
work with an 80 Hz crossover point.
If your Processor/Receiver has no internal crossover (a fairly rare occur-
rence these days) the PedWoofer’s crossover should be used to optimize
the performance of the system, by ensuring that the subwoofer and satel-
lites produce a cohesive and well integrated sound picture.
Higher crossover frequencies pass more bass to the PedWoofers but can
quickly begin to sound boomy. They also make it easier to localize the
subwoofer sonically, which is highly undesirable. Higher crossover fre-
quencies may be suitable, however, when using very small satellites that
have no real low frequency performance. Settings lower than 80Hz should
only be employed if you are using larger speakers that have extended
bass response. This way, the PedWoofer will only reproduce the very
lowest bass frequencies that are in the range where the main speakers
begin to roll off. It’s generally undesirable to have the main speakers and
the subwoofer overlap too much. Larger speakers means a lower LOW
PASS crossover frequency, smaller speakers means a higher LOW PASS
crossover frequency. If necessary, contact the manufacturer of your sat-
ellite speakers for their speci ed low frequency response to determine
the appropriate LOW PASS setting on your PedWoofer ampli er. In the
end, however, a little time spent experimenting will generally result in
dramatically better bass response.
A Word About Bass, Center Channel Modes, and
Many Dolby Pro Logic surround processors and
surround receivers provide a choice between “Wide” (full fre-
quency range) and “Normal” (restricted low frequency) mode for
the center channel speaker. Atlantic Technology recommends that
the center channel be operated in the Normal mode when using
a powered subwoofer. The center channel speaker will sound
more dynamic and the intelligibility of the system will generally be
improved when in the Normal mode.
Today, many processors and receivers offer Bass Management capa-
bility. If yours does it will ask you to choose between Large and Small
loudspeakers during the system setup procedure. When speakers are set
to Large the processor/receiver assumes that they can produce full fre-
quency range sound, including very deep bass at fairly high volume levels.
When set to Small it assumes that the speakers are bass limited and feeds
System Setup and Operation
System Setup and Operation
After all four feet have been installed carefully remove the spiked feet
from their package. USE EXTREME CAUTION, AS THE POINTED SEC-
TIONS OF THE SPIKES ARE VERY SHARP. If you are placing the Ped-
Woofers on a carpeted surface we recommend using the pointed ends
of the spikes. If you are placing the PedWoofers on a hard surface (wood,
tile, cement, etc.) we recommend removing the sharp pointed ends of the
spikes by unscrewing them from the body of the spike.
Screw the bodies of the spikes onto the aluminum foot using your hand
and being careful not to cross thread them. If you are concerned about
the pointed ends you can unscrew them from the body of the spike before
you install them. Once the spikes have been installed carefully turn the
PedWoofers over and place them in their nal location. You can adjust
for slight discrepancies in level by screwing out the small pointed section
of the spike. Unscrew them no more than a total of 5 turns in order to
maintain adequate strength in the foot/spike combination
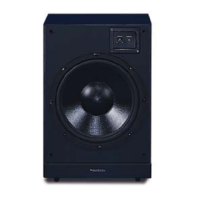
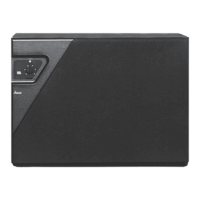
SA-700
Servo Controlled
Subwoofer Amplifier
Atlantic Technology
®
I N N O V A T I V E H O M E T H E A T E R