EasyManuals Logo

ATOMSTACK A10 Pro User Manual

ATOMSTACK A10 Pro
24 pages
To Next Page IconTo Next Page
To Previous Page IconTo Previous Page
Page #22 background imageLoading...
Page #22 background image
Installation et utilisation du matériel
11
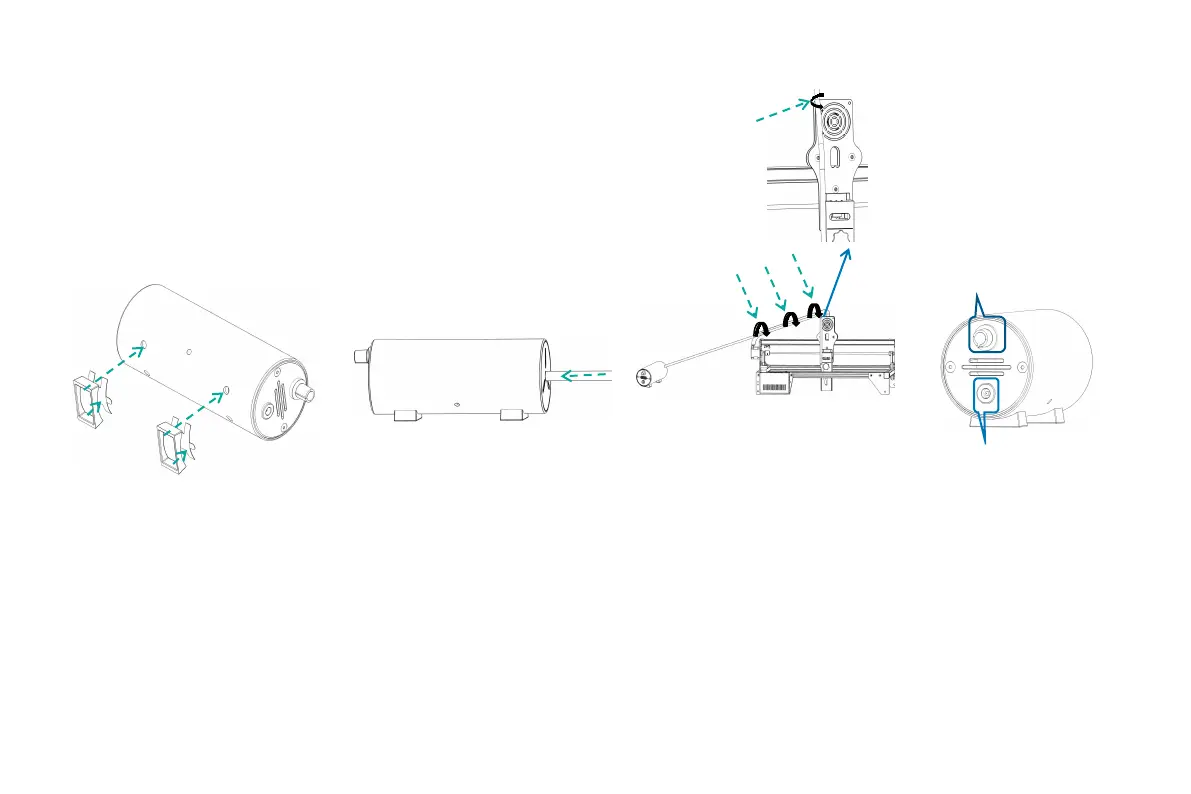
1. Détachez le papier de
protection adhésif du tampon en
silicone, alignez les poteaux de
positionnement sur le tampon en
silicone avec les trous de montage
sur la pompe et collez le tampon
en silicone sur le corps de la
pompe.
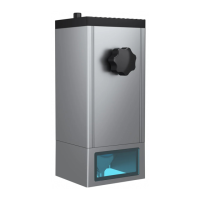
2. Insérez le tube à air dans le
port de la pompe à air
3. Le tube de la machine doit
être fixé avec la ligne de
connexion par l'attache en
nylon. Attention à ne pas le fixer
trop serré pour bloquer le tube.
Interface
d'alimentation
CC
Bouton de réglage
de la vitesse
(commutateur)

Other manuals for ATOMSTACK A10 Pro

Questions and Answers:

Question and Answer IconNeed help?

Do you have a question about the ATOMSTACK A10 Pro and is the answer not in the manual?

ATOMSTACK A10 Pro Specifications

General IconGeneral
Laser Power10W
Laser Wavelength455nm
ConnectivityUSB
Engraving Accuracy0.01mm
Output Voltage12V
Engraving Area410mm x 400mm
Material CompatibilityWood, Plastic, Leather
Control SoftwareLaserGRBL
Laser Protective CoverYes
Input FormatBMP, JPG, PNG, DXF
Power SupplyAC 100-240V, 50/60Hz
Focusing MethodFixed focus laser, no need to adjust focus before engraving

Related product manuals