Do you have a question about the ATOMSTACK A6 PRO and is the answer not in the manual?
Explains the division of the home page into Engraving and Setup modules.
Details steps for selecting files, navigating, and using previous/next pages.
Describes features like file selection, autofocus, frame, and position setting.
Details display of file name, completion percentage, pause/stop buttons, and coefficient adjustments.
Explains how the tilt detection function is triggered and how to deactivate its alarm.
Lists precautions for outdoor use and density boards, and how to use the function.
Explains how to use the flame detection function, including fire detection and response.
Advises on using fixed-focus tools for irregular objects and Z-axis behavior after failure.
Guides on moving the Z-axis manually or via Lightburn and handling range exceedance.
Details autofocus operation via the display screen, including finding limits and focal distance.
Details setup for automatic focus control within the Lightburn software.
Explains how to add a custom button for autofocus in LaserGRBL.
Guides on how to use the autofocus function in Lightburn and LaserGRBL.
Provides notes on GCode content and handling problem detection dialogs during autofocus.
Covers function availability, motor locking, object stability, HDMI cable use, and startup settings.
Details enabling the function, returning to origin, and motor lock confirmation prompts.
Guides on selecting the engraving file and preparing for resume.
Covers moving the laser, auto-focusing, setting the bottom-left corner, and starting engraving.
Explains how the machine prompts and resumes engraving after a power interruption.
Covers calibration methods, repositioning needs, .gc file export, and function features.
Details selecting 'Red Light Positioning' and turning on the crosshair light for calibration.
Explains marking positions and starting the calibration engraving.
Describes observing errors between marked and laser positions and proceeding to the next step.
Guides on using directional buttons to adjust the laser position for accuracy.
| Laser Output Optical Power | 5.5W |
|---|---|
| Laser Wavelength | 450nm |
| Engraving Accuracy | 0.01mm |
| Control Software | LaserGRBL, LightBurn |
| Connectivity | USB |
| Focusing Method | Manual |
| Laser Protective Cover | Yes |
| Laser Type | Diode |
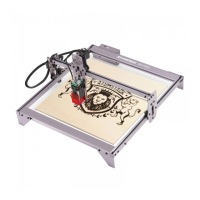
| Engraving Area | 400mm x 400mm |
| Supported Materials (Engraving) | Wood, Bamboo, Paper, Plastic, Leather |
| Supported Materials (Cutting) | Wood, Leather, Acrylic, Plastic, Bamboo, Paper |
| Input Format | BMP, JPG, PNG, SVG |
| Power Supply | AC 100-240V |
| Frame Material | Aluminum |