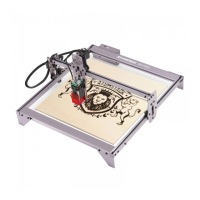
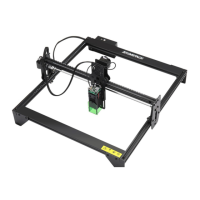
The ATOMSTACK A5 (10W/15W/20W/30W/Pro) is a laser engraver designed for various engraving and cutting tasks. This document provides a comprehensive guide for its installation, safe operation, maintenance, and troubleshooting.
Function Description
The ATOMSTACK A5 is a laser engraver system component, designed to be integrated into a larger laser engraver for use. It utilizes a collimated laser beam for engraving and cutting various materials. The device is classified as a Class 4 laser product, emphasizing the need for strict safety precautions during operation. It is capable of engraving and cutting materials such as wood, bamboo, leather, plastic, fabric, paper, opaque acrylic, and glass. Materials not recommended for engraving include metal, precious stones, transparent materials, and reflective materials.
Important Technical Specifications
The ATOMSTACK A5 series offers different laser power options, including 10W, 15W, 20W, 30W, and a "Pro" version, indicating varying levels of engraving and cutting capability. The device is designed to meet the requirements of IEC 60825-1, the latest version for laser products.
The installation process involves several steps:
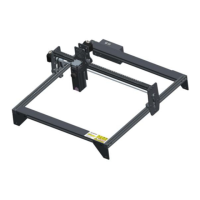
- Contour Installation: Assembling the basic frame of the engraving machine. This involves placing four large profiles as shown in the manual, ensuring correct orientation, and tightening M5 screws diagonally.
- X-axis Assembly, Control Box, and Support Frame Installation: Attaching the X-axis component to the base frame, installing the control box, and securing three support gaskets using an M5 Allen key. The guide rail passes through the middle of three rollers, and the distance between upper and lower guide wheels should be adjusted if too tight.
- Belt and Aluminum Profile End Cap Installation: Installing two synchronous belts by tightening one end with a T-nut, passing the other end through the roller on the X-axis assembly, and then tightening and fixing it with another T-nut. The T-nut should be as close to the end of the profile as possible, and excess belt should be cut off. Profile end covers are then attached with protrusions facing down. The manual provides tips for checking belt tightness by pressing the belt and observing for deformation.
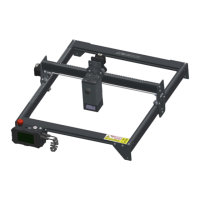
- Laser and Laser Protective Cover Installation: Fixing the laser head onto the slider board with M510 countersunk head screws, ensuring they are tightened. Green protective covers are then inserted on the left and right sides, followed by the front green protective cover, which is secured with M514 flat round head screws.
- Y-axis Limit Column and X/Y-axis Eccentric Screw Adjustment: Fixing the Y-axis limit column with M3*14 screws on the left slide rail. The eccentric nut is adjusted with a wrench to ensure smooth movement of the X and Y axes without shaking. A method for determining the appropriate tightness of eccentric nuts is provided: if the bracket can slide at a constant speed to the end when lifted at a 45-degree angle, the tightness is suitable.
- Cable Installation and Fixing: Inserting three wire terminals as shown and securing the cable bundle to the machine's fixing holes with cable ties to prevent loosening.
Usage Features
The ATOMSTACK A5 is designed for user convenience with clear installation steps. However, it emphasizes critical safety features due to its Class 4 laser classification.
- Protective Housing: The laser engraver must have a protective housing to prevent human access to laser radiation. If an access panel is present, mechanisms must be in place to prevent laser activation (Class 3B or Class 4 equivalent) when a person is inside, and a warning device must alert of laser emission (Class 3R, 3B, or 4 equivalent).
- Interlock Function: The housing should have an interlock function that automatically turns off the laser when opened or removed.
- Emergency Stop Button: An emergency stop button is required to immediately halt laser output in unexpected circumstances.
- Reset Button: A reset button allows work to resume after confirming safety and lifting interlock or emergency stop conditions.
- Security Management: Physical keys, dongles, or password systems should be used to prevent unauthorized operation.
- Warning Marks: Any window or channel that allows observation or reception of laser radiation must have warning marks.
- Safety Glasses: Users must wear appropriate safety glasses (OD5+) to protect eyes from direct, reflected, and stray laser light.
- Fire Safety: Due to high temperatures generated during cutting, materials can catch fire. The machine should not be left unattended during carving. A working fire extinguisher should be nearby. Debris and flammable materials must be cleaned after use.
- Ventilation: Laser engraving produces smoke, vapor, particles, and potentially toxic materials, necessitating proper ventilation.
- Horizontal Position: The engraver must be used in a horizontal position and securely fixed to prevent accidental shifting or dropping.
- Power Safety: The power adapter includes a ground wire to prevent electric shock. The power plug must be connected to a grounded power socket.
- Environment Safety: The workplace must be clear of flammable or explosive materials. A metal plank should be placed underneath the machine during engraving or cutting.
- Software Compatibility: The device supports LaserGRBL and LightBurn software. Windows OS supports LaserGRBL, while Mac OS supports both. Drivers for both operating systems are available for download. Users may need to update the CH340 driver if connection issues occur.
Maintenance Features
The ATOMSTACK A5 features a highly integrated design, minimizing the need for maintenance. However, if the laser system requires repair or tuning, specific precautions must be followed:
- Power Disconnection: Always unplug the power cord from the laser to ensure it is in a power-off state before any maintenance.
- Protective Eyewear: All personnel present during tuning must wear OD5+ protective glasses.
- Flammable Materials: Ensure no flammable or explosive materials are in the vicinity.
- Laser Position: The laser's position and direction must be fixed to prevent accidental movement and shining on people, animals, flammable objects, explosives, or other valuable objects during debugging.
- Eye Protection: Never look directly at lasers.
- Reflective Surfaces: Do not shine the laser on mirror objects to avoid accidental injury from reflections.
Troubleshooting Tips:
- COM Port and Baud Rate: Ensure the correct COM port is selected for software connection, and the baud rate is set to 115200. Verify that the connection between the computer port and the USB cable is not loose.
- Mechanism Check: Before engraving, confirm that all mechanisms (synchronous belt, eccentric column of roller, laser head) are not loose or shaking.
- Focus Adjustment: Correctly adjust the focus, ensuring the distance from the end of the laser protective cover to the engraving surface is 2mm.
- Material Parameters: Refer to the parameter table in the LaserGRBL/LightBurn manual for engraving and cutting different materials. Mirror metal engraving requires manual surface blackening treatment.
The manufacturer, Shenzhen AtomStack Technologies Co., Ltd., provides customer service and technical support via their website (www.atomstack3d.com) and email (support@atomstack3d.com). They also offer a discussion group accessible via a QR code.