MANAGEMENT INTERFACE
MDU Solutions
®
– UCrypt
®
QAM to QAM – Quick Start Guide 7-1
MANAGEMENT INTERFACE
7. Management Interface
7.1 Connect to the Management Interface
Minimum Management Computer Requirements
• Computer running Windows
®
or other OS
• Ethernet Network port available
• Web browser such as Internet Explorer
®
, Firefox
®
or similar
• Adobe Reader for reading this manual
• Notepad or text editor for capturing text and logs
7.2 Congure the Management Computer Network Port
Set-up of the UCrypt unit requires a laptop or desktop PC running Microsoft
®
Windows or other operating system with an
available Ethernet network port and web browser software(called the “Management Computer” in the following procedures)
The Management Computer network port must be assigned an IP address in the same subnet as the UCrypt device for access
to the UCrypt Management Interface. The following procedures are for Microsoft Windows XP and a factory default IP address
setting on the UCrypt device of 192.168.0.23 subnet 255.255.255.0
• Connect the Management Computer’s Ethernet adapter to the UCrypt device’s Ethernet port using a Cat5e network
cable (supplied with the unit). Link lights should illuminate indicating that the cable connection is correct and
working.
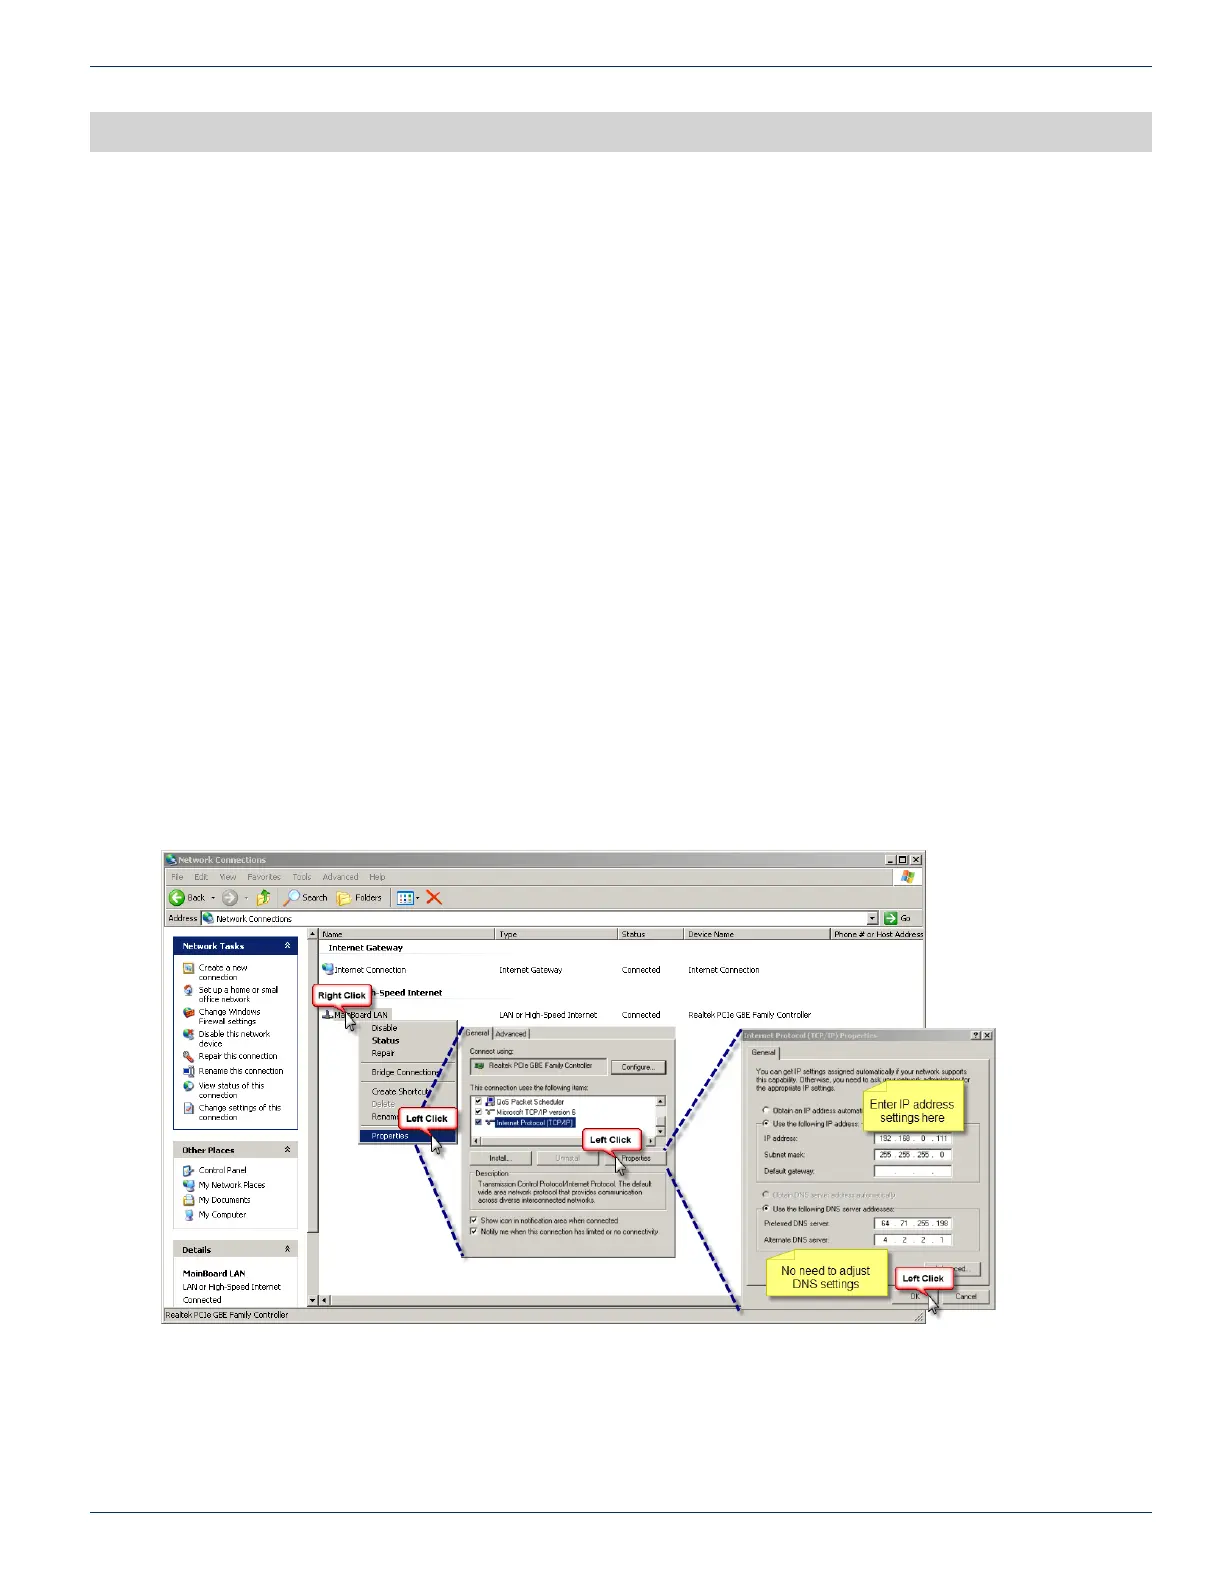
• Set the Management Computer’s Ethernet interface to a static IP address on the 192.168.0.x subnet, as described below:
◦ From the Control Panel, open Network Connections and select the connection associated with the
Ethernet adapter to be used for connecting to the UCrypt device (e.g., Local Area Connection).
◦ Right click on the connection and select Properties.
◦ Select Internet Protocol (TCP/IP) and click Properties.
◦ Click the selection box beside Use the following IP address to enter a check mark in the box.
CHAPTER 7: