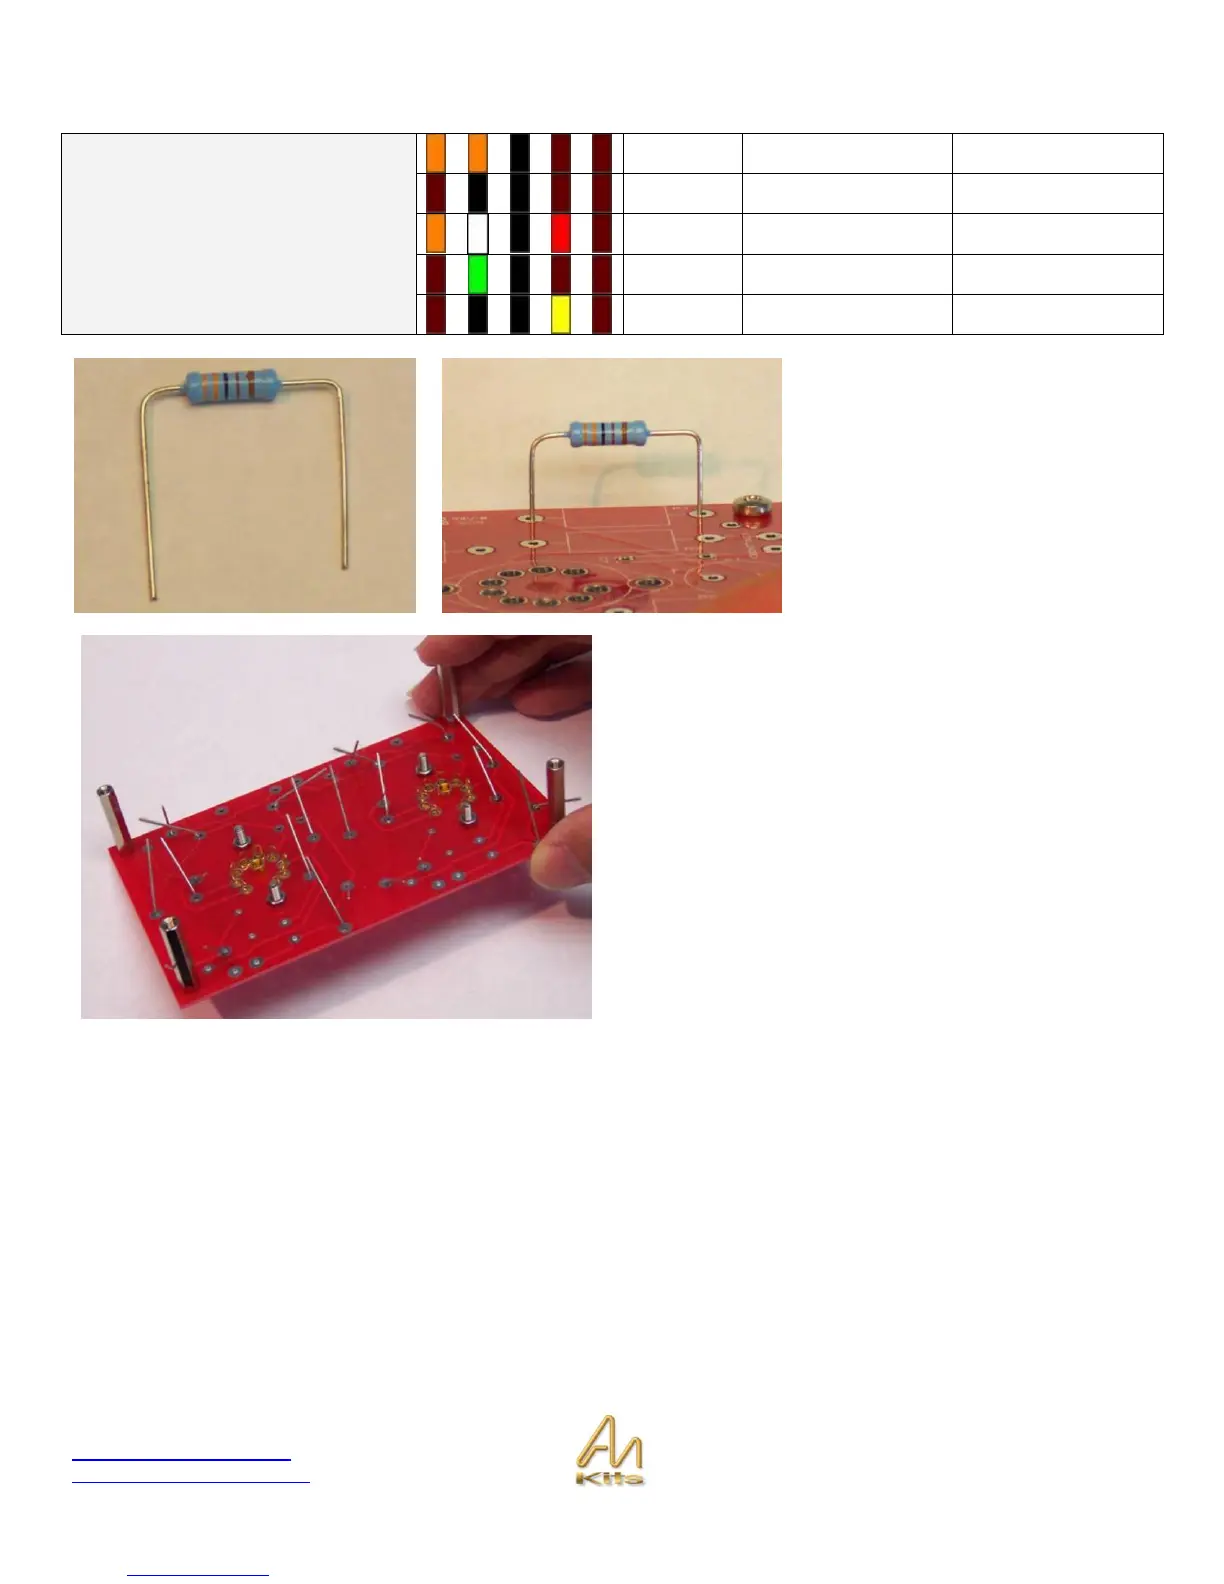
You will want to bend the resistors to
the correct length for easy insertion
into the board – I suggest that you
place all the resistors into position and
bend the legs gently on the under side
of the board to make sure they stay in
one place – also line them up so that
all the color codes are readable in the
same direction.
Once the resistors are placed, check them with picture on
the next page and the parts list for correct values before
soldering.
Solder all the resistors AND the VALVE BASES into
position. Once soldered, clip off all the component legs
from the underside of the board.