1. Separate the last 3” of each speaker wire conductor.
2. Strip ½” of insulation from the end of each wire.
3. Twist the exposed copper strands with your fingers 3 or 4 times so the strands stay together.
Note: As you make your connections, be sure to connect the positive (+) terminals on your amplifier to the positive
(+) terminals on your speakers. Even if your wire does not have (+) or (-) markings, most 2-conductor speaker wire
has printing on one side to help you differentiate between the wire pairs.
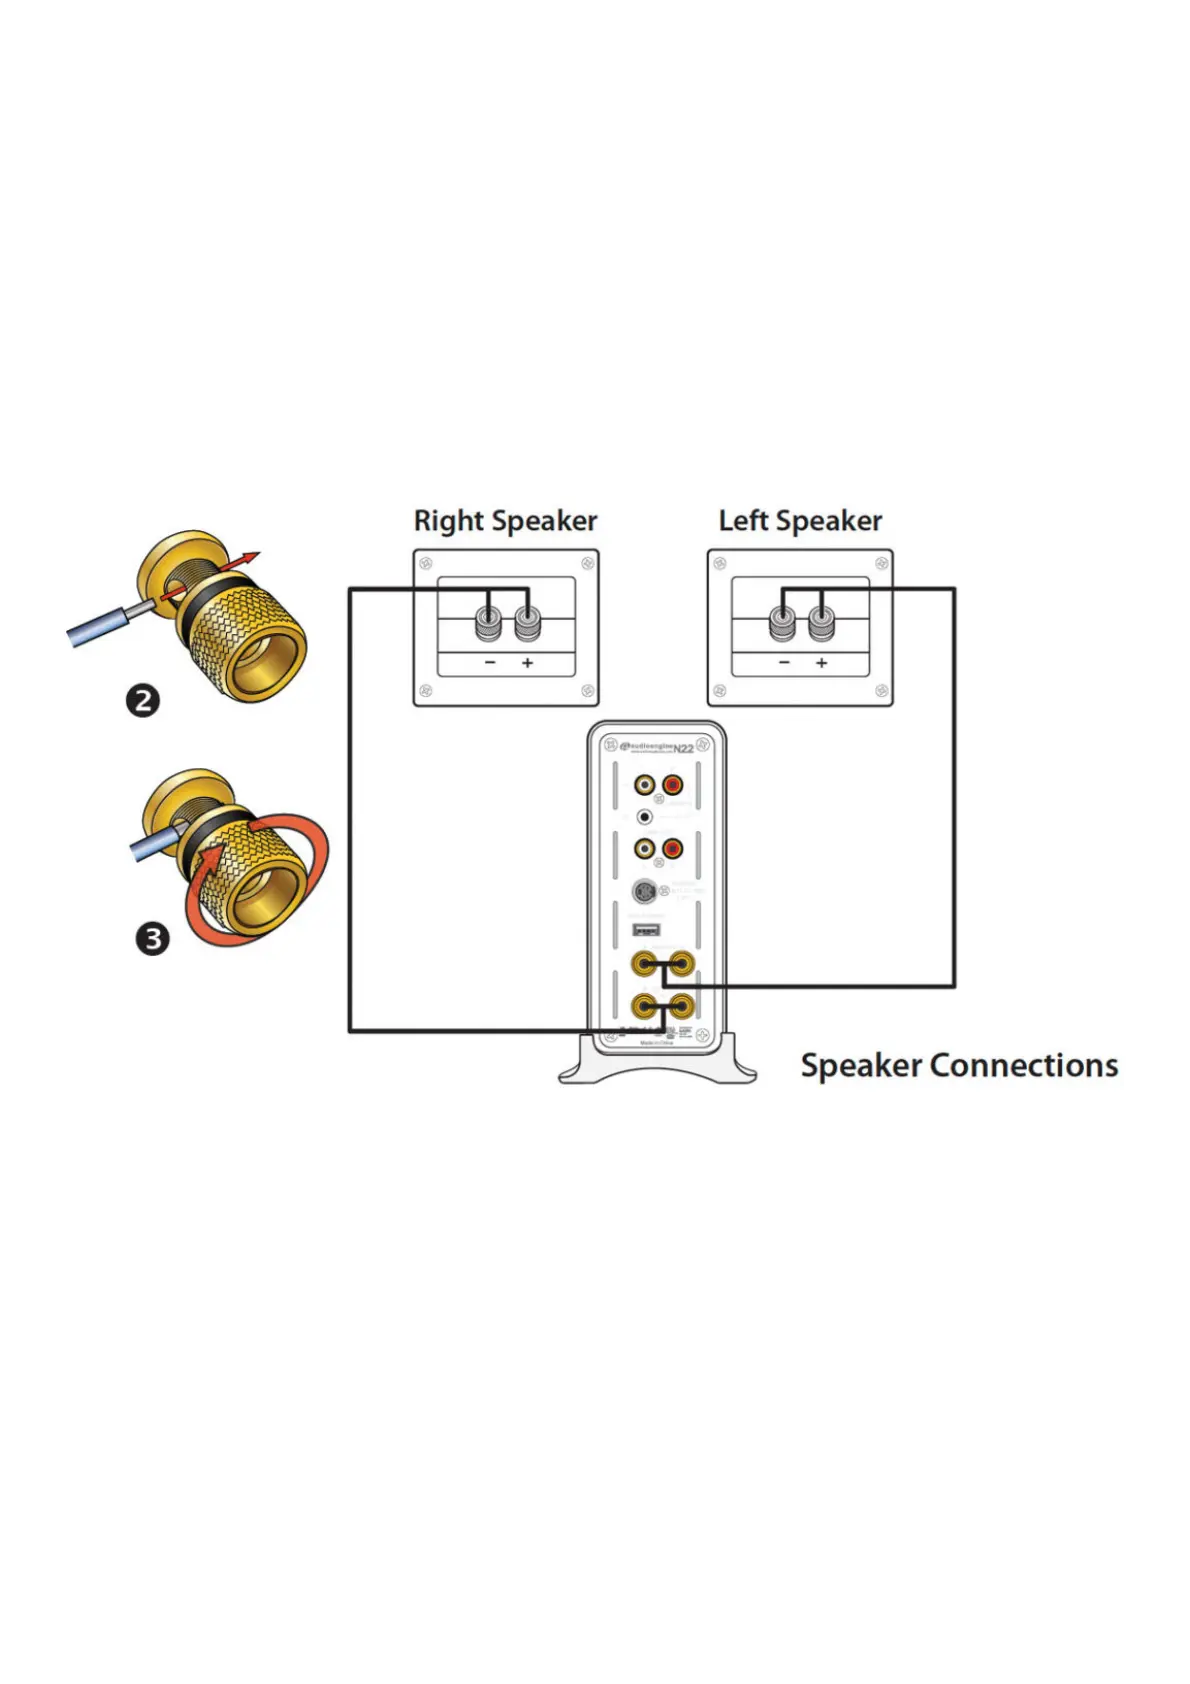
If you are Using Bare Wire
1. Use your thumb and finger to unscrew the binding post connectors on the back of each speaker.
2. Insert each speaker wire into the holes on the side of the binding post connectors, observing proper polarity.
3. Retighten the binding posts with your fingers.
4. The stripped portion of the wire should be secured firmly in each connector.
5. Make sure that none of the speaker wire strands have come in contact with an adjoining terminal.
6. Repeat steps 1 and 5 to connect speaker wires to the amplifier.
Step 3 – Connecting the Power Supply
Be sure that the volume/power switch on the front panel is in the OFF position by rotating it counterclockwise until
you hear a click.
Connect the cable with the round end from the power supply to the N22 rear panel power connector. Note that this
connector is “keyed” so line up the arrow on the cable end with the arrow on the rear panel. Please do not
use excessive force on the connector and use only the power supply provided with the amplifier.
Connect the AC power cable from the power supply to a power outlet and verify that the indicator light on the power
supply is illuminated. We recommend using a high-quality surge suppressor and/or AC line lter on all electronics
equipment.
Step 4 – Connecting Audio Sources
Using the appropriate audio cable (3.5″ mini-jack and/or RCA cable), connect your audio source (computer, iPod,
etc.) to the N22 audio inputs. One of each cable type is included with your amplifier.