Step 3 – Connecting the Power Supply
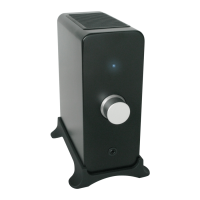
Be sure that the volume/power switch on the front panel is in the OFF position by rotating it counterclockwise until
you hear a click.
Connect the cable with the round end from the power supply to the N22 rear panel power connector. Note that this
connector is “keyed” so line up the arrow on the cable end with the arrow on the rear panel. Please do not use
excessive force on the connector and use only the power supply provided with the amplifier.
Connect the AC power cable from the power supply to a power outlet and verify that the indicator light on the power
supply is illuminated. We recommend using a high-quality surge suppressor and/or AC line filter on all electronics
equipment.
Step 4 – Connecting Audio Sources
Using the appropriate audio cable (3.5″ mini-jack and/or RCA cable), connect your audio source (computer, iPod,
etc.) to the N22 audio inputs. One of each cable type is included with your amplifier.
Step 5 – Operation
Turn on the N22 volume/power knob and set the volume control to an initial setting of about 3 o’clock. The front panel
power indicator will be illuminated.
Turn on your audio input source and adjust the volume to your desired listening level.
Note that both audio inputs on the N22 are active so two audio sources may be connected to the amplifier at the
same time without the need for an input switch. We recommend using the volume control on each audio source to
adjust the overall system volume.
Other Features
Headphone Out – For headphone enthusiasts the N22 includes a high performance, low-noise headphone amplifier
which works well with all types of headphones. Even if you don’t connect speakers to your N22 the headphone
amplifier will make your iPod or computer sound better through headphones. Keep in mind that permanent hearing
loss may occur if earbuds or headphones are used at high volume so be sure to set the volume to a safe level.
Line Out – The N22 includes a variable preamp output so you can connect a subwoofer, external amplifier, or

 Loading...