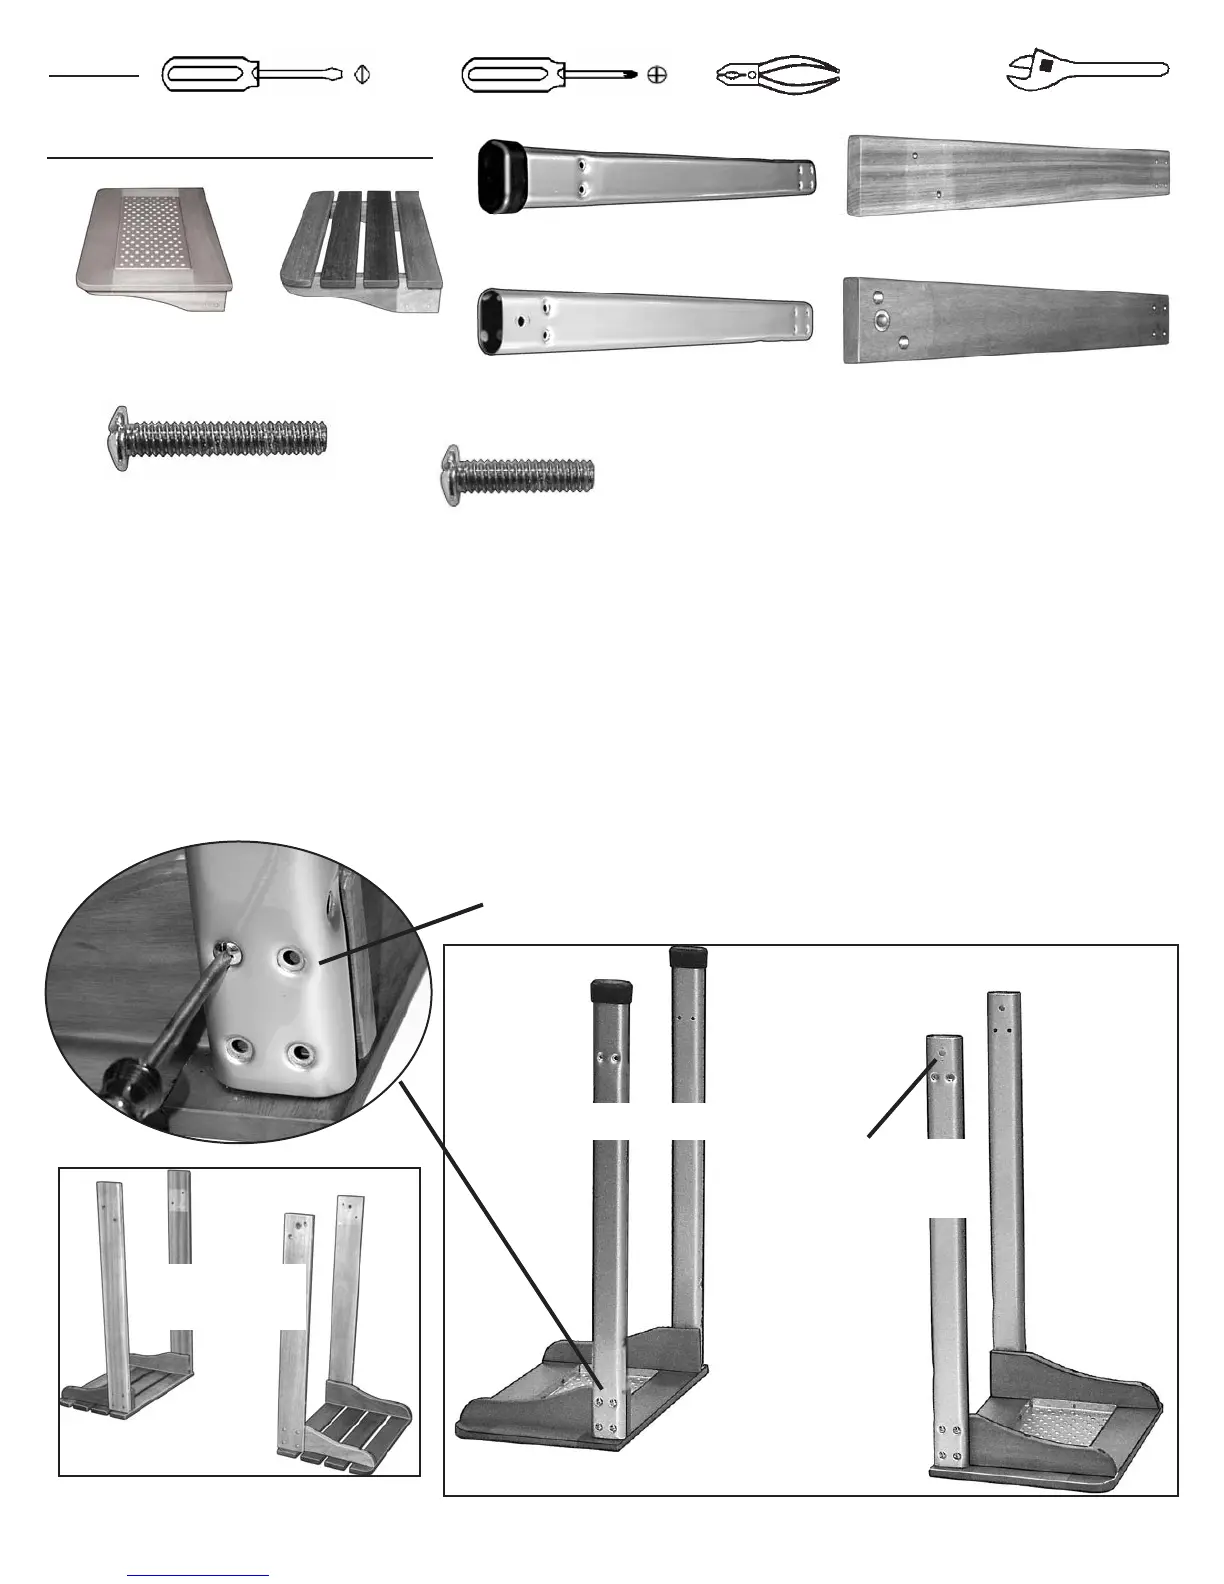
· Lay Side Tables upside down on a flat surface. Side tables will fit on either side of grill.
· Attach the two Fixed Legs to one Side Table. Align four recessed holes of a Fixed Leg with four
inserted holes in a Side Table. The four large recessed holes in the Fixed Leg should face away
from Side Table. Attach four 1/4 -20 Bolts (Item 5 or 5A) through each Fixed Leg into the
threaded holes in the Side Table. Do not tighten bolts completely. (NOTE: For easier alignment
and further assembly, final tightening of all bolts will be completed in Step 6).
· Attach the two Wheel Legs to the second Side Table the same way. (Wheel Leg is the short leg
with a large axle hole at one end.)
(ITEM 5) 1/4-20 x 1 3/8” Bolt
STEP 1- Leg/Side Table Assembly
TOOLS:
(ITEM 3 or 3A) Fixed Leg
(ITEM 2 or 2A
Side Table
(ITEM 4 or 4A) Wheel Leg
(ITEM 4) Fixed Leg
(ITEM 3) Wheel Leg
with Axle hole
Recessed
holes face out
5
(ITEM 5A) 1/4-20 x 1” Bolt
Wood Side
Table/Legs
(ITEM 2B)
Side Table
and/or
or