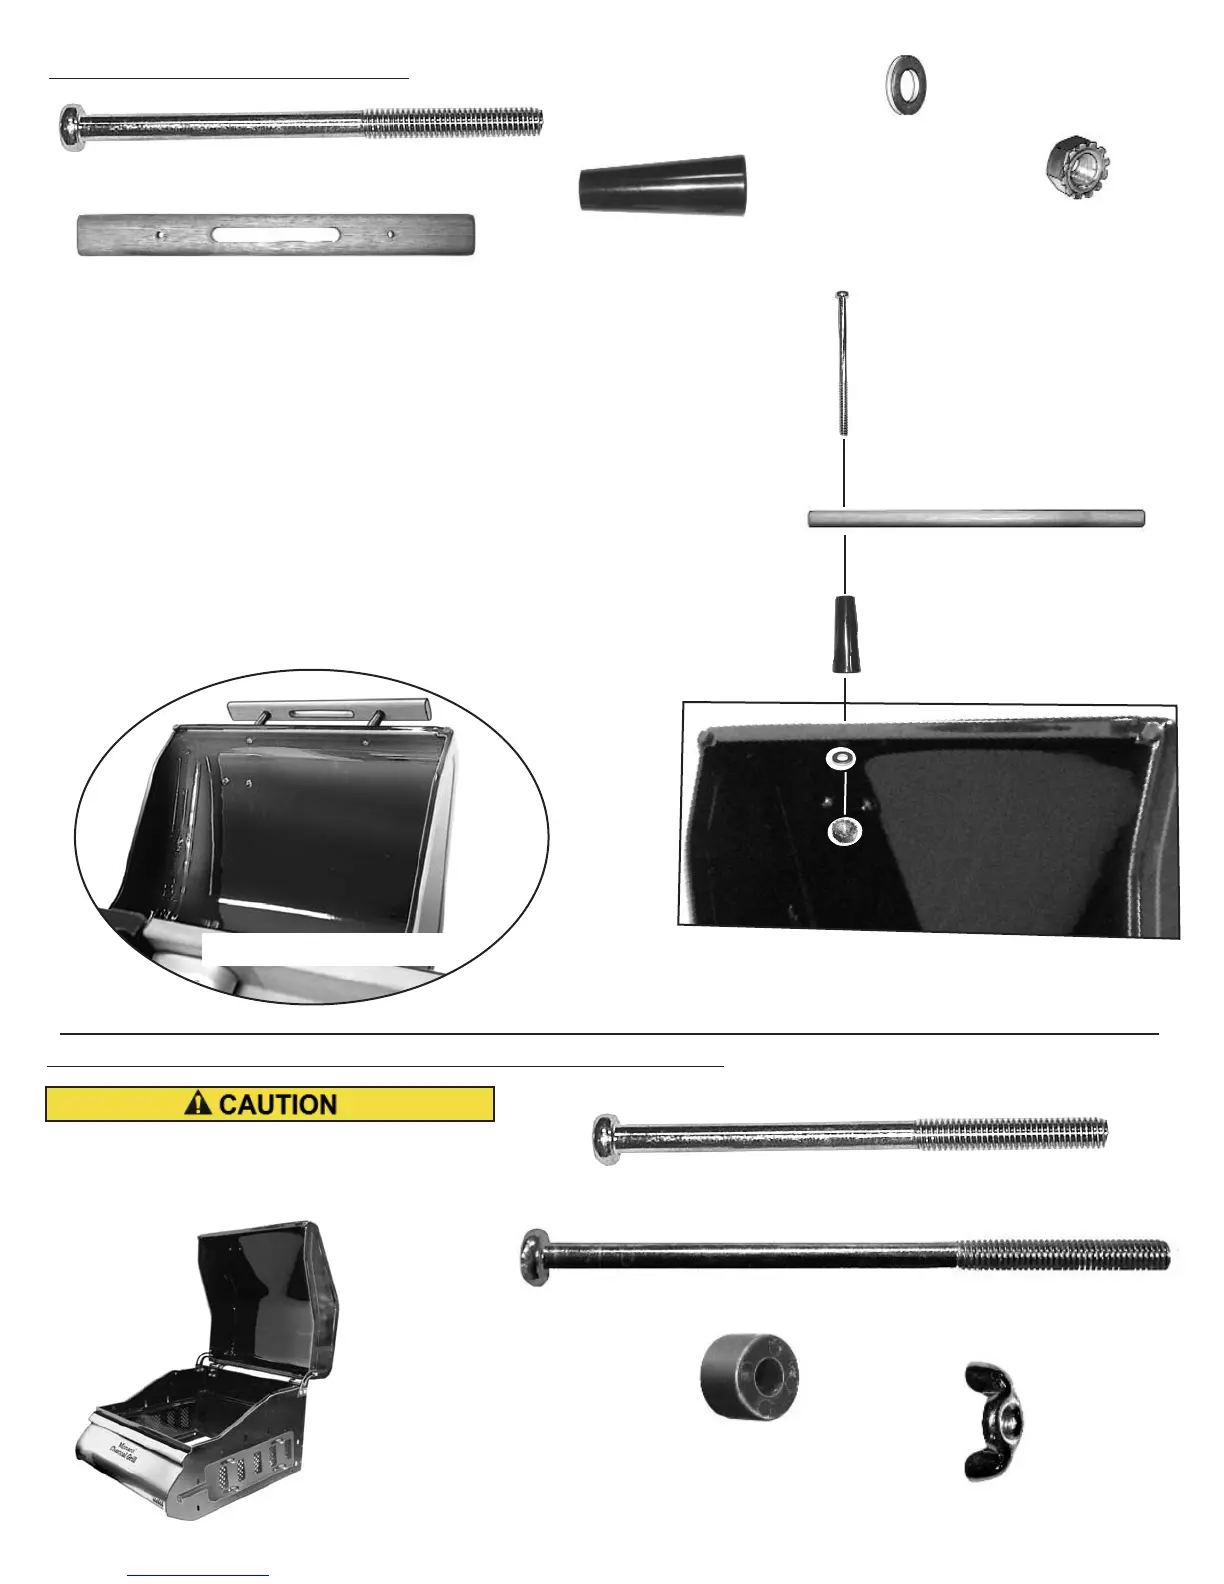
STEP 5-Hood Handle Assembly
(ITEM 17) Bolt, 6mm x 90 mm
(ITEM 18 or 18A) Hood Handle
(ITEM 19) Handle Spacer
(ITEM 16) Locknut
6mm
STEP 6-Grill Body/Cart Assembly (Continues on next page)
(ITEM 17) Bolt, 6mm x 90 mm
(ITEM 20) Body Spacer
(ITEM 21) Wingnut, 6mm
9
· Open Hood and lay it on on its backside.
· Insert 6 mm x 90 mm Bolt through recessed hole of
Hood Handle, through Handle Spacer through a
hole in Hood. (Note: Wide end of Handle Spacer
goes against the Hood.)
· Attach a 6mm Washer and Locknut to the Bolt from
inside Hood. Do not over tighten; it may crack the
Hood finish.
· Repeat for other end of Handle.
Assembly of Grill Body will require
two people.
(ITEM 14) Washer
6 mm
(ITEM 11 or 11A)
Body Assembly
Assembled Handle
(ITEM 17A) Bolt, 6mm x 110 mm