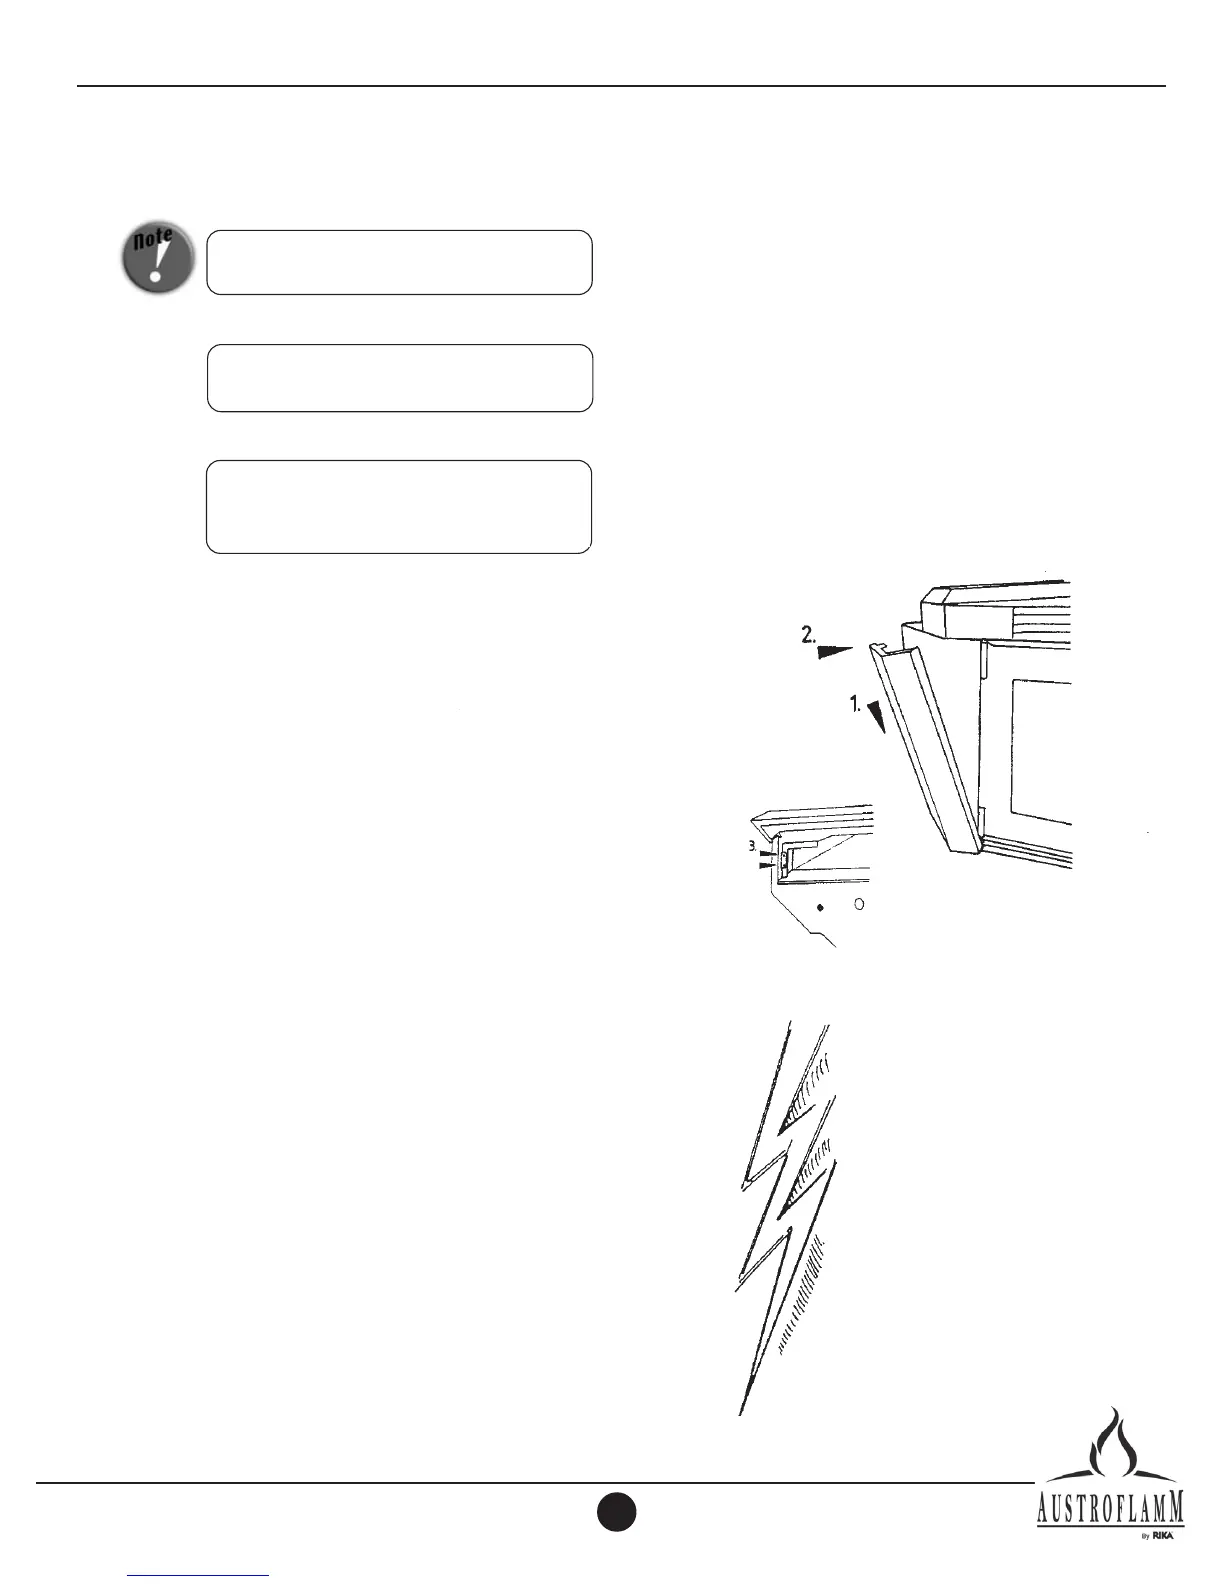
SIDE CLADDING
1. Place the sidepieces on the mounts pro-
vided on the base.
2. Push the side against the furnace until it
is stood vertically.
3. Then fasten at the top in the pellet con-
tainer using two screws.
Repeat this procedure on the other side of
the furnace.
During assembly do not drop any items (screws)
etc. into the fuel container - they can block the
conveyor helix and damage the furnace.
CONTROL AND CONTROL BOARD
The INTEGRA II pellet furnace has an elec-
tronic control fitted internally in the furna-
ce and a control board that is fitted to fur-
nace cladding.
The control (main board) and the control
board may only be altered by trained speci-
alist dealers or the service department.
Improper handling of these parts leads to
the warranty becoming null and void.
ATTENTION! Only work on the fire when the
mains plug has been removed from the socket.
Your furnace must be switched off and have
cooled down before carrying out any work on it.
GENERAL
ATTENTION! Only work on unit when the power
cord has been unplugged from the wall.
stove
During assembly do not drop any items
(screws) etc. into the hopper. Foreign items
will block the auger and damage the unit.
Then, fasten inside the hopper at the
top, using two (2) screws.
stove.
stove
control fitted internally in the stove
and a control board that is fitted to unit
cladding.
ASSEMBLY
13
stands vertically.
The control (main board) and the control
board may only be altered by specially
trained dealers or service department.
Improper handling of these parts will lead
to the warranty becoming null and void.
stove