78 ST4000+ Wheel & Tiller Autopilots: Owner’s Handbook
5 Installing the ST4000+
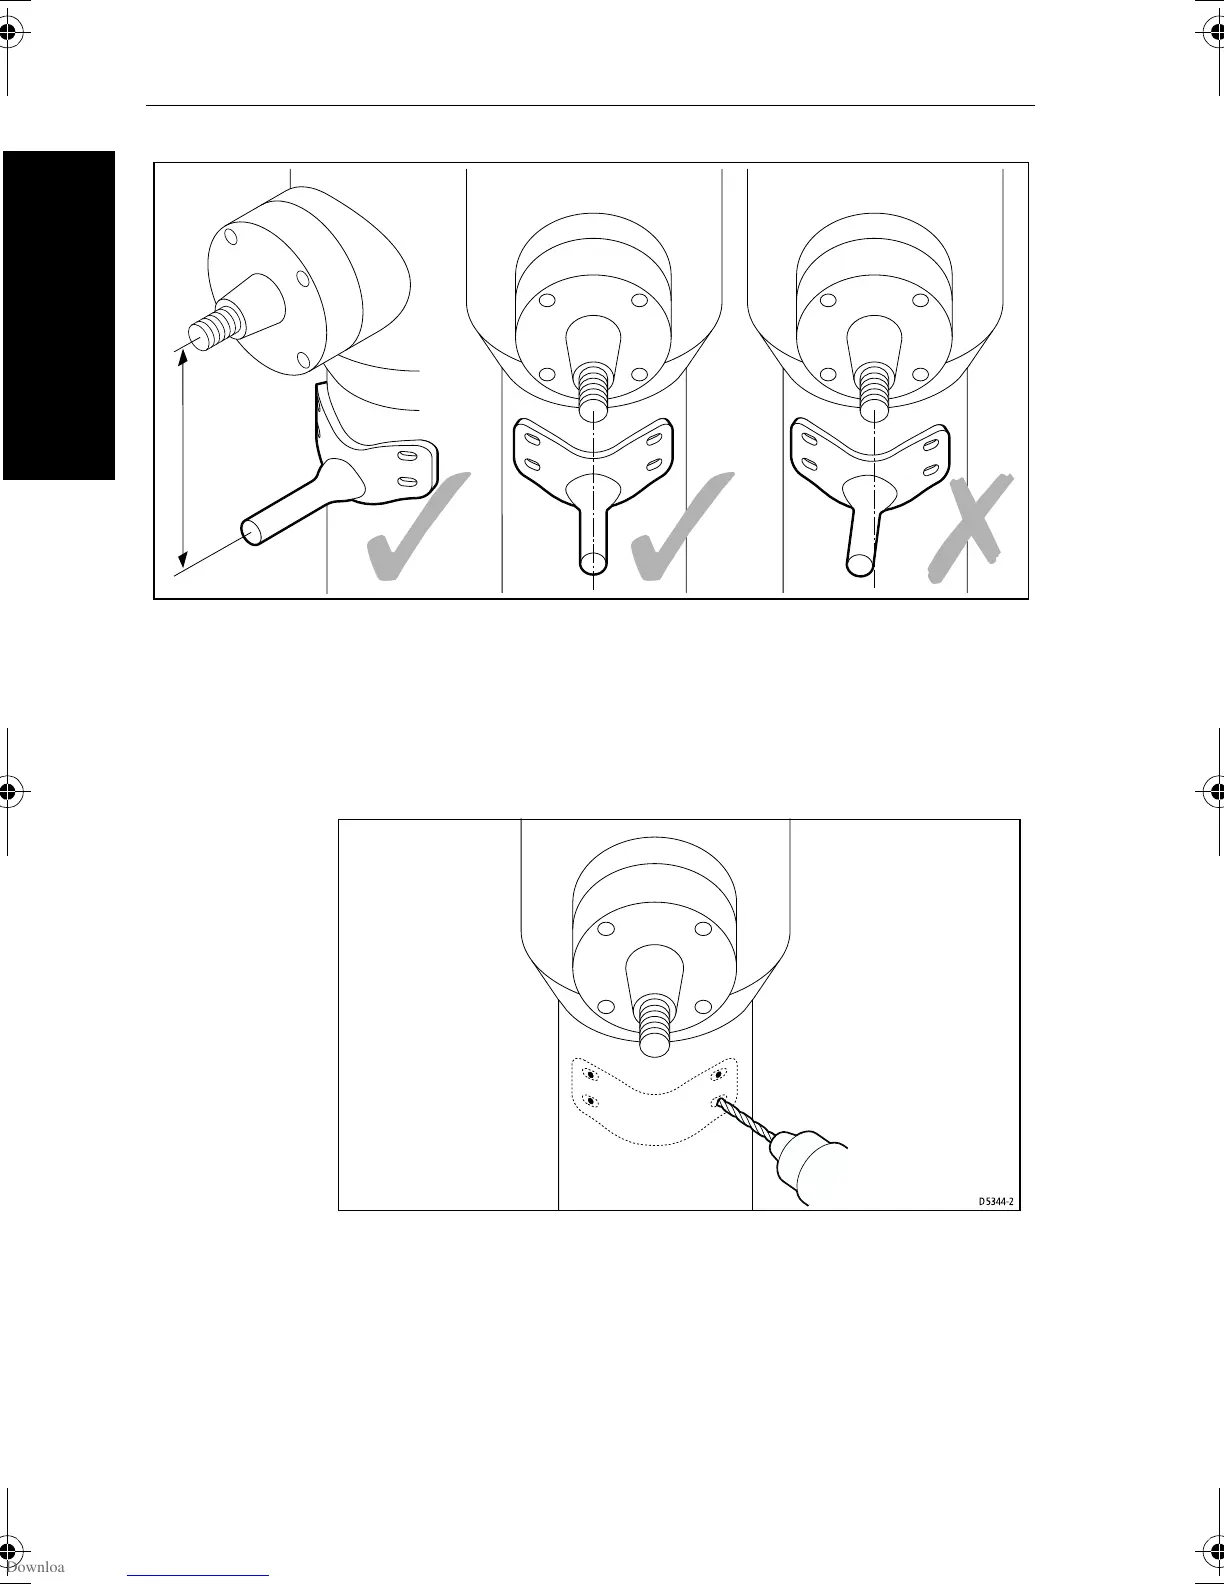
8. When the pedestal bracket is correctly positioned and aligned,
mark around the inside of the slots, then remove the bracket.
9. Use a center-punch to mark the center of each slot, then use the
smaller supplied drill bit to drill a 4.0 mm (
5
/
32
in) diameter hole.
Note: Drill at right angles to the pedestal surface.
10. Hold the bracket in place then lightly tighten the four cross-head
screws (No 10 x
3
/
4
in). As you do this, make sure the bracket is
correctly aligned.
11. Replace the wheel, making sure that you locate the pin in the
correct slot (slot 1 or slot 2).
12. Turn the wheel with the clutch off to check that the bracket is
correctly positioned and aligned.
D5346-2
154 mm
(6.1 in)
D5344-2
81131_6.book Page 78 Wednesday, August 22, 2001 2:26 PM