EasyManuals Logo

AUTOHELM ST50 Wind Trim User Manual

AUTOHELM ST50 Wind Trim
9 pages
To Previous Page IconTo Previous Page
Page #9 background imageLoading...
Page #9 background image
8
ST50
WindTrim
and
SpeedTrim
Operation
and
Installation
Handbook
ST50
WindTrim
and
SpeedTrim
Operation
and
Installation
Handbook
9
2.2
Mounting
procedure
Surface
Mounting
The
surface
must
be
smooth
and
flat.
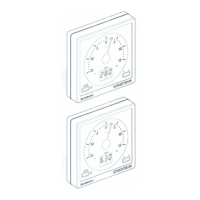
1.
Use
the
template
provided
to
mark
the
centres
of
the
two
fixing
holes
and
cable
boss.
Note:
Adjacent
units
should
have
6mm
(1/4
in)
separation
to
allow
room
for
the
protective
covers.
2.
Drill
to
4mm
(5/32
in)
diameter.
3.
Use
a
50mm
(2in)
diameter
cutter
to
drill
the
hole
for
the
centre
boss.
4.
Screw
the
two
fixing
studs
(2)
into
the
back
cover.
5.
Pass
the
cable
tails
through
the
central
hole
and
secure
the
instrument
with
the
thumb
nuts
provided
(3).
A
sealing
gasket
(4)
is
already
attached
to
the
back
cover
of
the
instrument.
Bracket
Mounting
As
an
alternative
to
surface
mounting,
a
kit
(Cat
no
D
130)
is
available
to
bracket
mount
the
instrument.
2
Flush
Mounting
A
flush
mounting
kit
(Cat
No.
D
183)
for
installations
where
a
flush
mount
is
required
or
is
more
desireable
.
Full
installation
instructions
are
provided
with
the
kit.
1/
I'.
I 4
~y
)f
1'11'1
, 2
o
('
,
01117-1

Questions and Answers:

Question and Answer IconNeed help?

Do you have a question about the AUTOHELM ST50 Wind Trim and is the answer not in the manual?

AUTOHELM ST50 Wind Trim Specifications

General IconGeneral
BrandAUTOHELM
ModelST50 Wind Trim
CategoryMarine Equipment
LanguageEnglish

Related product manuals