©
2007
Directed Electronics
7
H1/14 WHITE/BLUE (-) Channel 3 Output
This wire provides a (-) 200 mA output whenever the transmitter code controlling Channel 3 is
received. This output will continue as long as that transmission is received. Use for options such as
Directed’s 561T Valet
®
Start system, 529T or 530T power window controllers, etc.
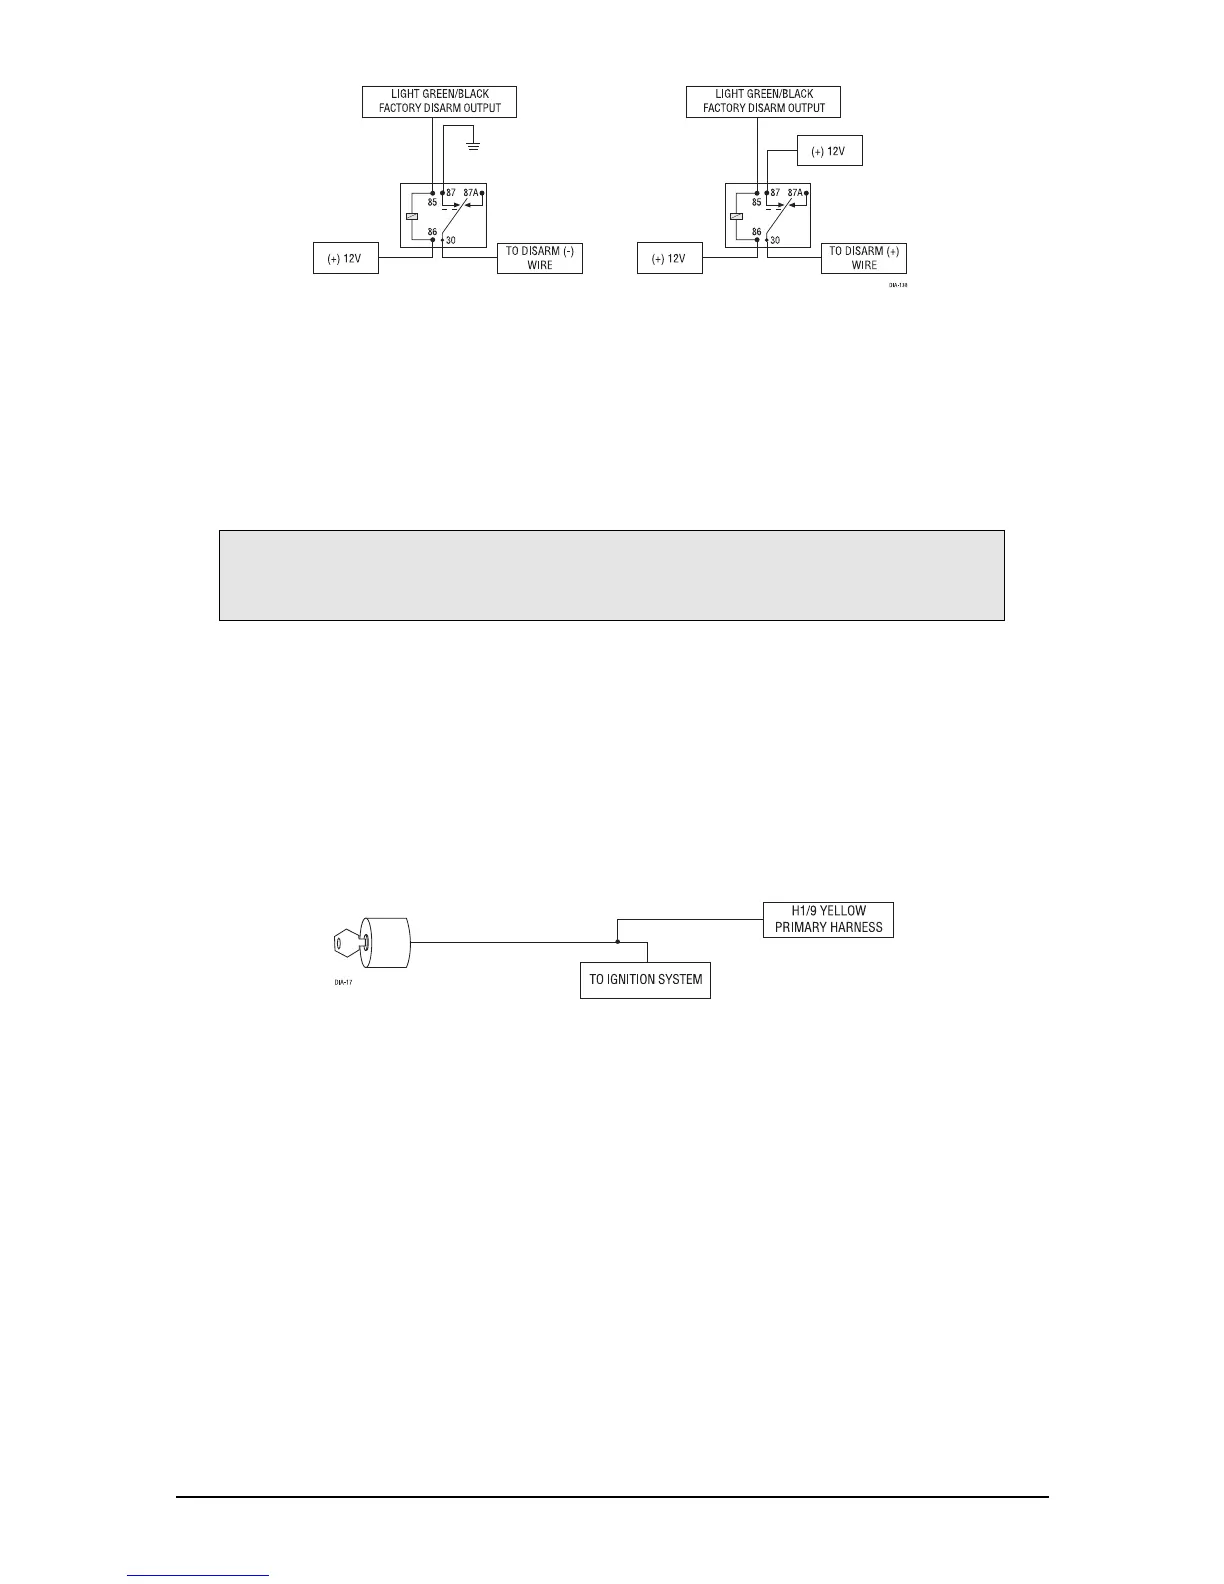
H1/15 YELLOW (+) Switched Ignition Input
Connect this wire to an ignition source. This input must show (+)12V with the key in run position
and during cranking. Make sure that this wire cannot be shorted to the chassis at any point. This
wire will trigger the system if the ignition is turned on before the unit is disarmed (doors unlocked
with the remote). It will also honk the vehicle’s horn and flash the parking lights (if connected).
IMPORTANT! Never use this wire to drive anything but a relay or a low-current input!
The transistorized output can only provide (-) 200 mA of current, and connecting
directly to a solenoid, motor, or other high-current device will cause it to fail.
 Loading...