B-36
BF4 Series
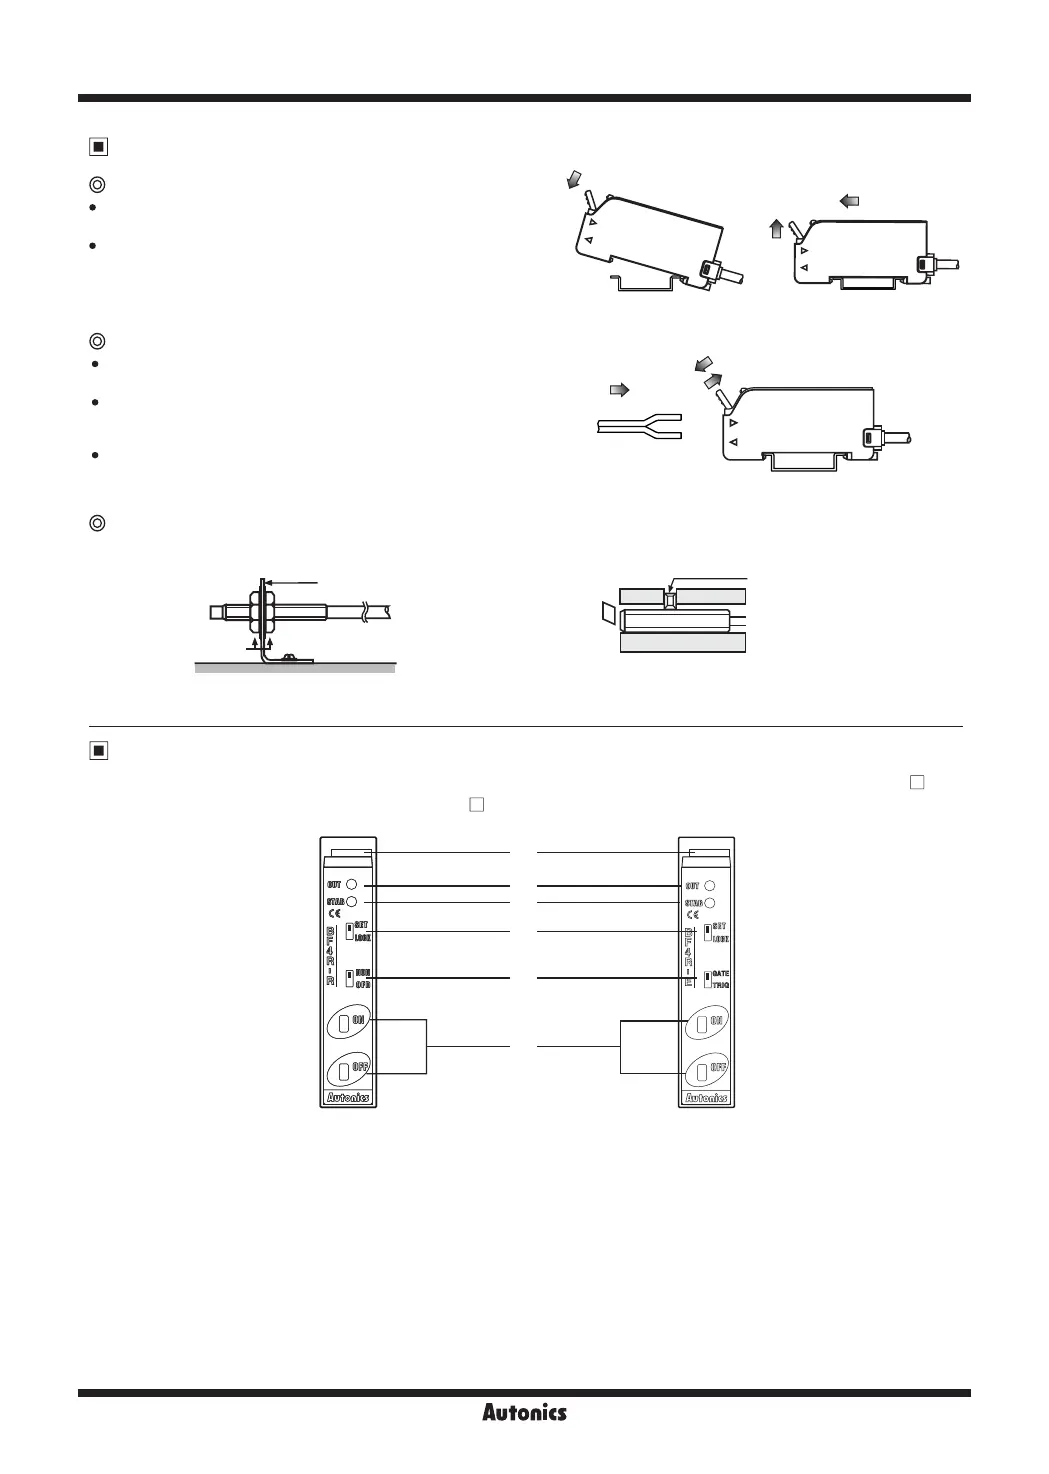
● Standard type (BF4R/BF4RP/BF4G/BF4GP)
External input sensitivity setting type (BF4 -R)
● External synchronization input type (BF4 -E)
Installations
Unit Description
Tightening torque:
Max. 0.198N
.
m
L bracket
Fixing nut
※
Notice: If setting bolt is tightened with over
specified tightening torque, hood of
fiber optic cable may be damaged.
Connection of fiber optic cable & amplifier
● In case of using L bracket
● In case of using screw
Mounting amplifier unit
Hook the front part of the amplier on DIN rail. Press the
rear part of the amplier on DIN rail.
Push the back of amplier toward
①
and lift the hole for
ber toward
②
up then simply take it out without tools.
Installation of fiber optic cable
Lift up the protective cover to the
①
direction to release
the lock setting.
Insert the cable to the
②
direction and adhere between
the cable and the inside of the amplier unit.
(insert depth: approx. 10mm)
Place up the lock lever to
③
direction to lock the lock
setting and close the protective cover.
[Mounting] [Removing]
②
①
②
①
③
1
6
2
3
4
5
1. Control output indicator (red)
: Turns ON or OFF by control output status.
2. Stability indicator (green)
: Turns ON at stable light ON/OFF level.
3. Mode setting switch
- SET: Set the switch to [
SET
] to use set the function.
- LOCK: Set the switch to [
LOCK
] not to set the function.
4. Timer setting switch (standard type, external input sensitivity setting type)
- NON: Set the switch to [
NON
] not to use timer function.
- OFD: Set the switch to [
OFD
] to use OFF Delay timer function.
External synchronization setting switch (external synchronization input type)
- GATE: Set the switch to [
GATE
] to use external synchronization as gate synchronization.
- TRIG: Set the switch to [
TRIG
] to use external synchronization as trigger synchronization.
5. Sensitivity setting button
: Used for sensitivity setting
6. Lock lever
: Used for connecting ber optic cable.






 To Next Page