Autostacker™ Parking Lift 35 P/N 5900248 — Rev. B — May 2021
Add the Platform Sections and the Drive-Up Ramp
The Platform sections, when installed, create the Platform. The Drive-Up Ramp lets you drive a vehicle
onto the Platform. The Platform sections are most easily installed from underneath. Raise the
Autostacker to a height that is good for you.
⚠ WARNING Do not go under the Autostacker until it is securely on a Safety Lock.
When you get to the Drive-Up Ramp, it secures only on the sides, not in the middle.
To add the Platform sections and the Drive-Up Ramp:
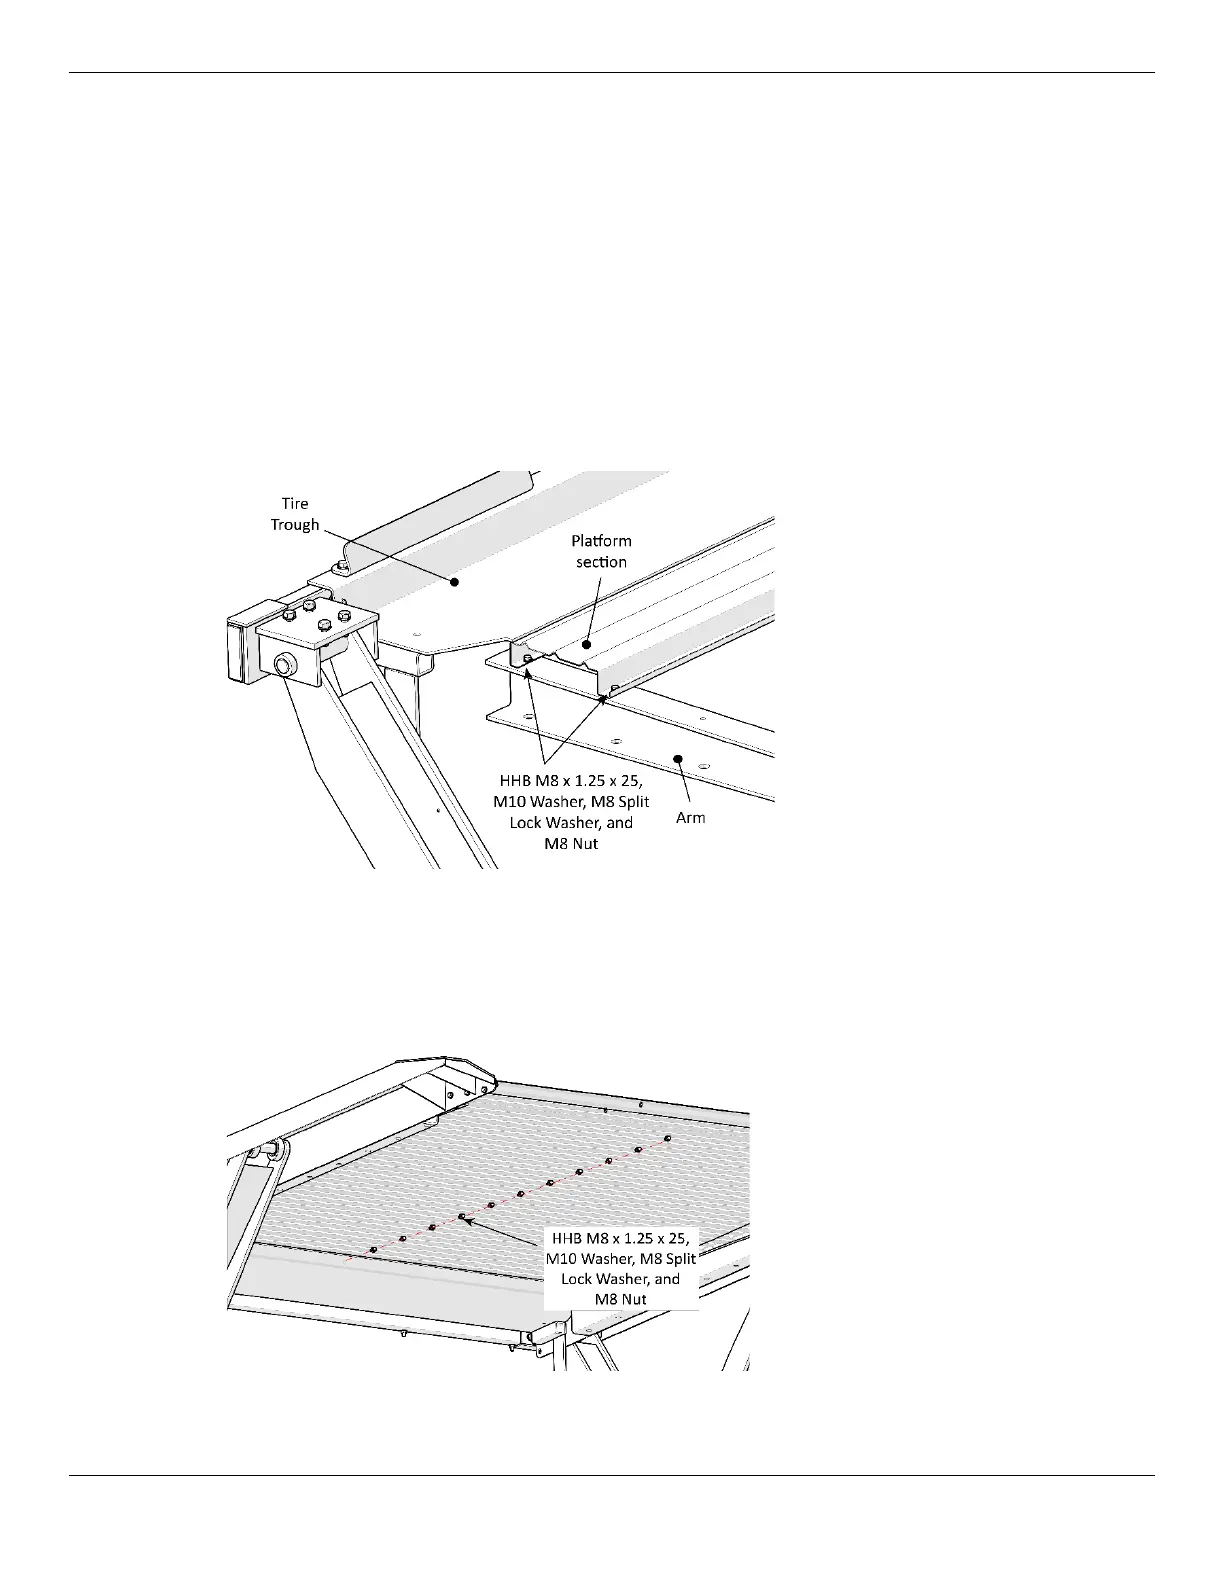
1. Starting next to the Tire Trough, put a Platform section next to the Tire Trough and then slide the
end closest to the Tire Trough under it slightly; bolt the ends of the Platform section into the
Platform Arm.
Top/Side view of Autostacker
Arm. Graphic shows how to place
the first Platform section just
under the Tire Trough.
Some components stripped away
in graphic for clarity.
2. Put the next Platform section into place against the first one.
You know the two are oriented correctly when the holes line up.
3. Attach the Platform sections to each other by putting in a Nut and Bolt in their center holes.
It is not necessary to put in all of the Nuts and Bolts now; wait until all of the sections are in place.
View is from underneath the
Platform. Graphic shows the
connections to make to the
individual Platform sections.
Not all components are shown.