This document serves as a comprehensive user manual for Avantco Undercounter Ice Machines, providing essential information for setup, operation, maintenance, and troubleshooting. The manual emphasizes the importance of reading it thoroughly before any interaction with the equipment to ensure proper and safe use.
Function Description
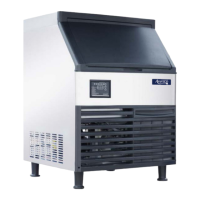
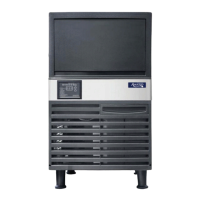
The Avantco Undercounter Ice Machine is a fully automatic appliance designed to produce ice cubes. Once properly installed and connected to a potable water source and power supply, the machine initiates ice production automatically. It features an intelligent system that detects when the ice storage bin is full and automatically stops the ice-making process, resuming when ice levels decrease. These ice machines are specifically designed for indoor, ambient-controlled environments, making them suitable for various commercial settings such as kitchens in stores, offices, hotels, restaurants, and other catering occasions. They are not intended for residential use.
The ice-making process involves several stages:
- Self-check: Upon initial power-on, the ice maker performs a self-check and pumps out any residual water.
- Preparing: After the self-check, the inlet valve opens, allowing water to flow in until a set level is reached. The ice maker then performs a defrost cycle.
- Ice making: Following a 30-second pre-cooling period, the water pump activates, circulating water smoothly and evenly over the evaporator. Ice cubes gradually form in the ice cube tray.
- Ice Harvest (Drop): Once the ice-making process is complete, the water pump turns off, and the defrosting valve activates. Hot gas enters the evaporator for approximately 1-2 minutes, causing the ice cubes to slide from the evaporator into the storage bin. A crucial safety warning advises against placing hands into the ice storage bin during this process to prevent injury from falling ice.
- Bin full stop: The machine is equipped with a sensor that detects when the storage bin is full. Once triggered, the machine will continue for 40 seconds before stopping ice production.
- Repeat ice-making: When the ice cubes triggering the sensor are moved or spread out, the ice maker will automatically resume the ice-making process within a few seconds.
The control panel provides various indicators and functions:
- LED Display: Shows different codes and counts for self-check ("ini"), preparing (counts forwards in seconds), ice making (counts forwards until water reaches 32°F, then backwards to 0), ice harvest (counts forwards in seconds), and cleaning ("CLE" for cleaning/descaling, "STL" for sanitizing, "RIN" for rinsing).
- LED Lamps: Indicate specific functions or statuses.
- Ice cube thickness adjustment: During ice making, users can adjust the ice cube thickness by pressing the "–" button for 3 seconds, then using the "+" or "–" buttons to extend or shorten the ice-making time by 1.5 minutes per click.
- Cleaning button: Holding this button for 3 seconds initiates the cleaning process.
- ON/OFF button: Toggles the machine's power.
The machine also incorporates special protection features, including automatic shutdown if ice harvest is not detected in three cycles or if the ambient temperature is too high. Fault codes (E01-E12) are displayed to indicate specific issues, such as sliding board failure, ice making overtime, high temperature, water shortage, high pressure, sensor faults, refrigeration system failure, and water level control faults, most of which trigger a protective shutdown.
Usage Features
The Avantco Undercounter Ice Machine is designed for straightforward operation, but requires adherence to specific guidelines for optimal performance and longevity.
- Initial Setup: Before startup, users must ensure all packaging tape and accessories are removed from the ice bin, the machine is leveled, water lines are connected, the water valve is open, and the power plug is connected with the switch off. It's also critical to allow the machine to remain upright for at least 24 hours after delivery to allow the refrigerant to settle, preventing compressor damage.
- Environmental Conditions: The machine must be installed indoors, with ambient temperatures between 40-90°F. It should be kept away from heat sources, direct sunlight, and extremely high or low temperatures. Adequate ventilation space is required: no less than 12" for the front, 6" for the sides, and 8" for the rear.
- Water Supply: Potable water with a pressure of 18.75 psi to 80 psi and a temperature between 40-90°F is necessary. The manual strongly recommends using Avantco-approved water filters (C Pure Food Service Water Filtration systems) to ensure clean water, as failure to do so can void the warranty. The filter flow direction must be correctly installed according to markers.
- Power Supply: The machine requires a power supply matching the rated voltage on its nameplate (±6%). A circuit breaker or switch with leakage protection and reliable grounding is mandatory.
- Drainage: Proper floor drainage must be provided near the installation site. The drain pipe should have a level difference of more than 1" per 3' to ensure proper draining and must not be blocked. Any joint in the drain line cannot be higher than the machine's drainage port or the previous joint.
- Ice Cube Handling: Users should open and close the storage bin door gently and keep it closed when not removing ice.
- Long-Term Storage: If the ice maker is not in use for an extended period, it should be energized and run for 2 to 4 hours every two months.
Maintenance Features
Regular maintenance is crucial for the ice machine's performance, hygiene, and warranty validity. The manual stresses that maintenance should be performed by a qualified technician, and the water source and power supply must be shut off before any maintenance or manual cleaning.
- Exterior Cleaning: The area around the ice machine should be kept clean, and vents should not be blocked. The outer enclosure can be cleaned with a mild detergent and wiped clean. Commercial stainless steel cleaners and polishes can be used if necessary, as stainless steel can rust without proper maintenance.
- Inlet Water Filter: The water filter should be inspected regularly and the cartridge replaced every 3 to 6 months.
- Interior Cleaning: The ice storage bin's interior can be washed with water and a cleaner solution, then thoroughly rinsed. This process should be repeated with a water and sanitizer solution. It's important to ensure water pressure is below the maximum allowed pressure and to avoid flushing parts above the water pump or evaporator directly.
- Condenser (Air-cooled models): The condenser should be cleaned every three weeks using a soft brush or vacuum cleaner, brushing along the fin direction to avoid damage. The condenser filter needs cleaning every two weeks. Caution is advised due to sharp fin edges.
- Water Line: The water line should be cleaned regularly to ensure food safety.
- Winterizing: For winterizing, the water and power supply should be turned off, and residual water drained from the water trough, inlet pipe, and drain pipe. The manual explicitly states that maintenance performed by the user is not covered by the manufacturer's warranty.
Cleaning Function (Automated and Manual)
The ice machine offers both an automated cleaning cycle and instructions for manual cleaning and sanitizing.
Troubleshooting
The manual includes a troubleshooting guide to address common issues such as the machine not working, indicator being off, shutdown after startup, high temperature (E04), high pressure protection (E06), abnormal ice defrost, poor ice transparency, slow ice making, and excessive noise. For each fault, potential causes and troubleshooting steps are provided, ranging from checking power connections and ambient temperature to cleaning the condenser, checking water supply, and adjusting ice thickness settings.
Avantco Ice provides a 1-year parts and labor warranty for new equipment and a 5-year compressor warranty (parts only for years 2-5). The warranty is valid for commercial customers in the contiguous United States and is non-transferable. It covers defects in material and workmanship but excludes issues arising from improper installation, operating conditions (including residential or outdoor use), improper water pressure/temperature, failure to use/maintain a water filter, electrical issues, lack of maintenance, non-commercial use, second-hand purchase, lack of serial number/proof of purchase, misuse, neglect, unauthorized alterations, or normal wear and tear parts. For warranty inquiries or service, customers are instructed to contact an authorized dealer with their model and serial number. Failure to obtain authorization before service can void the warranty.