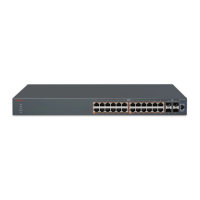
Replacing or adding a stack unit
Use this procedure to replace a failed stack unit or insert a new unit into a stack.
Important:
Automatic Unit Replacement (AUR) for both configuration and software is enabled for the
Avaya Ethernet Routing Switch 3500 Series switches in Release 5.1. This means that the
agent code image on a replacement unit, is automatically upgraded or downgraded to match
the software running on the stack. In addition, when a like-for-like replacement of a failed
unit occurs, any port-specific configuration is restored.
Procedure
1. Remove the failed switch from the stack.
2. Obtain a like-for-like replacement switch.
The replacement unit must have software version 5.1 already installed. Before
adding the unit to the stack, you must change to stacking mode and reboot.
>enable
#config t
#rear-ports mode stacking
#save config
#reboot
3. With the new unit turned of
f, physically insert the new unit in the stack and reconnect
the stack cables.
Important:
If you replace the base unit, remember that the stack has elected a temporary
base unit and the new unit does not automatically assume the base unit status.
Configure the new unit as the base unit (using the Base Unit Select switch) and
reset the Base Unit Select switches of the other stack members to nonbase units..
See Base Unit select switch on page 19,
4.
Turn on the new unit. Depending on the software load on the replacement switch,
it can automatically restart one or two times before joining the stack as a fully
operational member.
5. Check the log file on the stack to ensure that the replacement unit correctly joined
the stack. The log file displays AUR information messages.
Avaya Ethernet Routing Switch 3500 series stacking
24 February 2013

 Loading...