Make sure to
connect the
cable into the
IN connector.
8
Please set the
system selector
on the back of the
camera to 7.
3 12
16
15
Remote
Control &
Batteries
Package Content:
Avaya Optional – Not Included Accessories Avaya Optional – Not Included Accessories (cont.)
Non-Avaya
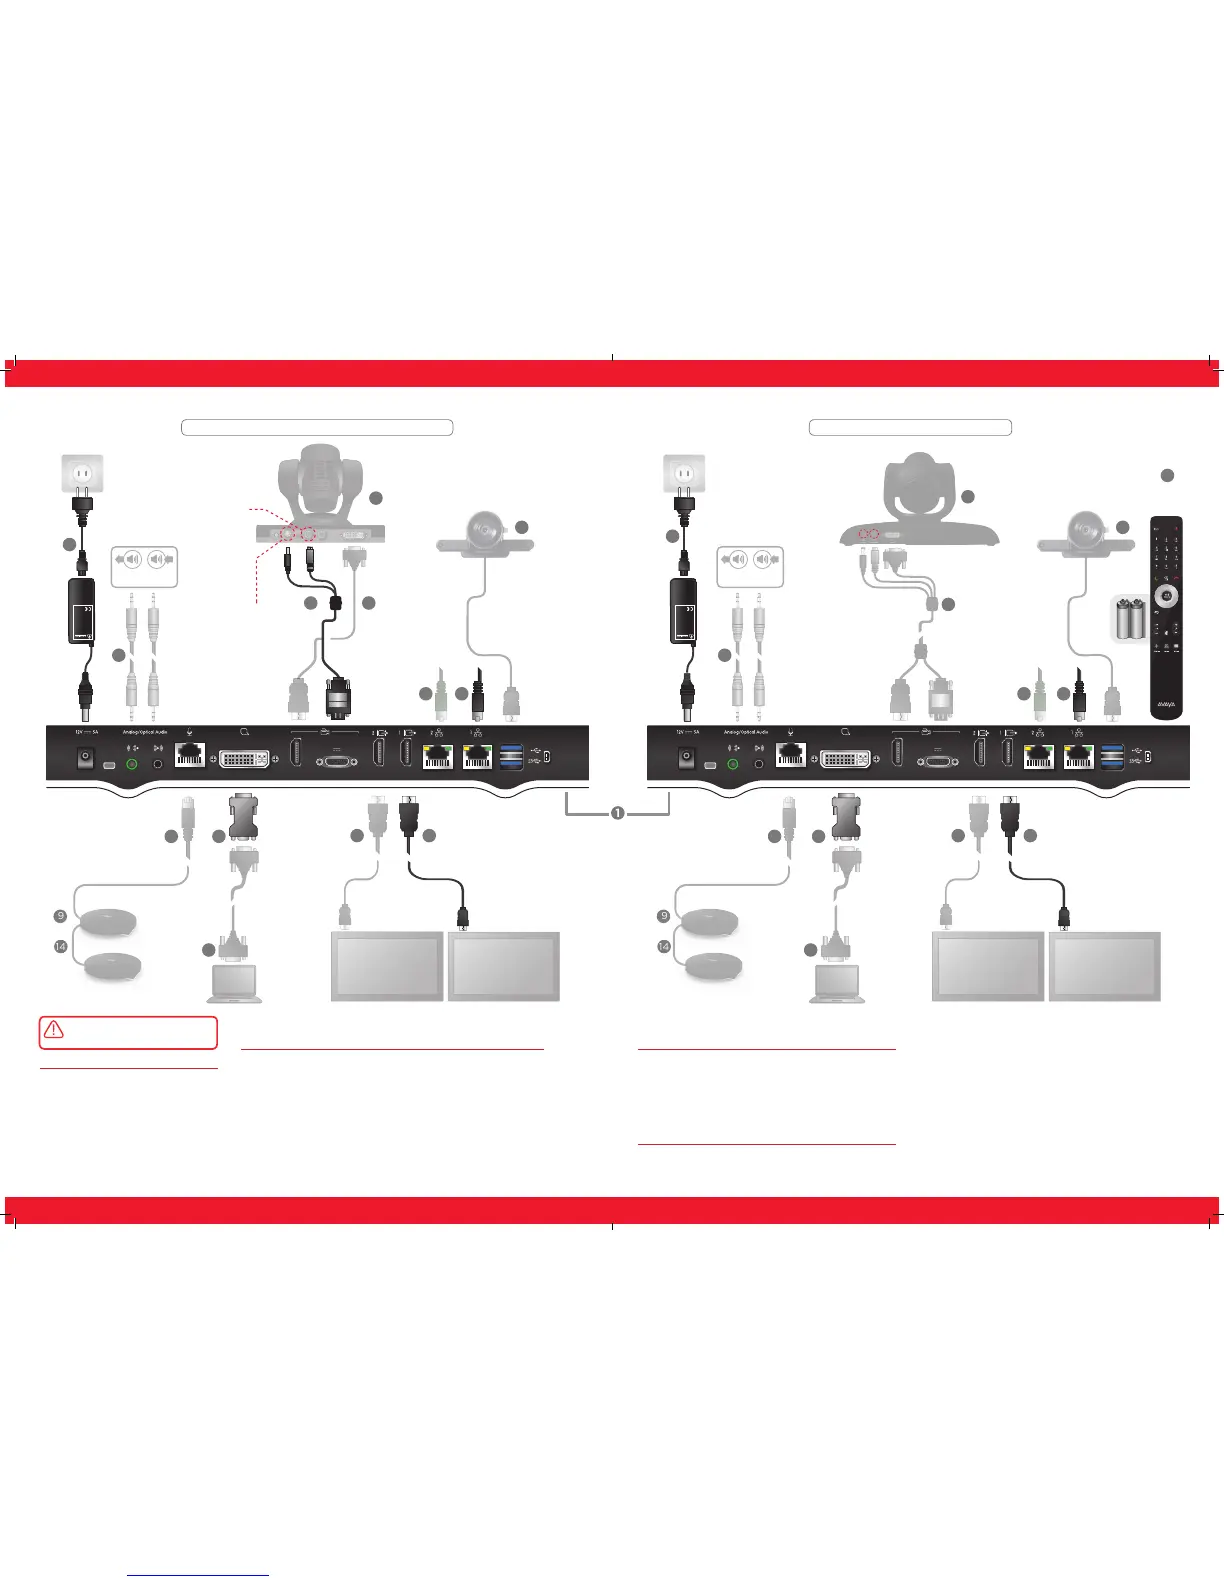
Avaya Scopia XT4300 Codec Only | Quick Hardware Setup
Setup with Flex or Deluxe CameraSetup with Premium or Advanced Camera
1. Codec Unit
2. Remote Control Unit and Batteries
3. Cable for power supply and VISCA
control of first camera
4. HDMI Cable for Display
5. Ethernet Cable
6. Power Supply and Power cable
7. DVI-I to VGA converter for PCs
with VGA output
8. Optional Premium or Advanced Camera
9. Premium 3-way microphone POD
10. Premium 3-way microphone POD cable
11. Audio Cable. Both sockets on the unit are dual purpose. They accept
either an analog 3.5mm MiniJack cable or an optical Toslink cable with
a Toslink mini-plug adapter. Optical digital audio format is S/PDIF
12. HDMI to DVI cable for camera
13. Optional USB camera connected to the upper USB2 port. Avaya or
qualified third party USB camera can be used, as reported in the XT
third party accessories list.
14. Optional Premium 3-way POD and cable. To cascade
a second 3-way POD, the Zoom Upgrade license must
be enabled.
15. Optional Flex or Deluxe Camera
16. Triple cable for Flex or Deluxe Camera
17. HDMI Cable for Mon2
18. Ethernet Cable for LAN
19. VGA cable
CAUTION: Make sure all units are
switched off whenever connecting
or disconnecting devices.

 Loading...


