35
3INSTALLATION AND DEINSTALLATION
2.2 CONNECTING THE SENSORS
ALS
20X
256
2.2.5 Photoelectric roll diameter
sensor
Both, ALS 20X as well as ALS 256 can be used with an
optional photoelectric sensor to check the outer diame-
ter (OD sensor) of the label roll. The OD sensor gives a
display message when less than a certain residual
diameter is left on the label roll.
– Permitted sensor type: PNP
– Order no.: RH A8192, LH A8204
Installing
Tools:
– Medium size screwdriver
– 2,5 and 8 mm hexagon socket driver
Remove the following parts from the deviation roller
axle: outer lock washer, shim ring(s) deviation roller
[50C], shim ring(s) and inner lock washer.
Remove reflector [51A] and mounting bracket [51D]
from the sensor holder.
Remove the mounting block [51C] (2 screws).
Move the sensor holder [51B] behind the dancer
arm with the upper end first and position it as illus-
trated [50].
Push the mounting block onto the deviation roller
axle and screw it to the sensor holder.
Push the shim ring, which came with the sensor unit
onto the deviation roller axle.
Reassemble the deviation roller with shim ring(s)
and lock washers, as it was before.
Fix the upper end of the sensor holder onto the
housing, using mounting bracket [51D] and M10
screw.
Attach the reflector to the sensor holder using two
thumb screws.
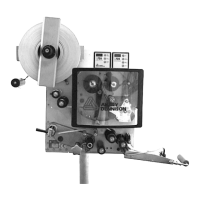
[50] Mounted OD sensor (pictured red).
A Reflector
B Sensor
[51] Mounting the OD sensor.
 Loading...