HD Native Installation Guide10
To install the HD Native card:
1 Turn off your computer and any peripherals.
Leave your computer’s power cable plugged in so
that the computer is grounded.
2 Disconnect all cables attached to the computer
(such as hard drives, displays, and USB and
FireWire devices) except for the power cable.
3 Lay the computer on its side so the access
panel is facing up.
4 Open the computer case using the latch located
on the back of the computer.
5 Remove the clamp that secures the metal
access port covers to the chassis.
6 Remove the metal access port covers for first
available 4x or higher PCIe slot.
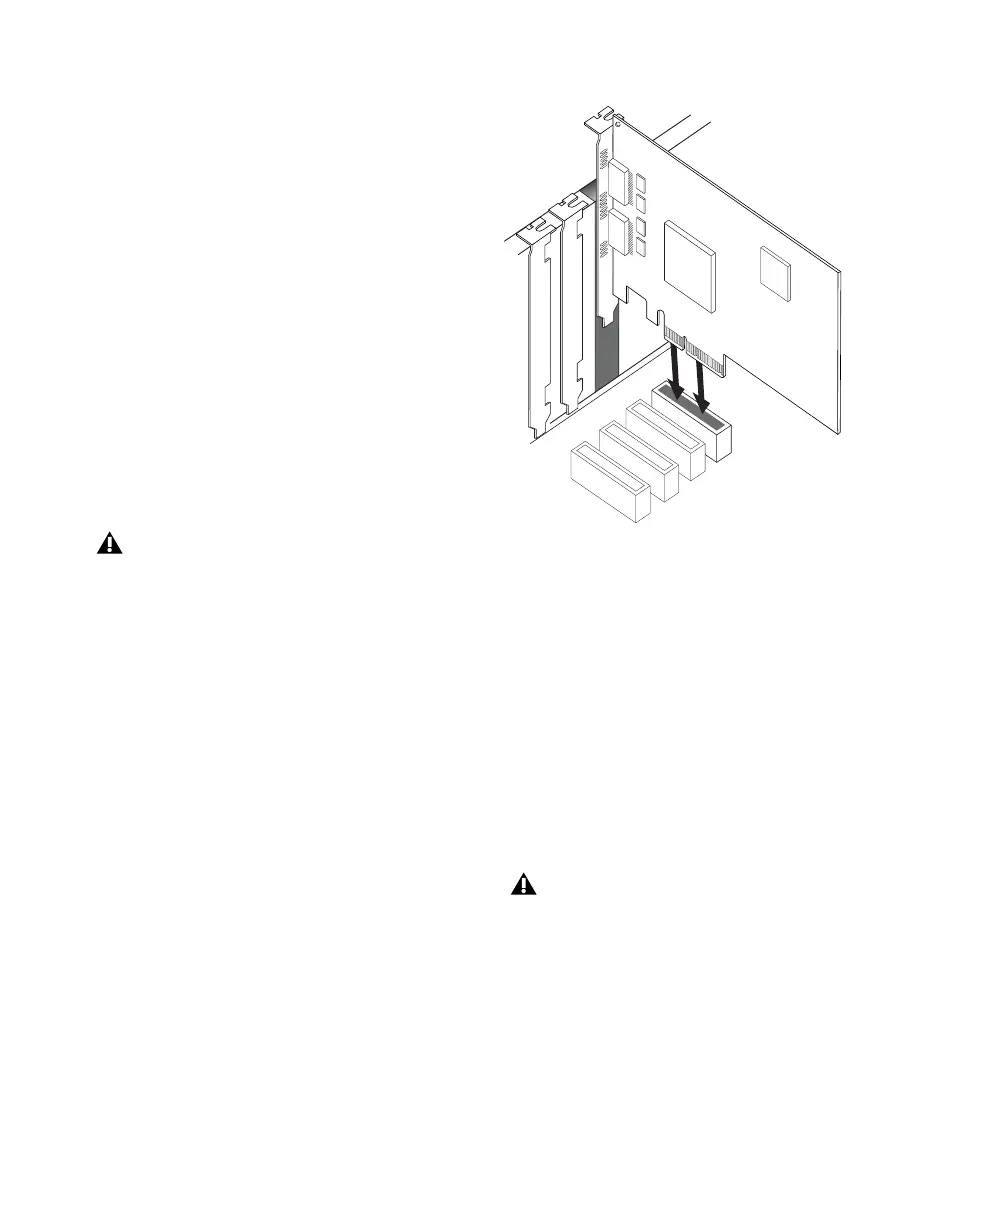
7 Install the HD Native PCIe card into the
corresponding PCIe slot in the computer. With
the card’s PCIe connectors facing down,
carefully insert the card straight down and
firmly seat the card’s PCIe connector into the
PCIe slot.
8 Ensure that all cards are properly installed in
your system:
• Display card for your computer monitor
• HD Native PCIe card
• Avid-approved video capture card
(optional)
• Avid-approved Host-Bus Adapter card
(optional)
9 Reattach the clamp that secures the cards and
the slot covers to the chassis.
Before handling the card, discharge static
electricity from your clothes or body by
touching a grounded metal surface, such as
the power supply case inside your computer
with the power cable connected.
Inserting the HD Native card into a PCIe slot
The card’s PCIe connectors will not seat
completely until you have replaced the
clamp that secures the cards and the metal
access port covers to the chassis.