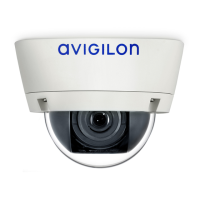
Removing the Dome Cover
Remove the dome cover by loosening the screws that fix the cover to the base. The Torx key included with the
dome camera can be used to loosen the screws.
NOTE: Be careful not to scratch or touch the dome bubble. The resulting marks or fingerprints may affect the
overall image quality. Try not to touch the dome bubble and keep the protective cover on the bubble until after
the installation is complete.
Mounting and Aiming Video Analytics Cameras
If you are installing an Avigilon™ video analytics camera, follow the listed mounting and aiming recommendations
to maximize the camera's analytics capabilities:
l The camera should be installed above 274 cm (9').
l The camera should tilt downwards no more than 45 degrees.
l The camera image should be level with the horizon line.
l The camera should be mounted to a stable surface to minimize the physical movement of the camera
after installation.
For more details, see Designing a Site for Video Analytics. The document is available in the eDocs app and on
the Avigilon website.
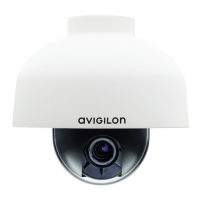
Mounting the DomeCamera
CAUTION — The dome camera must be mounted as instructed below or problems with moisture may
arise and will not be covered by the dome camera warranty.
The dome camera must be mounted on a 1-1/2” NPT male threaded wall or ceiling mounting bracket. The
mounting bracket is not included in the camera package.
Perform the following steps to mount the dome camera to a ceiling or wall:
1. If installing outdoors, make sure the camera is sealed to prevent excessive moisture from entering the
dome.
l If installing on a wall or overhang, use silicone sealant to seal the cable entry hole.
l If installing with a pole mount adapter (MNT-AD-POLE-B), use silicone sealant to seal the cable
entry hole on the pole mount adapter.
l Wrap the thread of the mounting bracket with the supplied Teflon sealing tape to create a water
tight seal around the camera connection.
Removing the Dome Cover 6
 Loading...