2. IN CAR INSTALLATION AND REMOVAL OF THE AVIONAUT GLIDER CAR
SEAT USING 3-POINT SAFETY BELT
2.1 Before Installaon
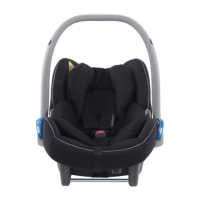
The Avionaut Glider car seat can only be installed on a forward facing seat equipped with a
3-point seat belt, which has been approved according to ECE R16 regulaon or similar (pic. 1).
Correct roung of your seat belt is essenal for your child’s safety. It must be routed in a correct
order, menoned in the instrucon manual, along red markings on the Avionaut Glider car seat.
Please see the tags on the Avionaut Glider cover. Never route the belt in any other way than
described above!
In some cases, the buckle of the safety belt may be too long and therefore sits too high against
the base of the Avionaut Glider car seat, making it dicult to install the car seat securely. If this
is the case choose a dierent posion in the car (pic. 4). In case a headrest of a car seat, where
the Avionaut Glider seat will be installed, does not let you align the Avionaut Glider child seat
with that car seat, please remove the headrest (pic. 5). Remember to put the headrest back in
its place if the seat is used by an adult person.
If the Avionaut Glider is equipped with an isox base, a support leg and is being installed using a
seat belt, isox connector plugs must be reinserted, in case they were removed before (pic. 29)
and the support leg removed. The gap that appeared aer removing the support leg must be
covered with a plug that comes with the leg (pic. 26). However, if the Avionaut Glider is provided
with a top tether strap, instead of the support leg, the strap must be removed (pic. 34).
Should an isox connector come out of the seat base it can only be put back in aer “clicking”
the seat into the isox anchorage (read 3.2 and 3.3) or by using the isox connector plug, which
needs to be reinserted into the Avionaut Glider isox connector. The isox connectors can then
be put back into the base (pic .29).
2
2.1
EN