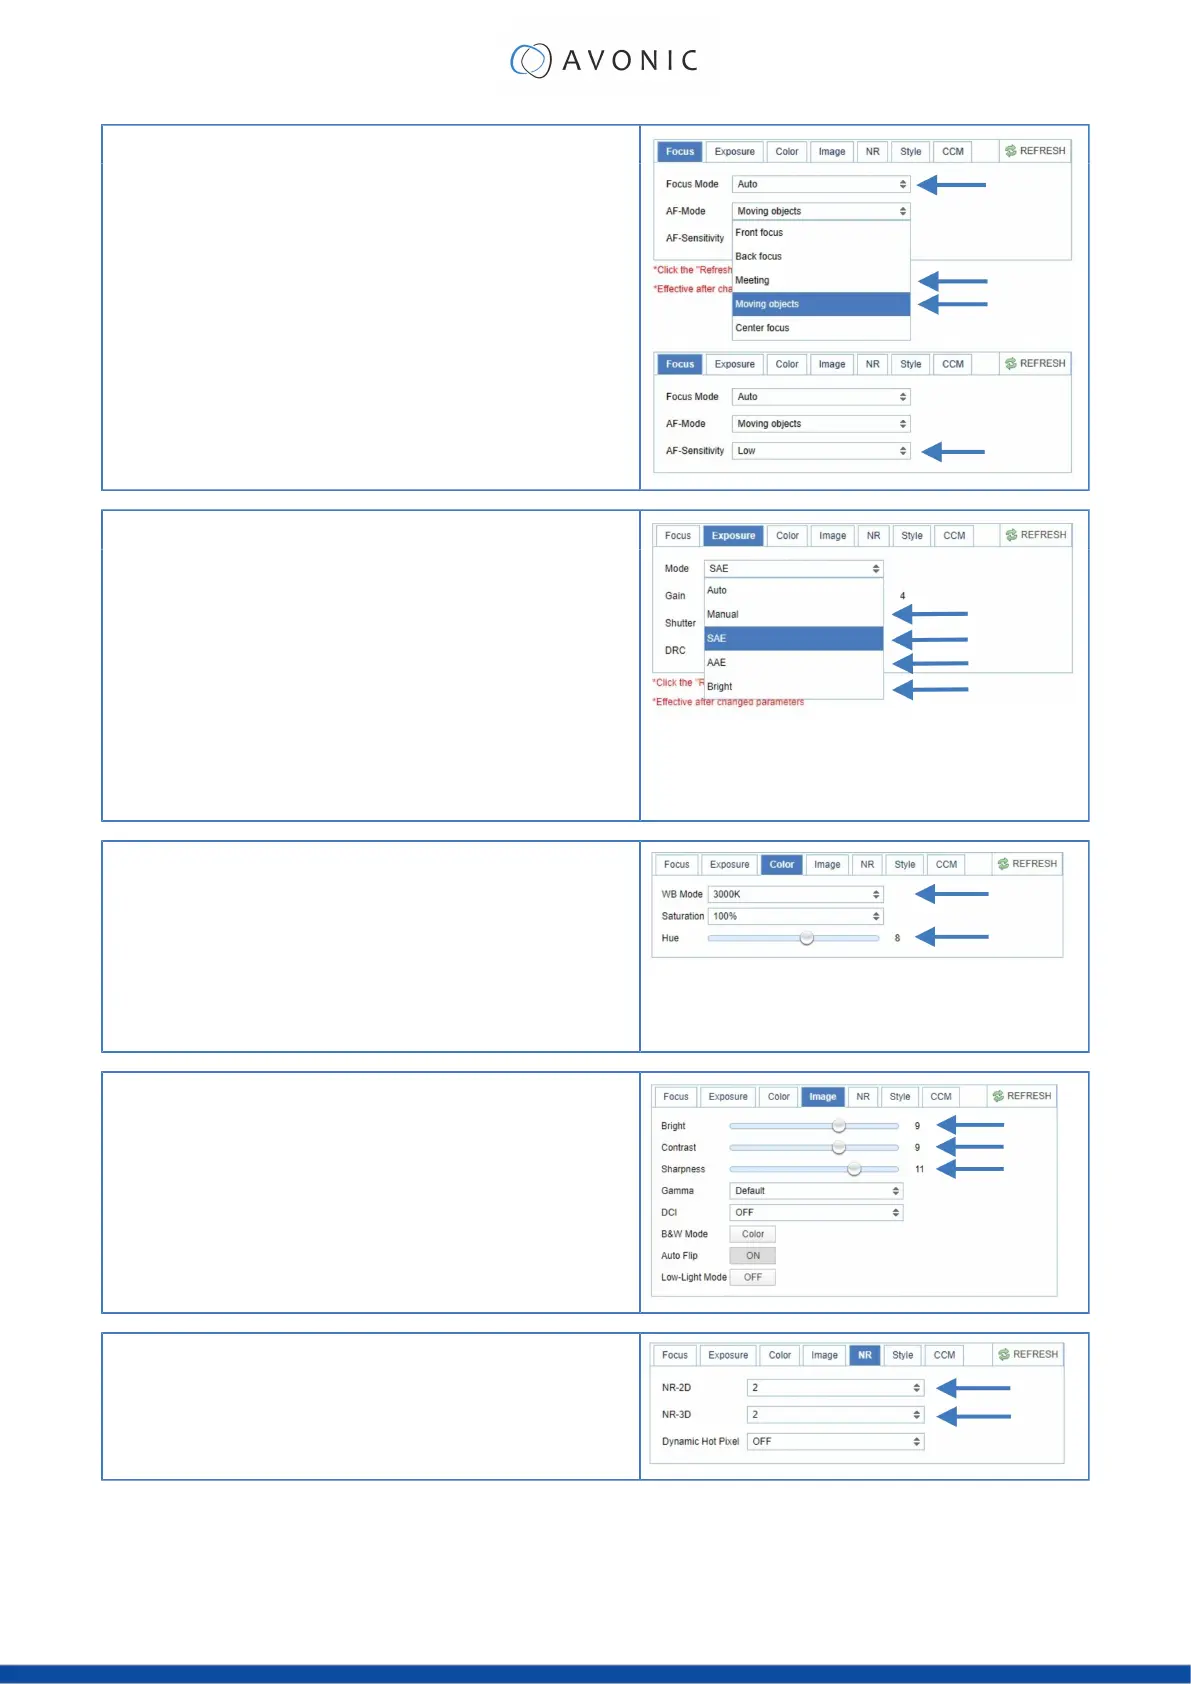
1. Focus
•
Navigate to Video > Camera Settings > Focus
•
If you have difficulties to focus, choose Focus Mode > Manual.
Otherwise set the Focus Mode to Auto and choose at AF-Zone
> Moving Objects if the filmed person or object is moving a lot, or
Meeting for general meeting purposes.
•
Set the AF-Sensitivity to high if you have chosen Education Tracking or
Moving Objects. Otherwise you can leave it to low.
2. Exposure
•
Navigate to the Exposure tab
•
Choose one of the following at Mode:
•
SAE: Do you have fast moving persons or objects before the
camera? Choose this mode to set the shutter speed.
•
AAE: Do you need more depth of field, because the distance
between the camera and filmed object is large? Choose this
mode to set the Iris (F-stop).
•
Bright: Do you have challenging light conditions? Choose this
mode to set the artificial brightness.
•
Manual: Do you have fast moving person or object on large
distance? Choose Manual to set the shutter speed and the Iris (F-
stop).
3. Color
•
Navigate to the Color tab
•
Choose at WB Mode one of the White Balance values (2400K ~ 7100K).
•
Do you have a lot of yellow light? Set the value of the WB Mode
approximately between the 5000K and 7100K.
•
Do you have a lot of blue light? Set the value of the WB Mode
approximately between the 2400K and 3300K.
•
If needed change the Hue to compensate.
4. Image
•
Navigate to the Image tab and set the sharpness.
•
If needed change also the bright and contrast settings to add more
brightness to the picture.
5. Noise Reduction
•
Do you have a lot of noise in the picture? Navigate to the Noise
Reduction tab and change the NR-2D (still-standing objects) and the
NR-3D (moving objects) to smooth the picture over.
24
 Loading...