9
APPENDIX DCCS CAMERA CONNECTION
(For Selected Models Only)
Note: This function is available only for DVR models which support DCCS function.
A1 Prerequisites
Make sure your cameras support the DCCS function. For details, please check with your distributor or
installer.
To ensure the signal transmission, the recommended distance between this DVR and cameras should not
exceed 200 meters by using 3C2V coaxial cables (112 braids).
However, different materials used in 3C2V coaxial cables with different connection distance may cause
some effects for the availability and fluency of signal transmission.
Therefore, please do the DCCS test as instructed in “A4 Examining Signal Transmission” at page 10 when
the connection is completed to ensure this system can work normally.
It’s not allowed to use a signal booster or modem to amplify signals and extend the connection distance.
The DCCS function doesn’t support the channel which is looped from a DCCS camera connected to the
same DCCS DVR or to other DCCS DVR.
A2 Installing DCCS Camera
Install the camera on the wall or ceiling based on your installation environment and camera type. For installation
details, please refer to the user manual of your camera.
Note: The distance between the camera and DVR needs to be within 200 meters for DCCS control to
take effects. For details, please refer to “A1 Prerequisites” at page 9.
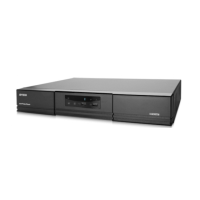
A3 Connecting DCCS Camera
The cameras must be connected and power-supplied before the DVR is powered on. Connect the camera with
the indicated power supply. Then, connect the camera video output to the DVR video input port with a coaxial
cable or RCA cable with BNC connectors.
Note: Only video channel 1 supports DCCS camera connection.
1) Video cable connection
Connect the camera video output to the DVR video input port with a coaxial cable or RCA cable with BNC
connector.
2) Power connection
Connect the camera with indicated power supply and make sure it’s power-supplied.