AWS Snowball User Guide
How It Works: Implementation
How It Works: Implementation
The following are overviews of how the Snowball is implemented for importing and exporting data. Both
overviews assume that you'll use the AWS Snowball Management Console to create your job and the
Snowball client to locally transfer your data. If you'd rather work programmatically, to create jobs you
can use the job management API for Snowball. For more information, see AWS Snowball API Reference.
To transfer your data programmatically, you can use the Amazon S3 Adapter for Snowball. For more
information, see Transferring Data with the Amazon S3 API Adapter for Snowball (p. 65).
End-to-End Import Implementation
1. Create an import job – Sign in to the AWS Snowball Management Console and create a job. The
status of your job is now Job created, and we have queued your job request for processing. If there’s a
problem with your request, you can cancel your job at this point.
2. A Snowball is prepared for your job – We prepare a Snowball for your job, and the status of your job
is now Preparing Snowball. For security purposes, data transfers must be completed within 90 days
of the Snowball being prepared.
3. A Snowball is shipped to you by your region's carrier – The carrier takes over from here, and the
status of your job is now In transit to you. You can find your tracking number and a link to the
tracking website on the AWS Snowball Management Console. For information on who your region's
carrier is, see Shipping Carriers (p. 74).
4. Receive the Snowball – A few days later, your region's carrier delivers the Snowball to the address
that you provided when you created the job, and the status of your job changes to Delivered to you.
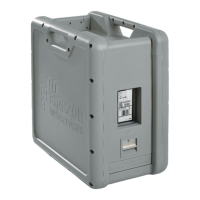
When the Snowball arrives, you’ll notice that it didn’t arrive in a box, because the Snowball is its own
shipping container.
5. Get your credentials and download the Snowball client – Get ready to start transferring data by
getting your credentials, your job manifest, and the manifest's unlock code, and then downloading the
Snowball client.
• The Snowball client is the tool that you’ll use to manage the flow of data from your on-premises
data source to the Snowball. You can download the Snowball client from the AWS Snowball Tools
Download page.
• The manifest is used to authenticate your access to the Snowball, and it is encrypted so that only
the unlock code can decrypt it. You can get the manifest from the AWS Snowball Management
Console when the Snowball is on-premises at your location.
• The unlock code is a 29-character code that also appears when you get your manifest. We
recommend that you write it down and keep it separate from the manifest to prevent unauthorized
access to the Snowball while it’s at your facility. The unlock code is visible when you get your
manifest.
6. Install and set up the Snowball client – Install the Snowball client on the computer workstation that
has your data source mounted on it.
7. Position the hardware – Move the Snowball into your data center and open it following the
instructions on the case. Connect the Snowball to power and your local network.
8. Power on the Snowball – Next, power on the Snowball by pressing the power button above the E Ink
display. Wait a few minutes, and the Ready screen appears.
9. Start the Snowball client – When you start the Snowball client on your workstation, type the IP
address of the Snowball, the path to your manifest, and the unlock code. The Snowball client decrypts
the manifest and uses it to authenticate your access to the Snowball.
10.Transfer data – Use the Snowball client to transfer the data that you want to import into Amazon S3
from your data source into the Snowball.
11.Prepare the Snowball for its return trip – After your data transfer is complete, power off the
Snowball and unplug its cables. Secure the Snowball’s cables into the cable caddie on the inside of the
Snowball’s back panel and seal the Snowball. Now the Snowball is ready to be returned.
9