AWS Snowball User Guide
Connect the Snowball to Your Local Network
Connect the AWS Snowball Appliance to Your Local
Network
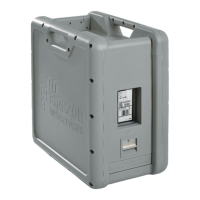
In this step, you'll connect the Snowball to your network. The Snowball appliance has two panels, a front
and a back, which are opened by latches and flipped up to rest on the top of the Snowball. Open the
front panel first, flip it on top of the Snowball, and then open the back panel, flipping it up to rest on the
first. Doing this gives you access to the touch screen on the E Ink display embedded in the front side of
the Snowball, and the power and network ports in the back.
Remove the cables from the cable catch, and plug the Snowball into power. Each Snowball has been
engineered to support data transfer over RJ45, SFP+ copper, or SFP+ optical 10 gigabit Ethernet. For SFP
+ optical, you'll have to use your own cable, connected to the SFP+ optical adapter in one of the SFP+
ports. For more information on cables and ports, see Supported Network Hardware (p. 91). Choose
a networking option, and plug the Snowball into your network. Power on the Snowball by pressing the
power button above the E Ink display.
1. Connect the powered-off Snowball to your network.
Note
We recommend that you set up your network connections so that there are as few hops as
possible between the data source, the workstation, and the Snowball.
2. Attach the power cable to the back of the Snowball, and then plug it in to a reliable source of power.
Then press the power button, located above the E Ink display, and wait for the E Ink display to read
Ready.
3. When the Snowball is ready, the E Ink display shows the following screen.
20