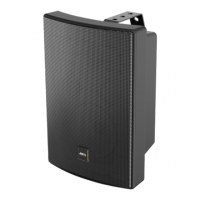
AXISC1004-ENetworkCabinetSpeaker
Aboutsystemoptions
ToaccessanetworkprotectedbyIEEE802.1X,devicesmustbeauthenticated.Theauthenticationisperformedbyanauthentication
server,typicallyaRADIUSserver,examplesofwhichareFreeRADIUSandMicrosoftInternetAuthenticationService.
InAxisimplementation,theAxisproductandtheauthenticationserveridentifythemselveswithdigitalcerticatesusingEAP-TLS
(ExtensibleAuthenticationProtocol-TransportLayerSecurity).ThecerticatesareprovidedbyaCerticationAuthority(CA).
Youneed:
•aCAcerticatetoauthenticatetheauthenticationserver.
•aCA-signedclientcerticatetoauthenticatetheAxisproduct.
Tocreateandinstallcerticates,gotoSystemOptions>Security>Certicates.SeeAboutcerticatesonpage28.
ToallowtheproducttoaccessanetworkprotectedbyIEEE802.1X:
1.GotoSystemOptions>Security>IEEE802.1X.
2.SelectaCACerticateandaClientCerticatefromthelistsofinstalledcerticates.
3.UnderSettings,selecttheEAPOLversionandprovidetheEAPidentityassociatedwiththeclientcerticate.
4.ChecktheboxtoenableIEEE802.1XandclickSave.
Note
Forauthenticationtoworkproperly,thedateandtimesettingsintheAxisproductshouldbesynchronizedwithanNTP
server.SeeDate&Timeonpage28.
Aboutcerticates
Note
•Iftheproductisresettofactorydefault,allcerticates,exceptpreinstalledCAcerticates,willbedeleted.
•Iftheproductisresettofactorydefault,allpreinstalledCAcerticatesthathavebeendeletedwillbereinstalled.
Howtocreateaself-signedcerticate
1.GotoSetup>SystemOptions>Security>Certicates.
2.ClickCreateself-signedcerticateandprovidetherequestedinformation.
HowtocreateandinstallaCA-signedcerticate
1.Createaself-signedcerticate,seeHowtocreateaself-signedcerticateonpage28.
2.GotoSetup>SystemOptions>Security>Certicates.
3.ClickCreatecerticatesigningrequestandprovidetherequestedinformation.
4.CopythePEM-formattedrequestandsendtotheCAofyourchoice.
5.Whenthesignedcerticateisreturned,clickInstallcerticateanduploadthecerticate.
HowtoinstalladditionalCAcerticates
1.GotoSetup>SystemOptions>Security>Certicates.
2.ClickInstallcerticateanduploadthecerticate.
Date&Time
TheAxisproduct’sdateandtimesettingsareconguredunderSystemOptions>Date&Time.
28