Setting Up the Saw
20
Checking the Table is Square
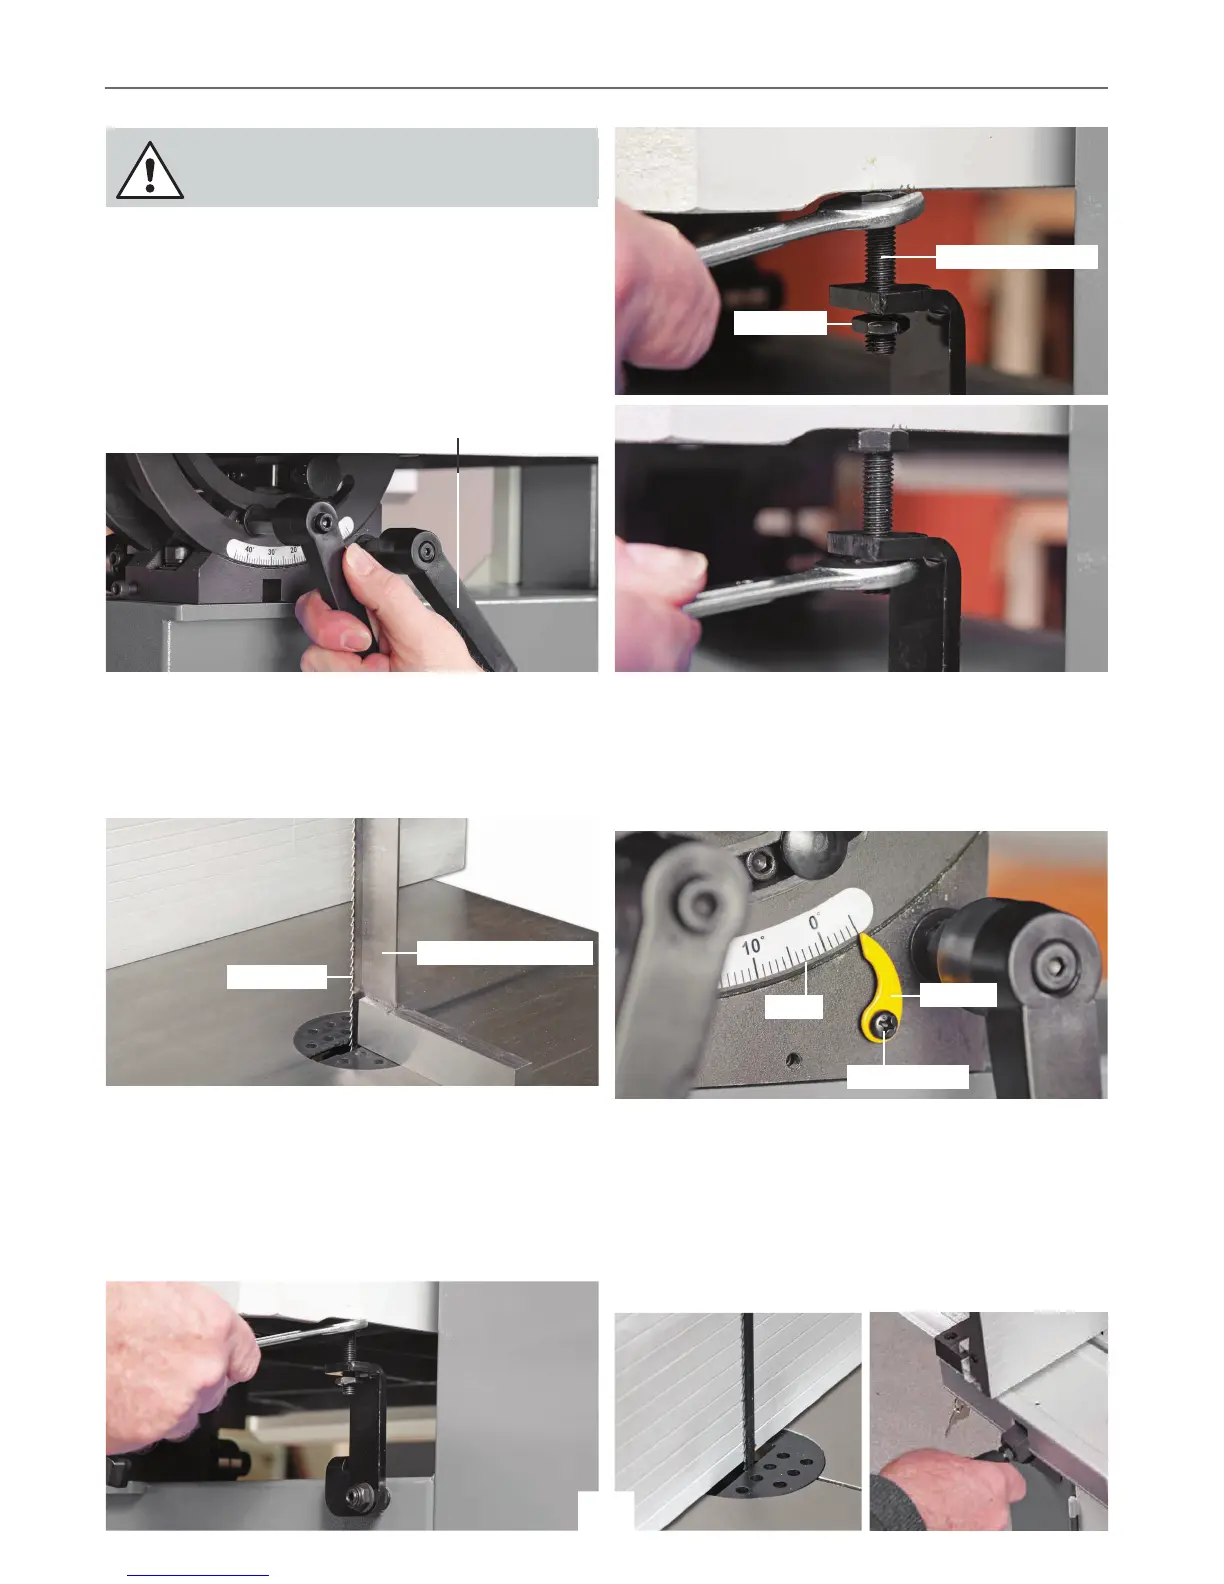
Step 1 Loosen the clamping handle beneath the table, see fig
39. Lower the table by turning the tilt quadrant rack and pinion
adjusting handle, until it’s against the stop. This is an angle
bracket to the rear of the cast iron table with an adjustable stop
bolt and lock nut, see fig 15. The head of the bolt acts as a stop
when it strikes the machine frame.
Fig 39
Step 2 Make sure the upper blade guide is raised as high as
possible. Place a square on the table and move it up against
the blade (behind the teeth), see fig 40.
Fig 40
Step 3 Check that the blade is perpendicular to the table. If
adjustment is required reset the levelling stop bolt to the rear
of the cast iron table then tighten the lock nut. Check again.
Once you are satisfied, tighten both tilt and table clamping
handle, see fig 41-42-43.
Fig 41-42-43
Step 5 Slide the fence assembly until it’s up against the blade
and press down the locking lever (5), see fig 45. Look at the
‘RED’ line on the magnifying glass to check it’s set to ‘0’ on the
scale, see fig 46. If it’s out of alignment, loosen the locking lever
(5) and tap the side of the fence rail (2) until the scale reads ‘0’
then re-secure the fence rail, see figs 47-48.
Fig 45-46-47-48
Levelling stop bolt
Tilt quadrant adjusting handle
Lock nut
90˚ Engineers square
Blade teeth
Step 4 Check that the pointer on the tilt quadrant scale reads
zero, if not, loosen the Phillips screw that holds the pointer and
adjust until correct. Re-tighten the screw and table clamping
handle, see fig 44.
Fig 44
Scale
Pointer
Phillips screw
MAKE SURE THE SAW IS DISCONNECTED
FROM THE MAINS SUPPLY!



 To Next Page