Checking the table is square
DISCONNECT THE SAW
FROM THE MAINS SUPPLY!
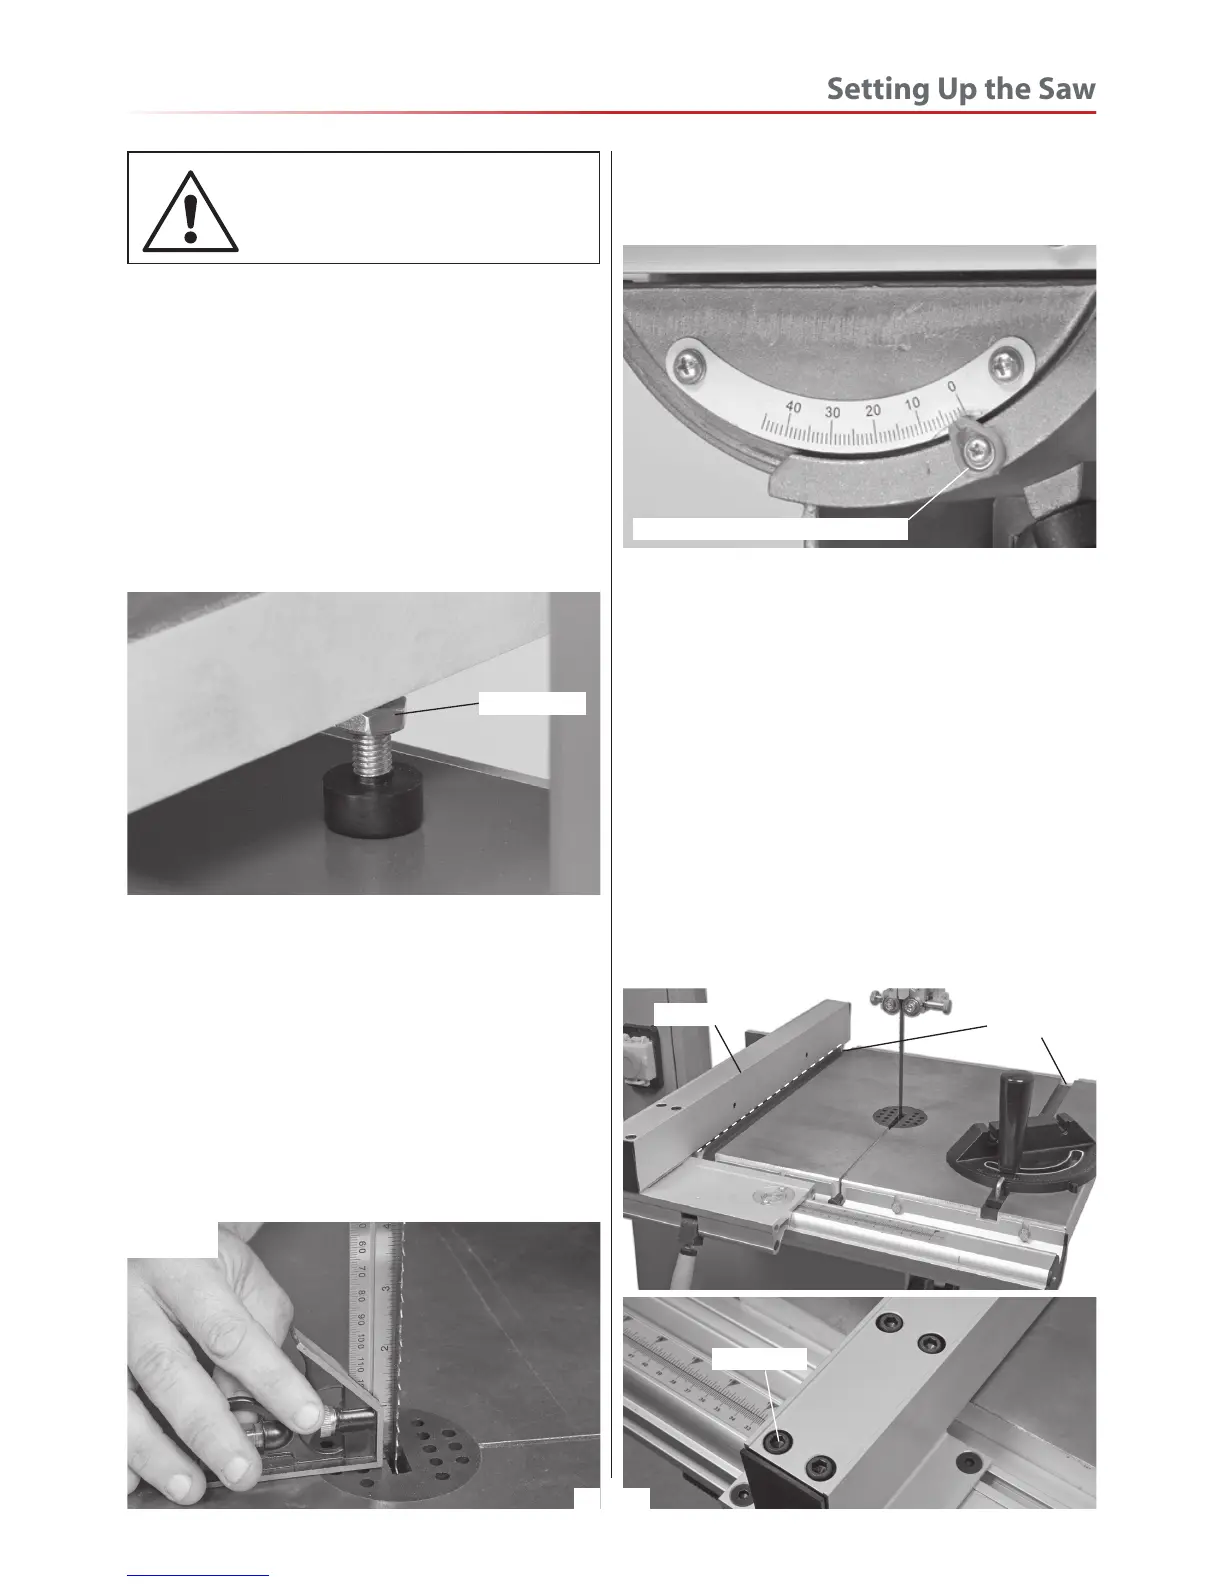
Loosen the clamping handle beneath the table
clamping the tilt mechanism, and turn the table hard
against its stop. This is a bolt with a lock nut screwed
into the underside of the table,see fig 12. The head
of the bolt has a rubber foot that acts as a stop when
it strikes the machine frame. Tighten the clamping
handle.
Fig 12
Make sure the upper blade guide is raised as high as
possible. Place a square on the table and move it up
against the blade (behind the teeth),see fig 13.
Check that the blade is perpendicular to the table. If
it is not, try resetting the table. If it is still not correct,
loosen the table locking handle and adjust the bolt
until perpendicularity is achieved, see fig 12. Tighten
the lock nut and then re-check. When you are
satisfied that the table is set correctly, check that the
pointer of the tilt gauge reads zero, if not, adjust it,
Fig 13
Locking nut
see fig 14. Retighten the table clamping handle.
Fig 14
Index pointer & adjusting screw
Setting the Fence
To make sure the guide fence is at 90˚line up the
guide fence with the edge of the table’s ‘T’ slot, see
fig 35. If you find that the fence is out of alignment
follow the steps below:
• Clamp down the fence by pushing the locking
lever down.
• Loosen the 4 Hex bolts that secures the fence rail
and adjust until the fence is in alignment with the
‘T’ slot, then re-tighten the bolts, see fig 15.
• Replace the extension fence.
Fig 15
‘T’ slots
Fence




 To Next Page