20
Chapter 3. Operating This Device
Communication setting
3.
After making a selection, press the RESET switch. “H2” blinks,
and when the blinking stops, configuration is complete.
At this time, “H2” is displayed.
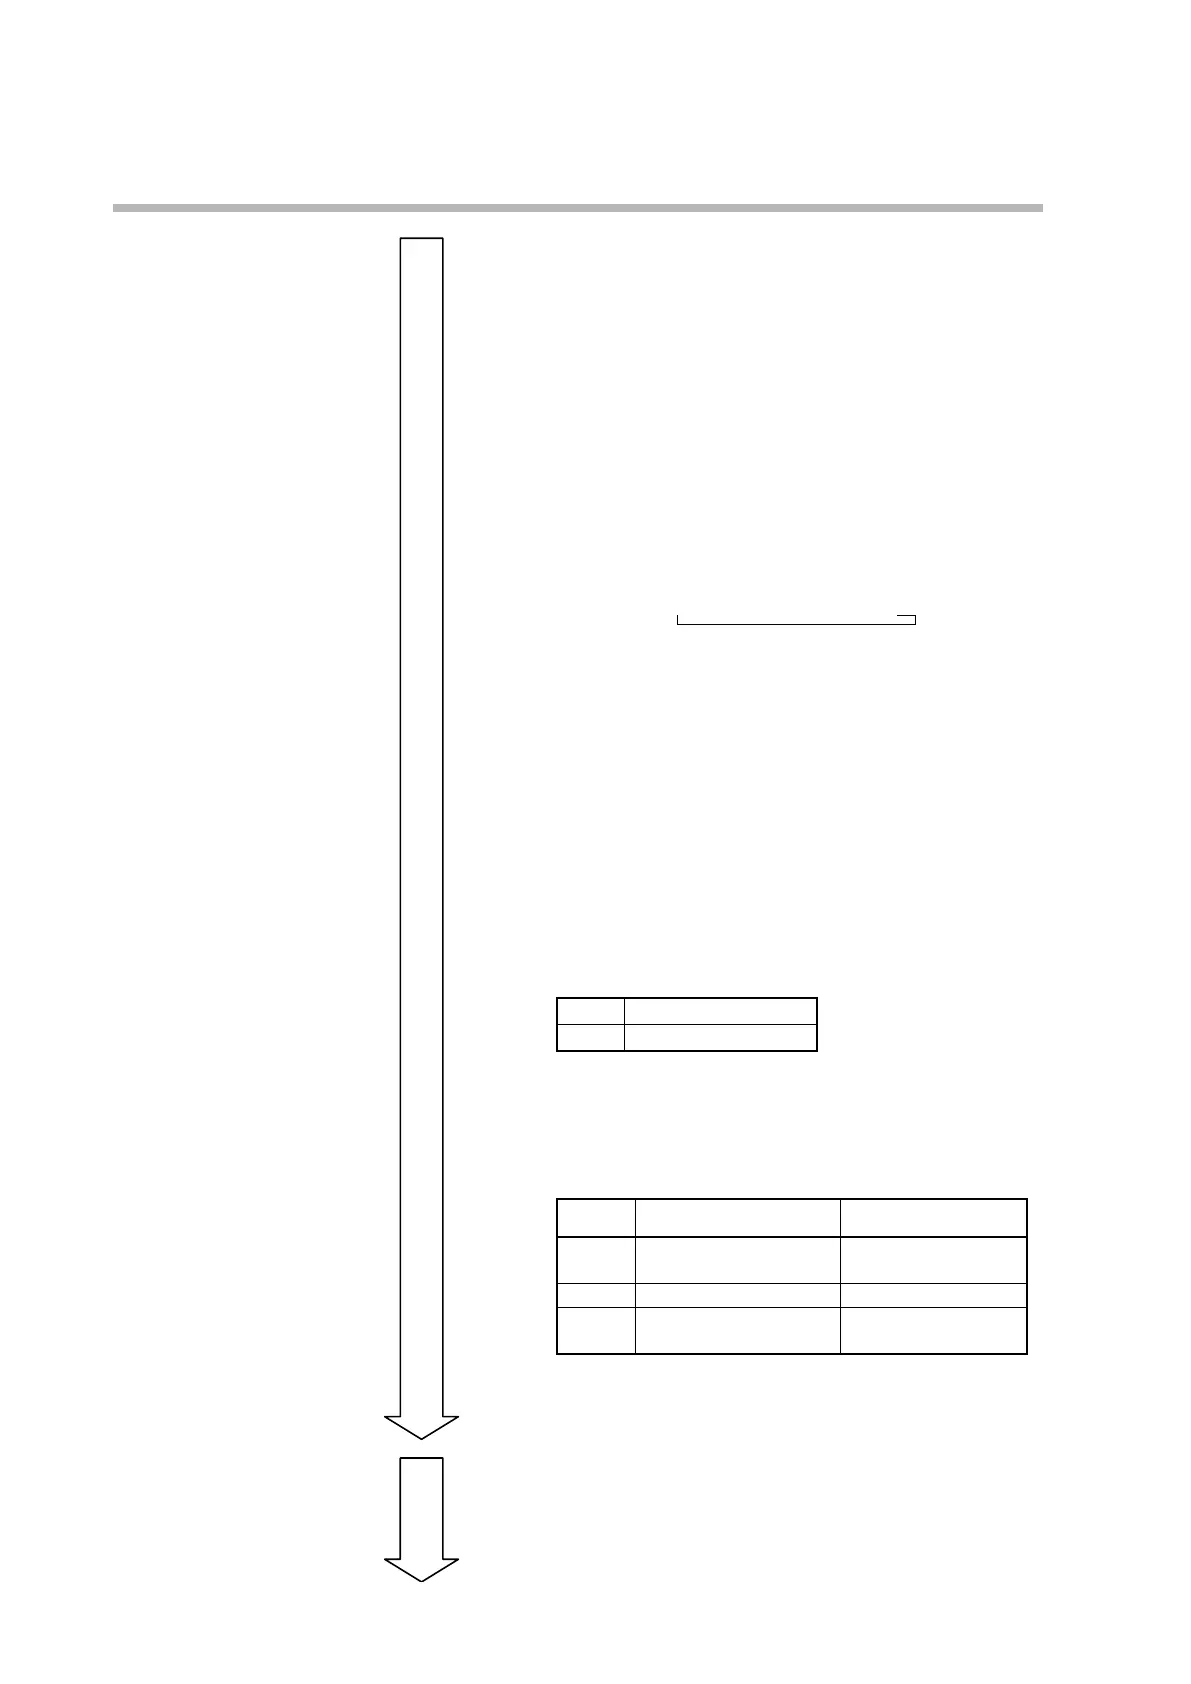
• Communications format setting (H3)
Use the DISP switch to selectH3on the 7-segment display.
1. Press the RESET switch. The 7-segment display shows
H3/_. _ represents 1, 2, or 4. (Default setting: 1)
1 : Even parity, 1 stop bit
2 : Even parity, 2 stop bits
3 : Odd parity, 1 stop bit
4 : Odd parity, 2 stop bits
2. When the DISP switch is pressed in this situation, the display
cycles through → H3/ 1 → H3/2 → H3/3.
Select the communications format.
3.
After making a selection, press the RESET switch. “H3”
blinks, and when the blinking stops, configuration is
complete.
At this time, “H3” is displayed.
• Initialization of settings (CL)
Use the DISP switch to select CL on the 7-segment display.
1.
Press the RESET switch. The 7-segment display shows CL/nO.
2. When the DISP switch is pressed in this situation, the display
toggles between CL/nO (no) and CL/y(yes). Select whether
to initialize all the communication settings.
CL/y
Execute initialization
CL/nO
Cancel initialization
3. After making a selection, press the RESET switch. “CL”
blinks, and when the blinking stops, initialization of settings
is complete.
Settings after initialization
Display Description Initial value
H 1
Communication address
setting
1
H2
Baud rate setting 3 : 19200 bps
H3
Communications format
setting
1Even parity, stop bit1
4. After initialization, check the settings and change them as
needed.
Exit
(3) Press and hold the DISP switch for 5 s or more to end
communication setting mode. Communication setting mode also
ends in the following cases:
• When the power is turned OFF.
• If an alarm occurs during communication setting mode.