15. Install the three lock nuts onto the threaded rods, tightening only the lock nut on the threaded rod with the preset hex/
jam nut.
16. Then bring the two remaining lock nuts down until they just contact the positioning collar. Do not tighten at this time.
17. Remove the HTT by loosening the two thumbscrews, removing the clevis pin and sliding the insertion tool o the sensor.
Then bring the two remaining sets of hex/jam nuts up to the underside of the positioning collar and tighten.
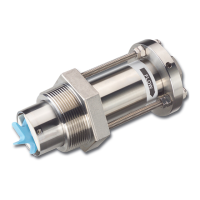
18. Align the sensor by loosening the two set screws in the side of the positioning collar with a 3/32 inch Allen wrench.
19. Align the sensor sight holes along the pipe axis using the alignment rod from the sensor installation kit. Make sure the
ow label arrow on the sensor matches the liquid ow direction inside the pipe.
20. Tighten the positioning collar set screws.
OTE:N As a backup to the flow label arrow, there is a small hole located beside one of the sight holes to also indicate the
upstream side of the sensor.
For removal of a Series 225, 226 flow sensor from a pressurized pipeline, refer to the document titled Hot Tap Flow Sensors
Application Data Sheet, available in the Resource Library at www.badgermeter.com.
Hot Tap Installation for 225BR, 226BR, and 226SS
Page 9 February 2018 SEN-UM-01635-EN-11
 Loading...