INSTALLATION
DIPSWITCH AND JUMPER SETTINGS
3 - 4 WBPEEUI240756A0
®
Factory Test Jumper (J2)
Jumper J2 is used for factory test purposes only. When in the
ON position, this jumper enables an LCD display that connects
to J1 for diagnostic purposes. This is a factory test feature and
should always be disabled (OFF) during normal operation. If
this jumper is in the ON position during normal operation, it
degrades the operation of the module because of the extra time
required to run diagnostics. Table 3-3 shows the setting for J2.
IMFEC11 Operating Mode Jumper (J3)
The operating mode jumper sets the IMFEC11 operation to
point-to-point mode or field bus mode. Set jumper J3 for the
desired operating mode. Table 3-3 lists the jumper settings.
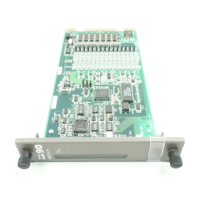
Figure 3-1 shows the location of J3 on the FEC circuit board.
Table 3-2. Sample Address
Switch Settings (S1)
Address
Example
Switch Position
1,2
(Binary Value)
3
(32)
4
(16)
5
(8)
6
(4)
7
(2)
8
(1)
08 001000
32 100000
63 111111
User setting
NOTES:
1. Switch positions 1 and 2 must be closed.
2. 0 = CLOSED or ON, 1 = OPEN or OFF.
Table 3-3. IMFEC11 Jumper Settings
1
Jumper Position Function
User
Setting
J2 Off Normal operating mode.
On Factory test mode.
J3 P-P Analog point-to-point mode. Module accepts analog inputs and
communication is possible with FSK smart transmitters.
FB Field bus mode. No analog inputs are possible and module only
communicates with FSK style smart transmitters on a field bus.
J4 FBS FEC module mode. Module will communicate only with FSK style
smart transmitters on field bus or point-to-point.
ASI Module accepts analog inputs only.
J6 - J20
2
Voltage Voltage input selection.
Current Current input selection (for TBM MMU terminations only).
NOTES:
1. To select a function, use a jumper to short pins.
2. J6-J20 are always voltage when used with the NTAI05 termination unit, NIAI04 termination module or NTFB01 termination unit.