20
LIBRA - installation
LIBRA FREESTANDING
INSTALLATION INSTRUCTIONS
1 800 463.2187 Monday to Thursday from 8 a.m. to 6 p.m. (EST)
.
Friday from 8 a.m. to 5 p.m. (EST)
Printed in Canada. Copyright © August 2021 Bains Ultra Inc. All rights reserved. 45200682
ELECTRONIC CONTROLS
1
ELECTRONIC CONTROL INSTALLATION – MIAPLUS
®
2
ELECTRONIC CONTROL INSTALLATION – DOT
Jig saw with fine cut blade
Drill
1/4 in. drill bit
TOOLS REQUIRED
KEYPAD INSTALLATION
LOCATION: Determine the most convenient location, on the wall close to tub.
WARNING
• Libra freestanding bath cannot be drilled for control installation.
DRILLING OF WALL: Refer to the Cutting Template on page 24
for the location and diameter of the holes.
IMPORTANT
• You will find the control attached to the turbine,
or to the electronic control modules.
7/8 in. Hole saw
Drill
DOT Chromatherapy (LED)
DOT WarmTouchShell
®
(WTS)
TOOLS REQUIRED
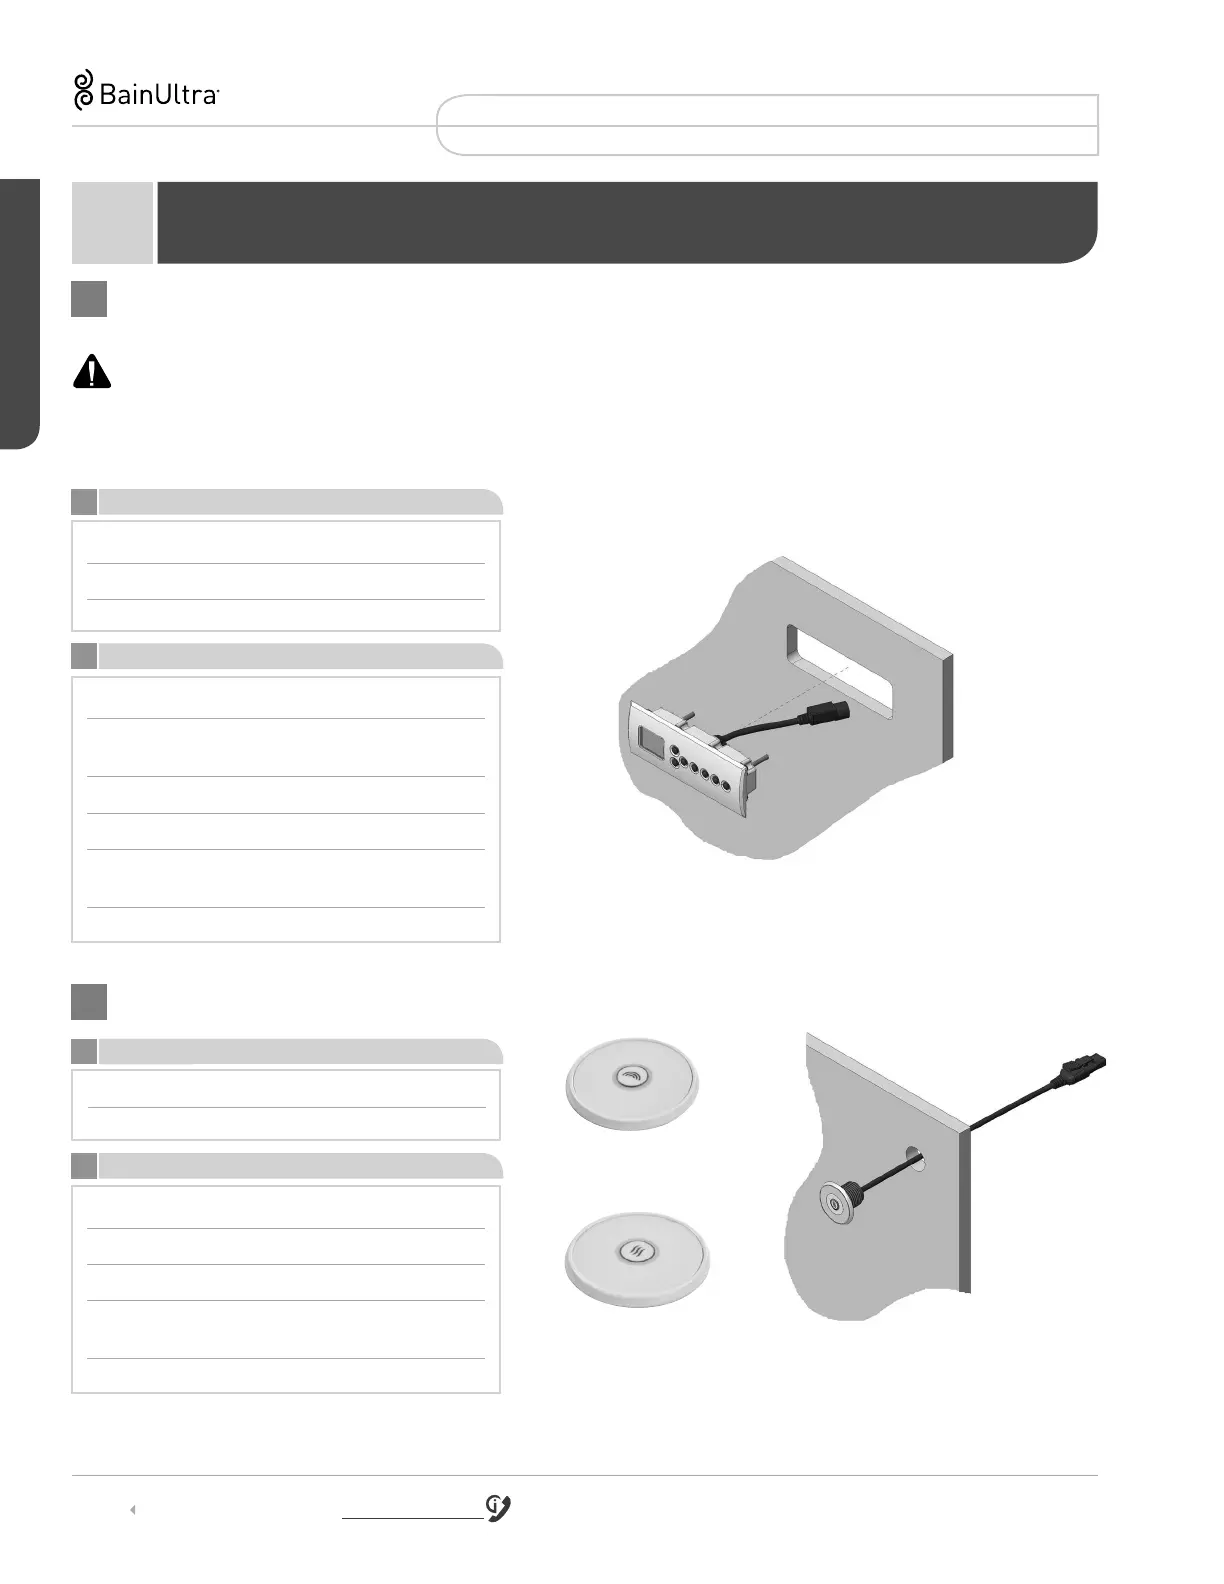
Drill wall (7/8” hole).
Push wiring through drilled holes.
Remove protective film from watertight seal.
Secure to the wall with permanent waterproof
sealant (mold-free clear silicone for bathrooms).
Secure temporarily with a tape for about 24 h.
KEYPAD INSTALLATION
WALL INSTALLATION
WALL INSTALLATION
Drill wall (template).
Remove the metal bracket not required
for wall mounting
Push wiring through drilled holes.
Remove protective film from watertight seal.
Secure to the wall with permanent waterproof
sealant (mold-free clear silicone for bathrooms).
Secure temporarily with a tape for about 24 h.