7
Important installation instructions
NOTE: For safety, you are advised to seek the assistance of a second person when installing or removing the
stand. Laying the TV at on a table withe bottom of the TV level with the edge makes tment and removal
much easier.
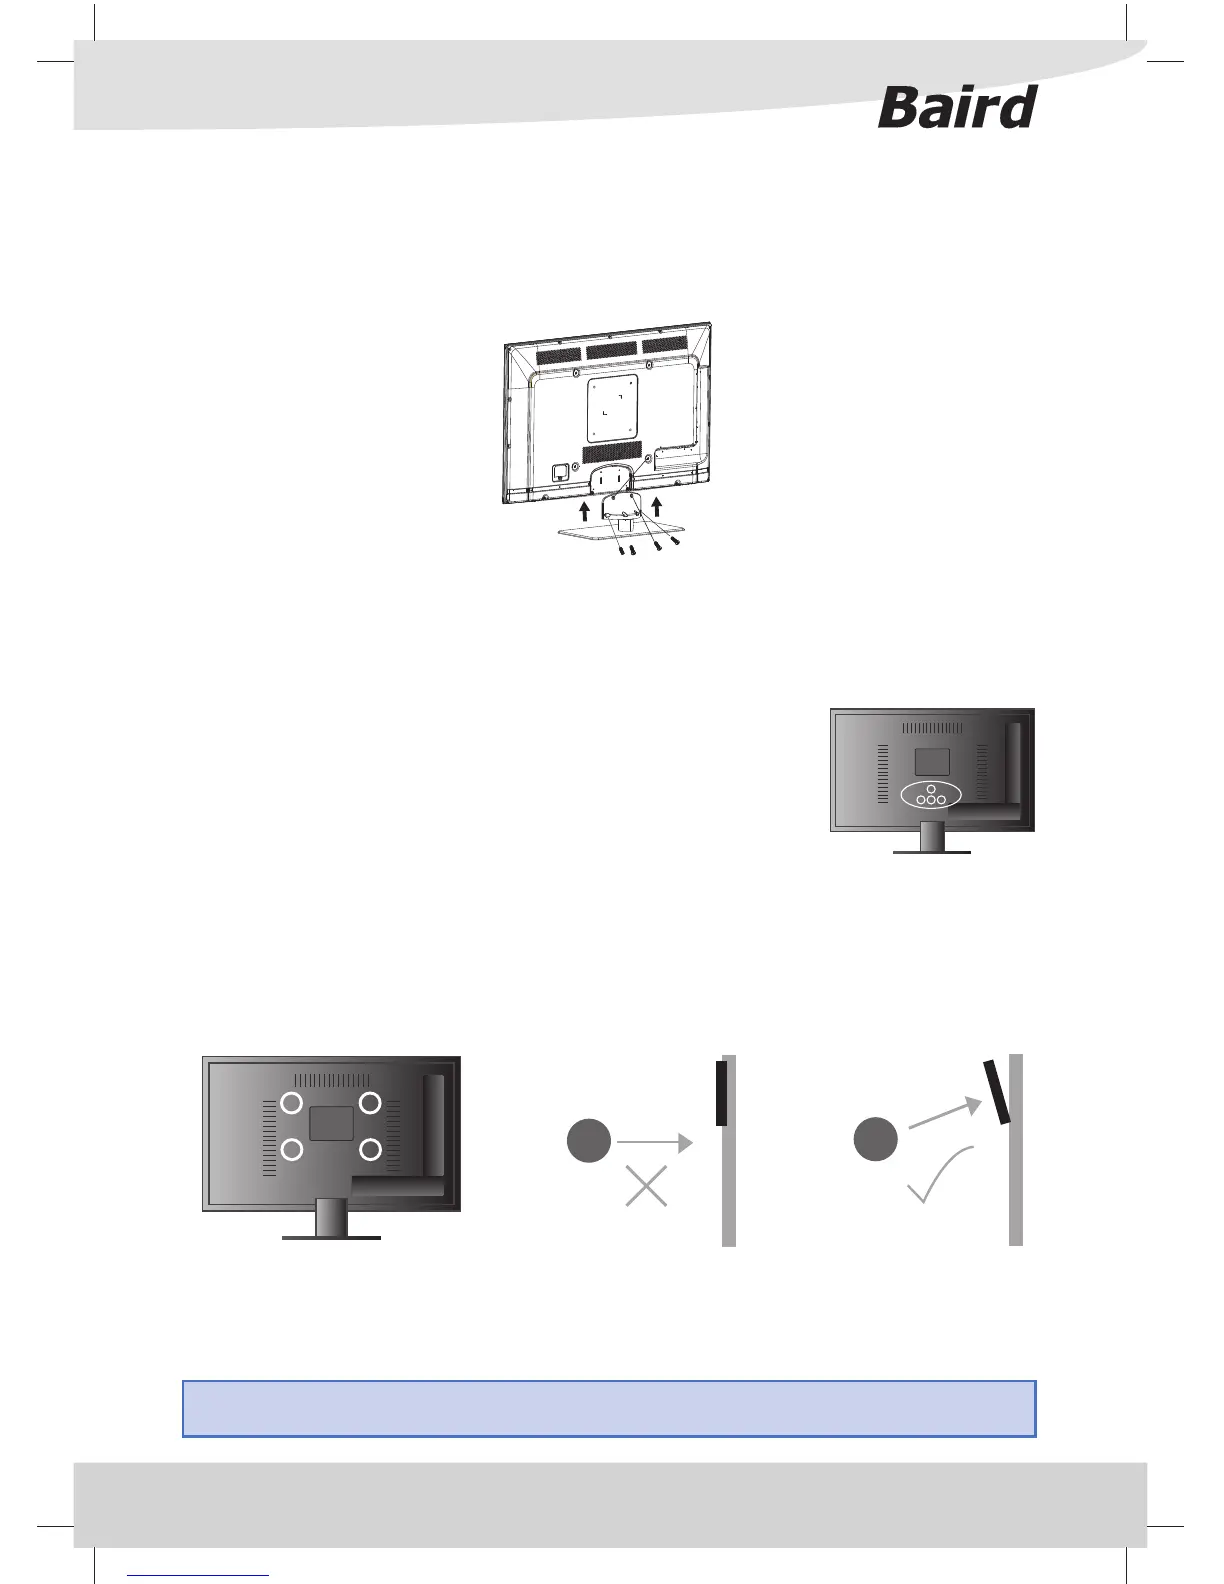
Detaching the Stand
1) Remove the screws highlighted
2) Although there are no live parts exposed when removing the stand, (in the
event of wall mounting the TV) for aesthetic purposes, included in the accessory
pack is a cover plate which can be clipped into the underside of the TV.
IMPORTANT - Before drilling any holes in the wall ensure you are not
drilling where there could be any electric wires, water or gas pipes.
Wall mounting the TV
This television requires a VESA STANDARD wall mount, or equivalent (The size of the mount will vary depending
upon the screen size of your TV).
1) Your TV is provided with four hexagonal spacers to attach your wall mount.
2) The wall mount can now be easily attached to the spacers using suitable screws. The positions of the spacers
is indicated in the diagram below.
Important – If wall mounting this TV, only use the spacers already provided in the wall mounting holes. Using
other screws which are longer could cause irreparable damage to internal parts.
For optimum viewing, if wall mounting the TV higher than eye level, the TV should be tilted downwards so
that the TV’s screen is ‘face on’. See g 1 and 2
Vi
g 2
TV
ewing angle
TV
Viewing angle
g 1
ATTACHING / DETACHING THE STAND
Attaching the Stand
Insert the stand into the bottom of the LED TV body and tighten the screws.