Document: 333D012G
5-18-2007
- 28 -
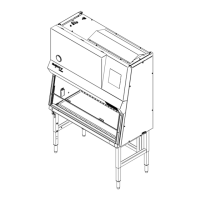
Changing the down flow filter
1. Loosen the two (2) ½” hex head down flow plenum clamping bolts located on either side of the down flow
plenum, alternating two or three revolutions at a time until the plenum is raised about ¼” [6.4mm]. This will
allow the down flow filter to slide out the front towards you. If the filter gasket sticks to the cabinet, use a putty
knife to break it free.
2. Slide the filter out the front towards you. Be careful not to contact the filter media.
WARNING
Once removed, the filter should immediately be sealed in a chemical hazard bag appropriately marked for the
type of hazard and then disposed of safely in accordance with environmental regulations.
If you also need to change the exhaust filter, go directly to “Changing the exhaust filter” steps now.
3. Slide the new down flow filter all the way in until it stops against the rear filter stop, gasket side facing down.
Be careful not to contact the filter media with your fingers. Position the filter so its frame is aligned with the
cabinet frame.
4. Tighten the two (2) ½” hex head down flow plenum clamping bolts, alternating two or three revolutions at a
time until the filter gasket is compressed approximately 1/8” [3.2mm].
5. Reassemble the cabinet following the previous instructions in reverse order.
IMPORTANT
When reinstalling the front seal panel, first tighten each ¼-20 hex cap screw until the bolt seal washer is engaged
with the panel. Next turn each bolt 1 ¼ to 2 ½ revolutions until the panel gasket is evenly compressed
approximately half way. Do not over tighten. Use caution if using a power driven tool.
6. Reconnect power.
7. Check the filter and gasket for leaks.
Changing the exhaust filter
If only the exhaust filter is to be replaced, the down flow plenum clamping bolts (lower) should be loosened
four or more revolutions before loosing the exhaust plenum clamp bolts (upper).
1. Loosen the two (2) ½” hex head exhaust plenum clamping bolts located on either side of the exhaust plenum,
alternating two or three revolutions at a time. This will lower the plenum and allow the exhaust filter to drop
down and slide out towards you. If the filter gasket sticks to the cabinet, use a putty knife to break it free.
2. Slide the filter out towards you, making sure not to contact the filter media.
WARNING
Once removed, the filter should immediately be sealed in a chemical hazard bag appropriately marked for the type
of hazard and then disposed of safely in accordance with environmental regulations.