Settings for the panic input [PanBut]:
The functions of this input can be selected via the three dip-switches [PanBut.].
Below are the three different options:
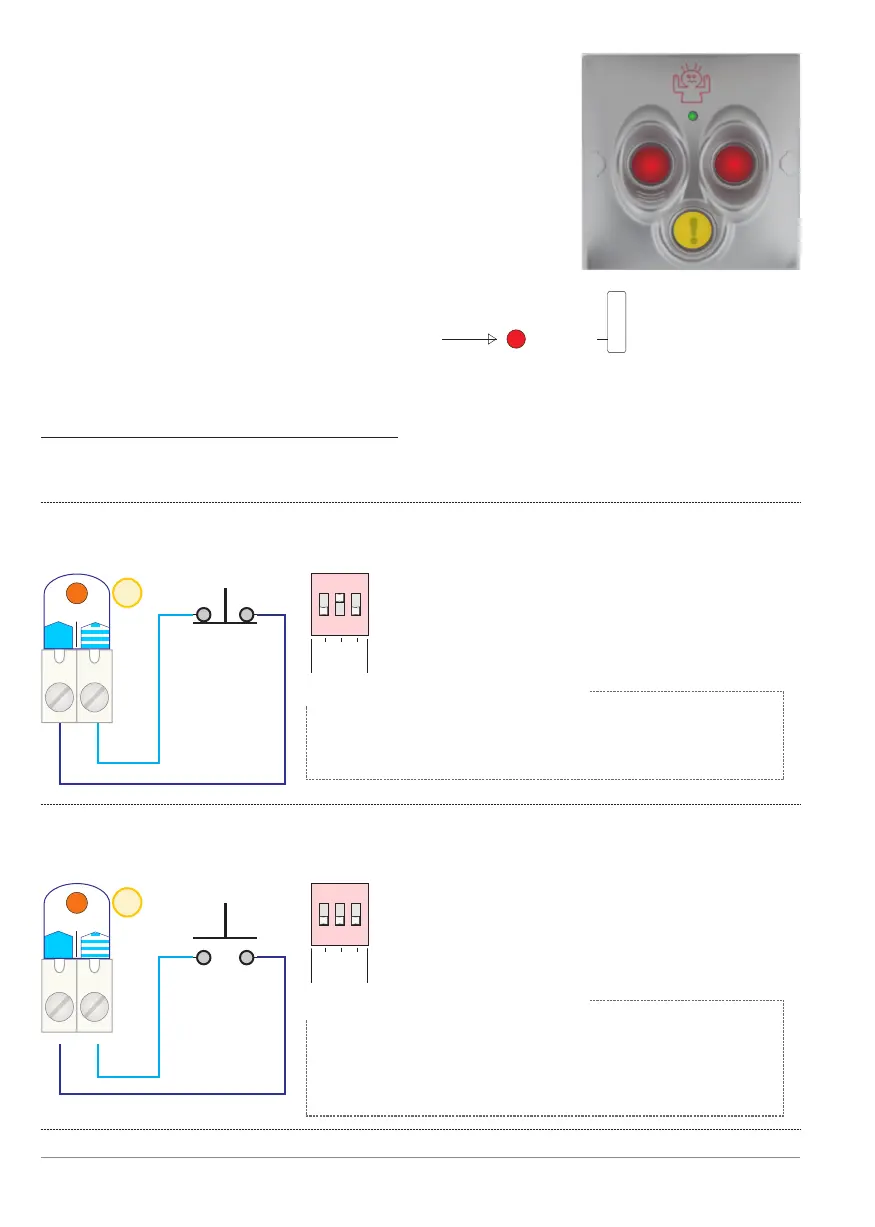
1. Panic mode starts when the input measuring a contact transition from
closed to open (NC-contact).
6
6
1
1
2
2
3
3
1
1
2
2
3
3
PanBut.
PanBut.
1
1
2
2
3
3
1
1
2
2
3
3
PanBut.
PanBut.
Panic contact
(starts when
contact opens)
Panic contact
(starts when
contact closes)
NC
NO
Dip switch settings [PanBut.]:
Dip 1: OFF
Dip 2: ON
Dip 3: Use this to choose whether the
Dip switch setting [PanBut.]:
Dip 1: OFF
Dip 2: OFF
Dip 3: Use this to choose whether the
Panic mode:
a) Dip 3 OFF - stop one minute after the first
pulse is received (1 minute delay timer), or
b) Dip 3 ON - last as long as the contact is open.
Panic mode:
a) Dip 3 OFF - stop one minute after the first
pulse is received (1 minute delay timer), or
b) Dip 3 ON - last as long as the contact is
closed.
PanBut.
Comm.
p. 10 - Panic input
Advantages of using a BANDIT panic button:
- Only when both red buttons are depressed at
the same time will a panic-trigger be directly sent
to the fog generator.
- As long as the yellow button has been pressed,
this will cause the built-in buzzer in the fog generator
to buzz. This function is intended to draw the
attention of employees that are on the premises.
- The three pushbuttons have background lighting
which is dimmable (0 - 50 - 100%).
- Tamper monitoring between panic button and controller
is also maintained. See section Tamper
- See also: example diagram 3, p. 36.
Panic button:
820-13S
!
BANDIT Controller CF31 v2 / Manual v.102
2. Panic mode starts when the input measuring a contact transition from
open to closed (NO-contact).