TROUBLESHOOTING
Manual 2100-746D
Page 55 of 59
Checking Remote (P/N 8408-061) or
Local Temperature/Humidity Sensor
(P/N 8408-059)
One local temperature/humidity sensor (P/N 8408-059)
or remote temperature/humidity sensor (P/N 8408-061)
can be used with the MC5000. These sensors are digital
humidity sensors with an integrated temperature sensor
that provides excellent measurement accuracy at very
low power.
Because these sensors are digital, there is not a direct
temperature measurement correlation that can be
used for troubleshooting. Therefore, conrmation of an
operational sensor is to be veried through observation
that the red LED is ON.
1. With the system powered up, locate the sensor. For
the local sensor (P/N 8408-059), the sensor will
be located at the bottom of the MC5000 enclosure.
If the remote sensor (P/N 8408-061) is being
used, location may vary.
2. Make sure to verify the LED is illuminated RED as
seen in Figure 31.
3. If the LED is not illuminated, make sure that the
wires are connected to the Main Control Board (P/N
8612-066).
4. If the LED does not come ON after verication of
the wire harness connection, a defective sensor
may be the issue.
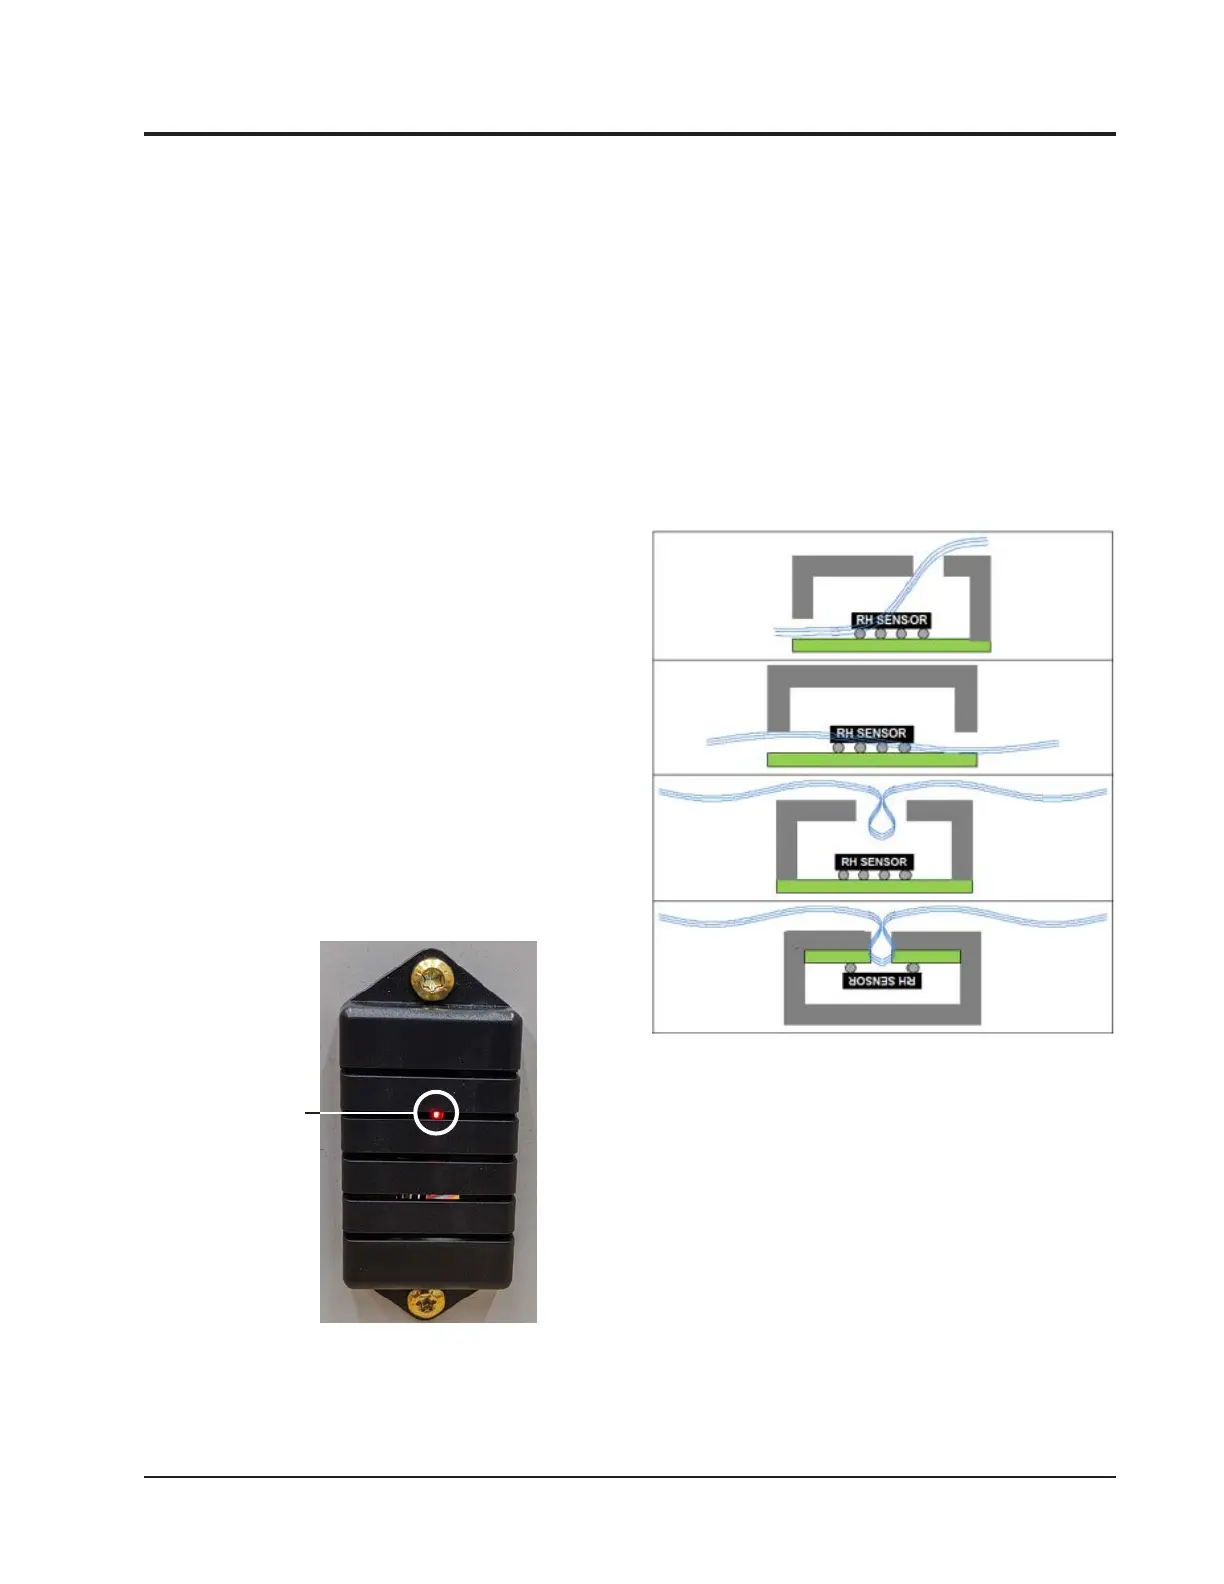
FIGURE 31
Verifying Sensor LED Is Illuminated
LED will be visible through the slots of the local sensor
cover. NOTE: This image shows local temperature/humidity
sensor (P/N 8408-059) in the enclosure at the unit.
Extreme Conditions
If the temperature/humidity sensor is exposed to
extreme conditions (in excess of 158°F or below -40°F)
for an extended amount of time, the RH offset may vary
(up to ±4%).
Airow Across Remote Sensor (P/N 8408-061)
If the remote sensor is not mounted correctly, the
humidity may not register accurately. Please verify that
the sensor has sufcient airow in its application (see
Figure 32).
NOTE: Lines across the sensor in image are representative
of airflow across sensor.
FIGURE 32
Sufcient Airow Across Remote Sensor
Red LED
 Loading...