Page 13>"-&#$95<19)(&?2$+#1"<+@&,($)+$&9)((&ABCCCBCDDBEFGF/Item 57608
HI>;JKLM;NIJOL!PIO!J;!I!Q; H;JRM
I(18<1<8$&>$<9$
1. After adjusting the miter or bevel setting,
check and adjust the Sliding Fence.
2. Loosen the Fence Lock Knob, and move the
Sliding Fence to be within 1/8" of the blade.
3. Tighten the Fence Lock Knob. Make sure that the
Sliding Fence still does not contact the Blade.
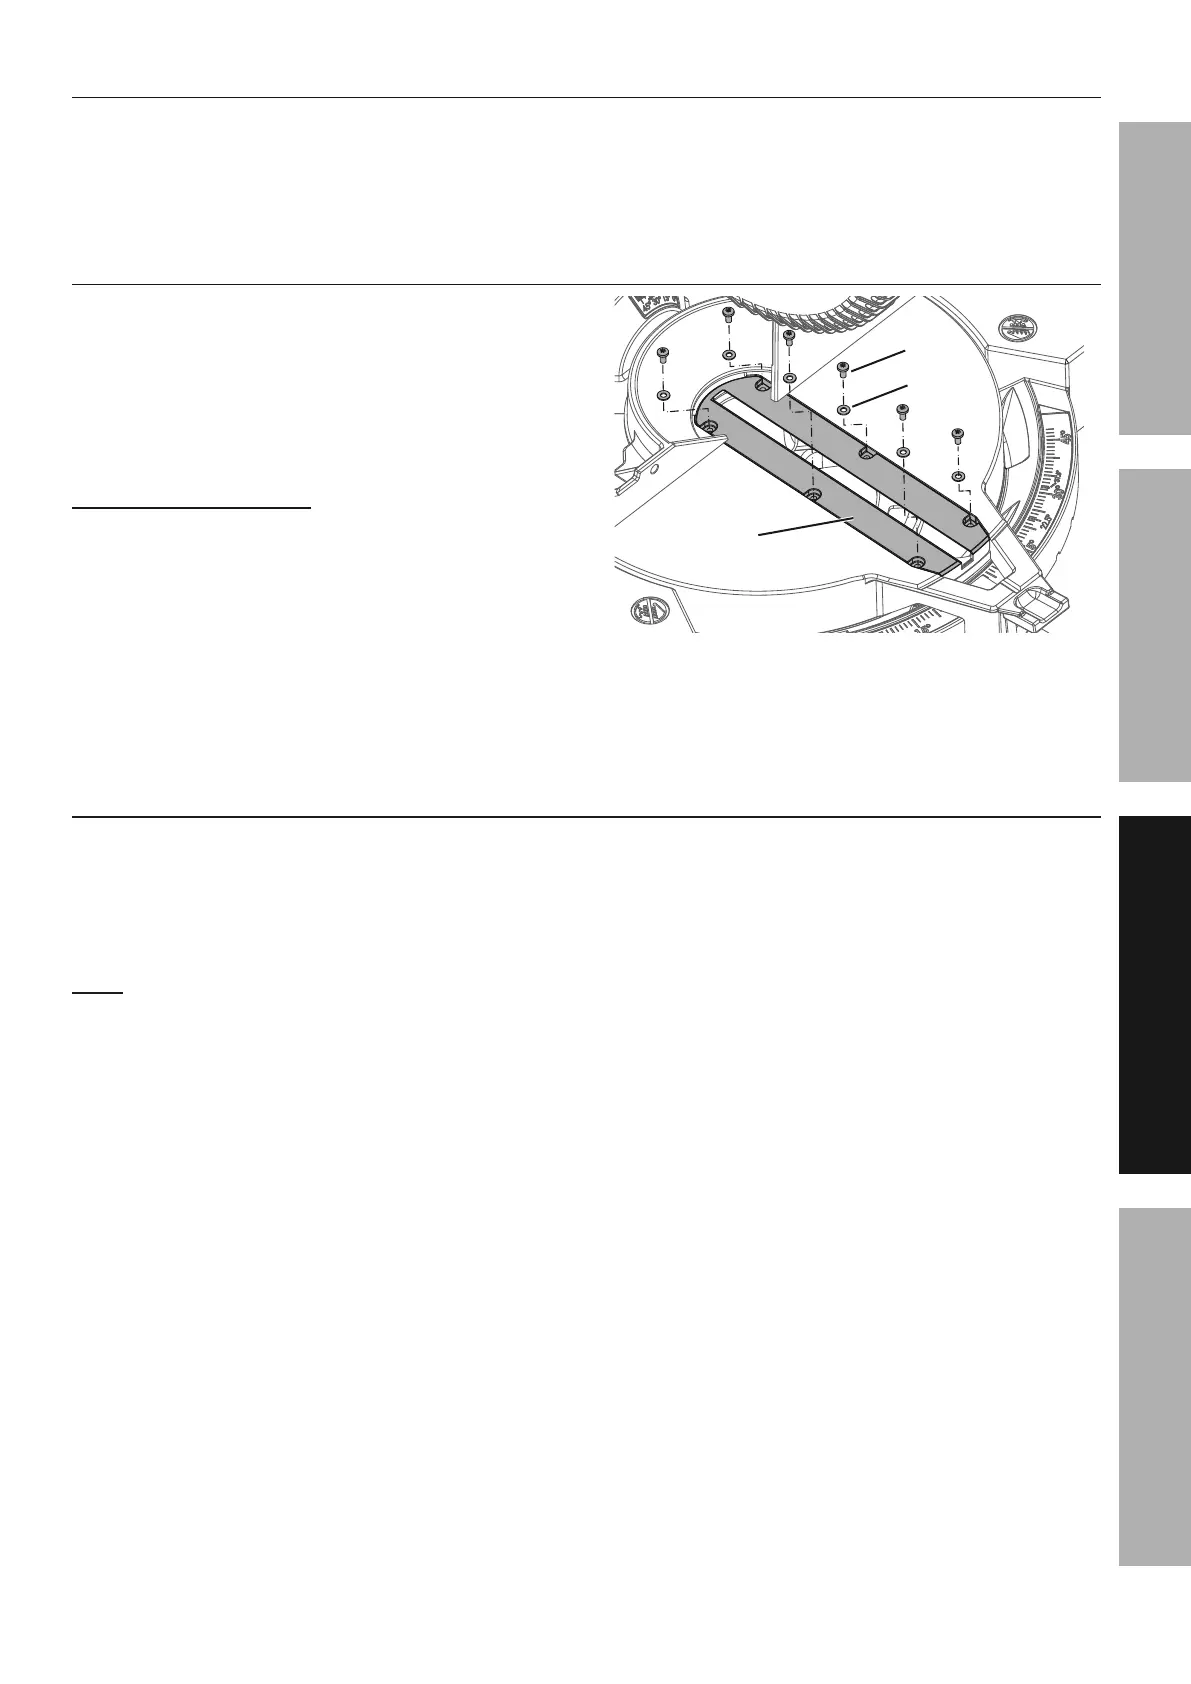
Kerf Board Replacement / Adjustment
If the Kerf Board becomes damaged it must be replaced.
1. Remove the six screws and flat washers holding
the Kerf Board in place and lift it from the Saw.
2. Install the new Kerf Board, with the left and right
sides on either side of the cut line. Replace the six
screws and washers and tighten the screws slightly.
J"&)*]2+#$&Y$-7&'")-*%
1. Check for blade clearance by moving the Saw
Head through its full range of motion with the bevel
angle set at 0º and at maximum left bevel angle.
Refer to Adjusting the Bevel Angle on page 12.
2. If the Saw Blade hits either side of the
Kerf Board, loosen the three screws for
that side and adjust. Tighten the screws
and check again for blade clearance.
Y$-7&
'")-*
H9-$3
S)+5$-
>182-$&_
3. After verifying blade clearance, tighten the six
screws holding the Kerf Board in place.
&&&&&&&&S"-X,1$9$&H$#&R,
1. Secure loose workpieces using a vise or clamps
(not included) to prevent movement while working.
2. Cut only the following materials:
Dimensional lumber, plywood, particle board, plastic.
!"#$% Use caution to avoid overheating the cutting tips.
If cutting plastic, cut at an even pace to avoid melting it.
3. Refer to cutting capacities in the Specifications Table
on page 8 for limitations on workpiece size.
4. Allow room on both left and right sides
of Saw for extended workpieces.
5. Use additional supports if needed to ensure
the stability of the workpiece. Mount the Saw
so that the surface is level to the ground, and
additional supports to provide a surface on the
same level as the saw table. If the work surface
and any workpiece supports are not level, and
on the same level, unwanted bevel angles will
appear in the cuts resulting in poor joinery.
6. Secure workpieces to the saw table using the Clamp
or other clamping devices (not included). Securing
the workpiece will provide safety by preventing kick
back and by removing the need to hold workpieces
near the blade by hand. Clamping the workpiece
will also improve cutting accuracy by preventing the
workpiece from moving during the cutting operation.
 Loading...